This temperature sensor, also referred to as a thermistor, is a genuine replacement component compatible with various appliance models. It works in coordination with the control board to monitor inter...
$59.35
In Stock
Order within the next 8 hrs and your part ships today!
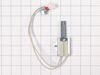
This gas range oven igniter is compatible with various models of LG gas ranges. It is made up of the igniter element, wire harness, connector and mounting bracket. The igniter is responsible for gener...
$317.43
In Stock
Order within the next 8 hrs and your part ships today!
This clear inner glass lets you see inside your LG oven while keeping the heat in. If your oven glass is cracked or chipped, replacing it helps restore energy efficiency and safe cooking. It’s made to...
$125.28
In Stock
Order within the next 8 hrs and your part ships today!
Upgrade your oven with this durable gliding shelf rack, designed to provide a stable surface for baking, roasting, and broiling. Its smooth sliding design makes it easy to insert and remove dishes, of...
$99.52
In Stock
Order within the next 8 hrs and your part ships today!
Help your LG gas range get back to peak performance with the LG Valve Assembly. Designed just for gas ranges, this genuine LG part controls the gas flow to your right rear burner, ensuring the flame i...
$60.45
In Stock
Order within the next 8 hrs and your part ships today!
Ask our experts a question about this model and we'll get back to you as soon as possible!
3 questions answered by our experts.
< Prev
1
Next >
Sort by:
Search filter:
Clear Filter
Your search term must have 3 or more characters.
Keep searches simple. Use keywords, e.g. "leaking", "pump", "broken" or "fit".
Sorry, we couldn't find any existing answers that matched.Try using some different or simpler keywords, or submit your new question by using the "Ask a Question" button above!
Chris
July 27, 2021
No control on oven display except time blinking.What could be wrong...
For model number LRG3095ST
Hi Chris,
Thank you for your question. If the time is blinking on the display, there may have been a power outage. Try unplugging the oven from the electrical outlet for a few minutes and plugging it back in to see if this resets it. If not, unplug the oven from the electrical outlet and remove the electronic control
board. Before removing it, check and make sure that the connections are fitted properly. If they are inspect the electronic control board for signs of damage, wear, scorching and burn marks. If it shows any of these signs, you will need to replace it. We hope this helps! If you have any questions, please let us know.
WHEN WE TRY TO LIGHT THE OVEN IT ONLY WORKS ON CONVECTION NOW AND WE HAVE TOTURN IT ON A FEW TIMES AND SOMETIMES OPEN AND CLOSE THE DOOR OR WE WILL GET AN F11 CODE WHAT MIGHT BE WRONG WITH IT
For model number LRG3095ST
Hello Tim, thank you for the question. According to our research, the F11 code indicates that the oven is not heating up. We would recommend checking the Temperature Sensor, part number PS11732697. If that does not help, we would recommend checking the Igniter, part number PS3535362, and Safety Valve, part number PS3536033. If you need help placing an order for it, please feel free to give us a call. We look forward to hearing from you!
Hi Eric, Thank you for writing. We suggest testing the Temperature Sensor. Testing the temperature sensor probe on your oven is easy. With the sensor at room temperature, measure the resistance between the two prongs at the end of the sensor connector. The resistance of the sensor should read approximately 1080 – 1090 ohms at room temperature. We hope this helps!
Took off the oven door then took out the racks and two screws in the oven bottom and removed it . Then removed the heat deflector. Then un plugged the old igniter and removed the burner to make it easier to remove the old igniter. Then installed the new igniter and reversed the process
As soon as my husband put it in the oven, the very thin prongs broke. There was no guard on either side of the prongs for protection like the one that had been in there. Very costly to us of $185 with no fix. Very disappointed in that ignitor. It would have been an easy fix. Had replaced one previously but it only lasted 6 months. Now we have a new stove
Remove oven bottoms Removed burners Remove igniters Pull out oven removed back disconnect wiring Installed new parts on burner made wiring hook ups Installed oven back and oven bottoms Tested and both work Took so long because I’m 75 years old Thanks for the proper parts