This handle screw, also known as a mounting bolt, is a mounting screw to help secure the door handle to your refrigerator door. If your handle is loose, you may just need to tighten the screw. If your...
Say hello to the DC Motor Assembly by LG ? your trusted partner in giving your refrigerator a fresh lease of life. This bona fide OEM part is tailor-made to slot perfectly into chosen LG refrigerator ...
This ice maker assembly is designed for use in select LG refrigerator models and includes all the essential components needed to produce and store ice efficiently. The unit features an ice mold, water...
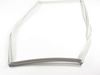
This pipe holder secures tubing or piping in place to maintain proper alignment and routing. Its durable construction supports stable installation and reliable operation.
This fan assembly circulates air to regulate temperatures and support efficient operation. Proper airflow improves performance and helps protect internal components. Replacing a failing fan assembly r...
Ask our experts a question about this model and we'll get back to you as soon as possible!
2 questions answered by our experts.
< Prev
1
Next >
Sort by:
Search filter:
Clear Filter
Your search term must have 3 or more characters.
Keep searches simple. Use keywords, e.g. "leaking", "pump", "broken" or "fit".
Sorry, we couldn't find any existing answers that matched.Try using some different or simpler keywords, or submit your new question by using the "Ask a Question" button above!
Terry
August 25, 2023
What are part numbers to replace water and air filters on model LRFXC2416S /01
For model number LRFXC2416S
Hi Terry, thank you for reaching out. The air filter, part number PS16222687, and the water filter, part number PS12724834, are compatible with your model. We hope this helps!
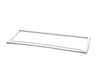
Watch YouTube videos on this topic if you are uncertain before tackling the job. The right door was easy to replace. Just pull the gasket with your fingers and it will come off easily. Place new gasket over door and use fingers to press it inside the groove few inches at a time. Pay attention to gasket orientation.
The left door is a bit harder because you need to remove the mullion at the door edge using a screw driver. Remove two screws on the center hinge and then slide the mullion up to disengage. Then unplug the wires to remove the mullion. Replace the gasket as described above and replace the mullion reversing the directions shown above.
Once I U tubed the the removal and replacement of the gaskets it was super easy. The right gasket change was easy without tools. The left gasket required me to remove the mullion first, which is why I used Utube.