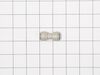
This handle screw, also known as a mounting bolt, is a mounting screw to help secure the door handle to your refrigerator door. If your handle is loose, you may just need to tighten the screw. If your...
Say hello to the DC Motor Assembly by LG ? your trusted partner in giving your refrigerator a fresh lease of life. This bona fide OEM part is tailor-made to slot perfectly into chosen LG refrigerator ...
This fan assembly circulates air to regulate temperatures and support efficient operation. Proper airflow improves performance and helps protect internal components. Replacing a failing fan assembly r...
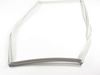
This door gasket is designed to form a tight seal around the perimeter of the refrigerator door, helping to keep warm air out and maintain the cool interior temperature. Made for select LG refrigerato...
Ask our experts a question about this model and we'll get back to you as soon as possible!
2 questions answered by our experts.
< Prev
1
Next >
Sort by:
Search filter:
Clear Filter
Your search term must have 3 or more characters.
Keep searches simple. Use keywords, e.g. "leaking", "pump", "broken" or "fit".
Sorry, we couldn't find any existing answers that matched.Try using some different or simpler keywords, or submit your new question by using the "Ask a Question" button above!
Michael
May 6, 2026
Is there a replacement for damaged right side door panel?
For model number LRFLC2706S
Hello Michael, thank you for reaching out. Yes, the right-side refrigerator door assembly for your model is part number PS16877713. We hope this helps!
Turn off the power to the refrigerator. Remove the back plate. Unplug the fan motor. Remove the fan housing and pull the fan blade from the motor. Replace the motor by removing 4 screws. Replace with the new motor and reinstall the fan blades. Secure the fan housing, plug the fan motor, and screw on the back panel. Plug and go!
Once I U tubed the the removal and replacement of the gaskets it was super easy. The right gasket change was easy without tools. The left gasket required me to remove the mullion first, which is why I used Utube.
For the right side of the refrigerator door, just pulled off the old gasket and replaced it with the new one. Old gasket came off easily. Just had to pull it off. No screws on the right side. Just pushed the new one in place in the groove on the door.
For the left side, needed a Phillip’s screwdriver to remove the flap first. Helps to have a second person hold the door from moving. Once flap was off, pulled the old gasket off and installed the new one just like the right side. Then screwed the flap back on once the gasket was in the groove properly.
Initially after install, it seemed like the magnet on the door was not strong enough but after a couple of days, the magnet seems a lot stronger, sealing the air out. Very happy I replaced it. It was a lot simpler to replace than I thought it would be.