This OEM filter measures 2.5 inches deep, 12.5 inches high, 5 inches wide and roughly 1.5 lbs. It is recommended to replace this filter every six months or 300 gallons, whichever comes first. If you n...
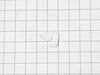
This tray cover, also known as the front drawer cover, fits on the front of the bottom drawer in your refrigerator. It is made of plastic and is white and clear in color. The cover creates a seal in y...
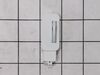
Having trouble keeping your food fresh because your refrigerator is not cooling properly? The LG Refrigerator Compressor Start Relay Thermistor Assembly could be the answer. This sturdy thermistor ass...
Keep your refrigerator running efficiently with this defrost sensor and thermistor assembly. It monitors the evaporator coil temperature to help regulate the defrost cycle, preventing frost buildup an...
Ask our experts a question about this model and we'll get back to you as soon as possible!
2 questions answered by our experts.
< Prev
1
Next >
Sort by:
Search filter:
Clear Filter
Your search term must have 3 or more characters.
Keep searches simple. Use keywords, e.g. "leaking", "pump", "broken" or "fit".
Sorry, we couldn't find any existing answers that matched.Try using some different or simpler keywords, or submit your new question by using the "Ask a Question" button above!
Denise
January 13, 2020
How do I reset ice maker?
For model number LRFD25850SW
Hi Denise,
Thank you for your question. There should be a reset button on the front of the ice maker that you can push and hold for about 5 seconds which should allow the unit to cycle. When you cycle the ice maker, you will need to check the ice maker to make sure water is getting to it. We hope this helps. Thank you and have a great day!
Was this helpful?
Thank you for voting!
Rita
April 28, 2023
Why does my freezer drawer have a sheet of ice under it?
For model number LRFD25850SW
Hi Rita, thank you for the question. Ice will form at the bottom of the freezer compartment if the door is not properly closed and the cool air in the freezer is able to combine with the warm and humid air outside. To avoid the formation of ice, please ensure that cool air circulates in all compartments of your freezer. We hope this information helps!
Was this helpful?
Thank you for voting!
< Prev
1
Next >
✖
Ask a Question
Ask our experts a question on this model and we'll respond as soon as we can.
Video makes it look easy. Kenmore refrigerator does not have "groove" along the right hand side of switch that allows for pushing down on release. Used a thin screwdriver to get under to push while holding switch edge with pliers. Kept slipping. Tape sides to avoid scratching inside of refrigerator.
Turn off power, remove upper and lower drawers (may need to open upper refrigerator doors to remove large freezer bin,) remove drawer supports (upper and lower), remove rear freezer panel (trick is to loosen 4 screws on fan bumpout to get the panel to come free from the freezer side wall), test thermistor with multimeter (should have continuity or near zero resistance across 2 orange fuse wires) before cutting zip ties, cut zip ties holding Thermistor in place, remove old Thermistor, install new Thermistor, install new zip ties, replace rear freezer panel, install upper and lower drawer supports, install drawers, turn on power, should be fixed if error code doesn't return after 6 hours.
Ordered a new tank assembly, but the new part also leaked because it had a hole in it. Ordered another that worked fine. Used a flat head screwdriver to remove the clips covering the screw holes to the tank assembly cover, then a phillips to remove the cover screws and the screws retaining the tank. Did not use the tubing that came with the new tank (removed it by taking out the neck clip then simultaneously pushing back on the neck piece while pulling out the hose). Used this same procedure to remove the old tank at both positions. Installed the new tank, replaced the clips, pressurized/tested the system and put the cover back on. Overall less than a 5 minute job...except for the extra week waiting for a good part.