




















LRFC21755ST LG Refrigerator - Instructions
Keep searches simple. Use keywords, e.g. "leaking", "pump", "broken" or "fit".
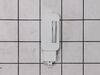
Lights out on refrigerator
Unplugged the refrigerator, Taped around the edges of switch as I had read to prevent possible scratches, used very thin flathead screwdriver to pry out old switch, unplugged old switch, plugged in new switch, put it back in opening, plugged fridge back in, and I had beautiful light! Hardest part was unplugging the refrigerator!
Parts Used:
-
Victoria from Oak Grove, KY
-
Difficulty Level:Very Easy
-
Total Repair Time:Less than 15 mins
-
Tools:Screw drivers
4 of 5 people
found this instruction helpful.
Was this instruction helpful to you?
Thank you for voting!
Refrigerator light not working. If I would flick the button it would go on for a minute but not stay on.
The old switch was a little hard to get out....took me a couple tries. I couldn’t move the frig out to unplug it, so just shut the power off in the kitchen. But, I was happy that’s what the problem was and so happy to have the light back on......it was probably three years it didn’t work!
Parts Used:
-
Dawn from NORTH BRANCH, MN
-
Difficulty Level:Easy
-
Total Repair Time:15 - 30 mins
4 of 5 people
found this instruction helpful.
Was this instruction helpful to you?
Thank you for voting!
The ice maker in freezer P/NO 5988JA0002Y would leak water and make giant ice block
I ordered and replaced the ice maker. To replace:
1. Go behind refrigerator and unplug electrical cord and turn off water supply.
2. In freezer locate electrical plug for ice maker. It has two tabs on the left and right side of it. Lift the tabs and pull the plug to disconnect it.
3. Remove the three screws, 2 on top and 1 on bottom of ice maker You can actually leave the screws in place if you loosen them sufficiently and lift the ice maker off of the screws and washers.
4. Install the new ice maker using the screws and plastic washers to secure it.
5. Plug the electrical connector for ice maker into the receptacle. Note: The plug only goes one way and is keyed with different shaped plugs and holes. The wires on my plug naturally fell upside down so I had to turn the plug 180 degrees to make it fit in the slot.
6. Turn on water and check for leaks.
7. Plug back in refrigerator and you should have ice in less than 12 hours.
1. Go behind refrigerator and unplug electrical cord and turn off water supply.
2. In freezer locate electrical plug for ice maker. It has two tabs on the left and right side of it. Lift the tabs and pull the plug to disconnect it.
3. Remove the three screws, 2 on top and 1 on bottom of ice maker You can actually leave the screws in place if you loosen them sufficiently and lift the ice maker off of the screws and washers.
4. Install the new ice maker using the screws and plastic washers to secure it.
5. Plug the electrical connector for ice maker into the receptacle. Note: The plug only goes one way and is keyed with different shaped plugs and holes. The wires on my plug naturally fell upside down so I had to turn the plug 180 degrees to make it fit in the slot.
6. Turn on water and check for leaks.
7. Plug back in refrigerator and you should have ice in less than 12 hours.
Parts Used:

-
Eric from SURPRISE, AZ
-
Difficulty Level:Really Easy
-
Total Repair Time:30 - 60 mins
5 of 8 people
found this instruction helpful.
Was this instruction helpful to you?
Thank you for voting!
Light doesn’t come on when fridge door opens
Pulled fridge away from wall, unplug electrical connection, open fridge door, use knife to prize out door switch, pull off and replace switch from electrical wiring.
Parts Used:
-
Lloyd G from QUEENS VLG, NY
-
Difficulty Level:Really Easy
-
Total Repair Time:15 - 30 mins
4 of 6 people
found this instruction helpful.
Was this instruction helpful to you?
Thank you for voting!
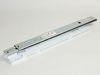
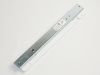
Freezer Drawer door would not close easily due to worn / damaged sliding rails
Removed the large freezer drawer bin. Took out the 2 screws holding the door to the rail, pulled drawer off the rails and set it aside. Note: the drawer still has the non-sliding part of the rail assembly attached to it. Reached inside the freezer and pushed the tab holding each of the rails and slide out the old rails. Removed the bolts on the freezer door holding the remaining part of the rail assembly (The white part). Attached the complete rail assembly to each side of the freezer drawer. Inserted the drawer and newly attached rails into the slots holding the rail. Slid the drawer in which allowed the rails to slide over the holding tabs. Checked door for in / out sliding easy and inserted the large bin back into the unit. I had purchased the full L & R rail assembly.
Parts Used:
-
James from SURPRISE, AZ
-
Difficulty Level:Easy
-
Total Repair Time:30 - 60 mins
-
Tools:Nutdriver, Screw drivers, Wrench set
3 of 3 people
found this instruction helpful.
Was this instruction helpful to you?
Thank you for voting!
interior light switch did not turn off light in ref
pried out old switch, disconnected wires ,placed wires on new switch
Parts Used:
-
Timothy from SUSANVILLE, CA
-
Difficulty Level:Really Easy
-
Total Repair Time:Less than 15 mins
-
Tools:Screw drivers
4 of 6 people
found this instruction helpful.
Was this instruction helpful to you?
Thank you for voting!
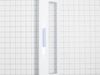
BROKEN COVER ON CRISPER DRAWER .
Part arrived with a broken window . I was able to use the old window from the broken part . I installed the new part in under three minutes .
Parts Used:
-
Cliff from OMAHA, NE
-
Difficulty Level:Easy
-
Total Repair Time:Less than 15 mins
3 of 3 people
found this instruction helpful.
Was this instruction helpful to you?
Thank you for voting!
Door switch would not turn on interior refrigerator light.
I had previously watched a YouTube video (do this first!!) on a similar Kenmore model so I knew what to look out for: (1) turned off power, (2) took thin putty knife to slip under outer lip of switch (most screwdrivers are too thick), (3) wiggled switch at front end to release the tab, (4) unplugged from the socket, (5) plugged in new switch, (6) popped new switch back into door, (7) turned on power. Voila !! Super easy. I couldn't believe it.
Parts Used:
-
Jane from SHORELINE, WA
-
Difficulty Level:Very Easy
-
Total Repair Time:Less than 15 mins
3 of 4 people
found this instruction helpful.
Was this instruction helpful to you?
Thank you for voting!
light didn't come on when the door was opened
I took a very thin bladed screwdriver and took the old part out -carefully.
The new part fit in quite easily.
The new part fit in quite easily.
Parts Used:
-
William L from SUMAS, WA
-
Difficulty Level:Really Easy
-
Total Repair Time:Less than 15 mins
-
Tools:Screw drivers
2 of 2 people
found this instruction helpful.
Was this instruction helpful to you?
Thank you for voting!
Switch stops working
Replace with new switch. this is the third switch i have replaced in 10 years. the only part, besides a light bulb, that has gone bad. obviously this is a problem with this model for Kenmore, or just poor switch design.
Parts Used:
-
David from PENNSVILLE, NJ
-
Difficulty Level:Easy
-
Total Repair Time:Less than 15 mins
-
Tools:Pliers, Screw drivers
2 of 2 people
found this instruction helpful.
Was this instruction helpful to you?
Thank you for voting!
Pops right in
-
Darlene from MISSION HILLS, CA
-
Difficulty Level:Very Easy
-
Total Repair Time:15 - 30 mins
-
Tools:Screw drivers
2 of 2 people
found this instruction helpful.
Was this instruction helpful to you?
Thank you for voting!
The part did not fit
Like the customer who put a review on your site before me, I was unable to complete the repair because the inlet tube did not fit my refrigerator. I was hoping to speak to someone regarding this issue.
Parts Used:

-
Stacy from ST AUGUSTINE, FL
-
Difficulty Level:Really Easy
-
Total Repair Time:30 - 60 mins
2 of 2 people
found this instruction helpful.
Was this instruction helpful to you?
Thank you for voting!
Light switch for refrigerator not functioning
-
shirley from ONALASKA, WI
-
Difficulty Level:Easy
-
Total Repair Time:30 - 60 mins
-
Tools:Screw drivers
2 of 3 people
found this instruction helpful.
Was this instruction helpful to you?
Thank you for voting!
Light quit coming on when door opened.
Unplug from wall receptacle. Pry switch out with screwdriver while pushing on inner tab. Then disconnect electrical plug.
Parts Used:
-
Calvin from Northome, MN
-
Difficulty Level:A Bit Difficult
-
Total Repair Time:15 - 30 mins
-
Tools:Screw drivers
1 person
found this instruction helpful.
Was this instruction helpful to you?
Thank you for voting!
Lights didn't come on when door was opened
I have moderate to good mechanical skills, but getting the old switch out was a sizeable challenge. Since this switch suffered some damage during extraction, I was lucky to have ordered a new one to replace it. Reinstall took approximately 90 seconds. PartSelect saved me an expensive service call.
Parts Used:
-
Philip from Ashland, MA
-
Difficulty Level:A Bit Difficult
-
Total Repair Time:15 - 30 mins
-
Tools:Pliers, Screw drivers
1 person
found this instruction helpful.
Was this instruction helpful to you?
Thank you for voting!