This kit comes with three separate thermal fuses and is usually used with clothes dryers that have a fan mounted on the motor shaft. Included within this kit is the high limit (Limit: 258) the gas hig...
$63.31
In Stock
Order within the next 12 hrs and your part ships today!
If your clothes are taking longer to dry or coming out with lint, it might be time to replace your dryer’s lint filter. This easy-to-install part catches lint and debris during each cycle, helping you...
$54.95
In Stock
Order within the next 12 hrs and your part ships today!
This 240-volt, 4750-watt heating element kit is designed to restore proper heat output in select dryer models. It generates the heat necessary to dry clothing efficiently during each cycle. If your dr...
$71.45
In Stock
Order within the next 12 hrs and your part ships today!
Included in this rear drum support roller kit are 4 screws, 1 spacers, 2 washers, 2 retaining rings, 2 rear rollers, and 2 cylinder support shafts.
*** Note: Per manufacturer this kit has been upd...
This blower wheel clamp is less than an inch long and is used for some clothes dryers to hold the blower wheel firmly in place. This green clamp is made of metal.
$18.04
In Stock
Order within the next 12 hrs and your part ships today!
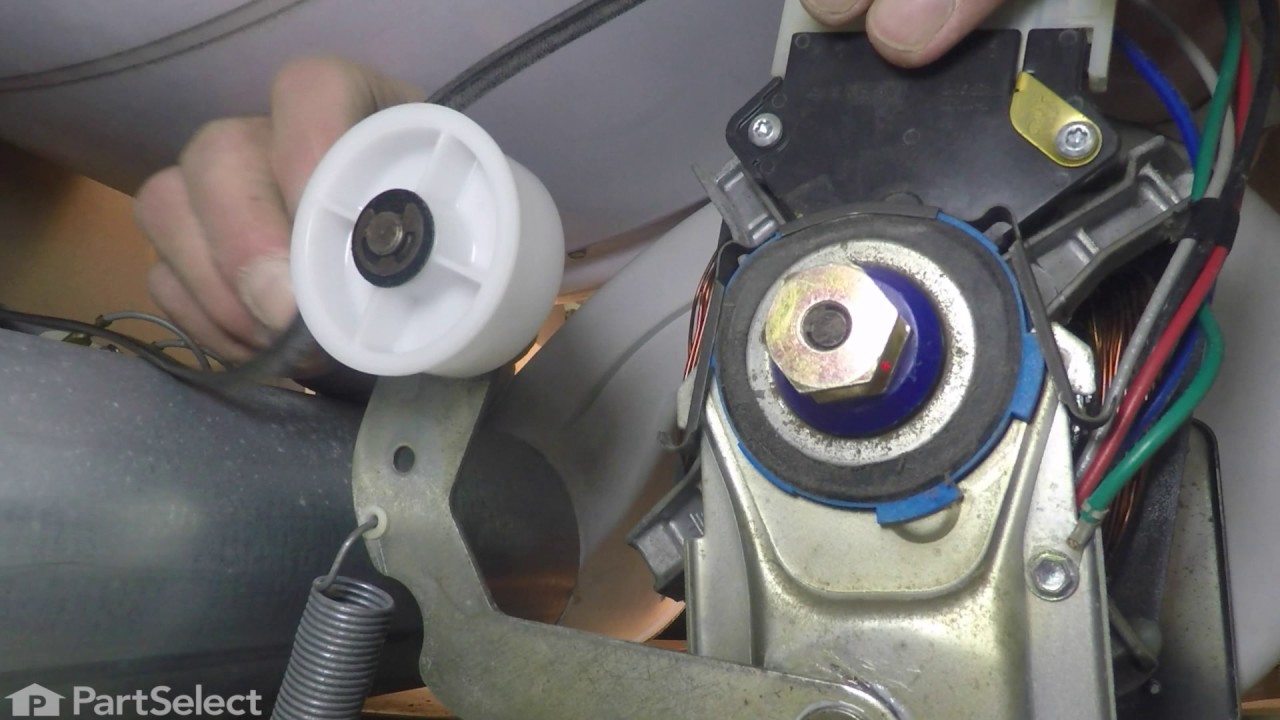
This is the replacement motor pulley for your dryer. The motor pulley transfers momentum from the drive motor to the drum via the drive belt. If the motor pulley cracks or is no longer staying on the ...
$91.90
In Stock
Order within the next 12 hrs and your part ships today!
Order within the next 12 hrs and your part ships today!
Questions And Answers for LNC7764A71
Ask our experts a question about this model and we'll get back to you as soon as possible!
5 questions answered by our experts.
< Prev
1
Next >
Sort by:
Search filter:
Clear Filter
Your search term must have 3 or more characters.
Keep searches simple. Use keywords, e.g. "leaking", "pump", "broken" or "fit".
Sorry, we couldn't find any existing answers that matched.Try using some different or simpler keywords, or submit your new question by using the "Ask a Question" button above!
Brian
April 15, 2022
I'm replacing the dryer idlers assembly part number wp532366 don't know where to hook the tension spring that is attached to the shaft. It was unhooked when I went to replace the part. Can't figure out where it hooks to the frame?
For model number LNC7764A71
Hello Brian, thank you for writing. The spring hooks on the idler and into item # 8 or part PS2048107 which is the housing. We have a video for a similar appliance, that may be of some help. If you need help placing an order, customer service is open 7 days a week. Please feel free to give us a call. We look forward to hearing from you.
Can I order replacement filter screen? And how much?
For model number LNC7764A71
Hello Solomon, Thank you for contacting us. I have researched the model you have provided and have found the part you are looking for is PartSelect Number PS11742807. Please enter the part number for current price and availability. Hope this helps!
Dryer stopped in mid cycle and door lite does not come on when door is opened. Checked breaker and nothing thrown. Could it be the thermal fuse as your website page suggests. When the door is shut and the on button is pushed, nothing happens.
For model number LNC7764A71
Hi David,
Thank you for your question. If the dryer stops too soon, we recommend checking the motor, the drive belt, the door switch, and the door latch. We hope this helps!
My dryer light isn't coming on inside the dryer and the push start switch doesn't work. I tried cleaning out the vent and was kinked. I don't think it's clean completely.I will try again. I was thinking the thermal Fuse has blown. The lint trap inside had a lot of lint in it. Is there a special cleaning brush to clean the vent?
For model number LNC7764A71
Hello Jacquelyn, thank you for contacting us. Yes, the thermal fuse is the likely culprit for both the light and start switch not working, especially with the history of a kinked and lint-filled vent. The lint buildup would have caused the dryer to overheat, blowing the fuse as a safety measure to prevent a fire. You need to replace the thermal fuse kit, part number PS2162282, to fix the issue. You can use a vacuum or a long brush to clear the vent hose. The vent cleaning brush is a long, single brush with a flexible wire or plastic shaft and a handle. The brush head is usually bristled all around. We hope this helps.
Needs the kit where have the part and in the part say L248-80F is heater i have similar with ID. L250-80F but don't work
For model number LNC7764A71
Hi Claudia, thank you for your inquiry. The part you have mentioned is a high limit thermostat. The high limit thermostat kit for your model is PS2162282. Glad to be of help!
I pulled out the broken lint filter and put the new one back in, real easy. I am so happy with the prompt delivery I got from PartsSelect.com. I ordered on a Monday and and it was delivered on a Wednesday
1. Unplug dryer from power outlet 2. Lift dryer top from front (hinged in rear). Just friction holding top down. Use flat scewdriver wrapped in cloth to help lift. 3. Locate heating element - rear top behind drum 4. Unplug red wires to the high limit thermal fuse 5. Unplug red wires to the heating element 6. Unlug white wires to the high limit fuse 7. Remove high limit thermal fuse 8. Remove heating element 9. Remove high limit fuse 10 Clean heating box Installation is reverse order but do the following first! Clean lint trap - Remove front of dryer 1. Unplug white door switch wires. inside front top right 2. remove two screws securing the front of dryer - inside front top left and top right. Front of dryer is hinged at bottom 3. Clean all the lint you can find. If you have never cleaned out the lint, there might be a lot and the cause of over heating (shorting fuse life). Add to your yearly things to do list. 4. While your at it check the alignment of the plastic glides the drum sits on. 5. Also check the foam gasket between the fan housing and lint trap. Mine was off a bit. Realigned with doubled sided tape.
I was about to purchase a new dryer because of the age of my dryer and not wanting to hire someone to fix it. After a little web research, I saw several do-it -yourself stories indicating this was a very easy repair.
This was an extremely easy repair and it save me lots of $$: (1) Disconnected power (2) Opened the top of the dryer (3) Disconnected wires to temperature sensor. (4) Used a 1/2" socket wrench with extension and a drill to remove 2 screws holding down the temperature sensor (5) Removed 1 screw holding down the heating element. (6) Removed wires connected to heating element and pulled out old element. (7) Reassembled new element. (8) Turned on empty dryer for 30 minutes to burn off smell from the new element.


 Diagram and Parts List for Admiral Dryer")


 Diagram and Parts List for Admiral Dryer")
 Diagram and Parts List for Admiral Dryer")


")