Refrigerator Air Filters are a key component for neutralizing odors and ensuring a fresh stream of air into your refrigerator. Swapping your old filter out for a fresh one isn’t difficult and should t...
This handle screw, also known as a mounting bolt, is a mounting screw to help secure the door handle to your refrigerator door. If your handle is loose, you may just need to tighten the screw. If your...
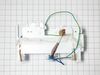
This wiring harness is 20 pin and 3 pin. Replacement ice maker for LG refrigerators. The ice maker assembly contains the mold to form ice and the ejection controls to fill the ice storage bin. Unplug...
Ask our experts a question about this model and we'll get back to you as soon as possible!
4 questions answered by our experts.
< Prev
1
Next >
Sort by:
Search filter:
Clear Filter
Your search term must have 3 or more characters.
Keep searches simple. Use keywords, e.g. "leaking", "pump", "broken" or "fit".
Sorry, we couldn't find any existing answers that matched.Try using some different or simpler keywords, or submit your new question by using the "Ask a Question" button above!
Joe
January 22, 2020
Hello i have a quick question during a recent move the movers hit the cover on the top of the fridge. The black plastic cover that covers the wiring harness on the fridges right door if your looking at it the left door. Everything seems fine except there is 1 wire a Green wired that isn't connected to anything it has a small circular attachment at the end like it should be held down with a screw. I do see a hole on the top of the fridge that appears threaded is where that wire goes? If so what size screw what does it. Do. I haven't plugged it back in as of yet until i figure out what this is and if everything is ok. Thanks again and i look forward to hearing from you. One last question sorry we have a small dent in one of the doors not a crease just a small ding can we get something like that repaired our do we need to reskin it or order a new door? Thanks again
Joe
For model number LMXS30776D
Hello Joe, thank you for your question. That is probably a ground wire. We would recommend using a small Phillips screw to hold that into place in the hole you found. Ant dent or crease in the stainless is really hard to fix, so the door would have to be replaced. I hope this helps.
1 person found this helpful.
Was this helpful?
Thank you for voting!
Don
June 10, 2022
How do you replace fresh air fan behind filter
For model number LMXS30776D
Hello Don, thank you for your question. The Fan behind the cover PS11711629 is Fan motor PS11761149. We do not currently have installation instructions for this part. For more specialized assistance or to speak with someone about this, I would suggest calling the manufacturer of the appliance directly. If you need help placing an order, customer service is open 7 days a week. Please feel free to give us a call. We look forward to hearing from you.
Hi Faith, thank you for reaching out. To set the temperatures on the custom chill drawer, you may need to press the select/lock button repeatedly to toggle through the four temperature settings. Store meat and seafood at 29°F/-1°C, cold drinks at 33°F/1°C, deli snacks at 37°F/3°C, or chilled wine at 42°F/5°C. We hope this information helps!
Was this helpful?
Thank you for voting!
Anthony
December 23, 2019
Repair said we needed mother board - fridge isnt cooling but freezer and beverage drawer are working? Cant find part
For model number LMXS30776D
Hello Anthony and thank you for writing.
PCB assembly board Part Number: PS11710898 is in the list of compatible items for your model. We hope this helps. Please contact us anytime.
Have you checked if the temperature sensor PS11706502 works or the defrost heater assembly PS3529165? It is worthwhile checking as these parts can also cause the symptoms to describe.
Shut off water supply. Disconnect main supply line. Remove rear lower panel on back of refrigerator. Remove all tubing clamps on back. Disconnect leaking tubing from water supply valve. Remove water filter and unscrew/remove water filter housing. Replace tubing - connect to water filter housing then to water supply valve. Reconnect filter housing and filter. Reinstall lower panel, then main water supply line, then all tubing clamps. Turn water back on and check for leaks after discarding several glasses of water to fill filter. Job complete!
Removed ice dispenser and display with small screwdriver from front of the fridge. Pried out the whole piece slowly. This exposed the motor that activates the chute. Plugged in the new motor before any removal to verify the motor was the problem. When it worked, removed old and installed new. 3 screws. Piece of cake.
An easy way to get a refrigerator out from the wall is to use a tow strap or 1/2 to 3/4 in. rope. Throw a loop behind refer while keeping both ends in your hands. Let it settle down to the lower half of unit and pull using both hands. Comes right out. Remove lower panel. Unscrew water valve from cabinet. Remove all tube holders Lay some rags down to catch a little water drainage. Turn off water supply valve at wall. Unplug Power. Remove filter and filter holder. (one screw). remove tube from valve by removing plastic C clip. Push plastic ring towards the valve and pull out tube at same time. With the tube free, remove filter, then mount screw to remove the inside filter holder. When it is out, pull the tube doing the same process as the lower end. Pull tube out and replace with new one putting everything back in reverse order. Before placing tube holders back on, turn on water to check for leaks. After turning water back on and plugging in power, push refer back into place. While I was there, I also replaced the hose from the wall to the refer.