




















LMV1680WW (CWHELGA) LG Microwave Oven Combo - Overview
Sections of the LMV1680WW
[Viewing 7 of 7]


Keep searches simple, eg. "belt" or "pump".

Microwave Grease Filter
PartSelect #: PS12713651
Manufacturer #: 5230W1A012E
Sold individually.
$21.95
In Stock
Air Duct Bracket
PartSelect #: PS3523851
Manufacturer #: 4810W1A151A
This bracket holds the metal or plastic flapper that closes off the exhaust duct when the fan is not running and opens when the fan turns on. If the exhaust fan on your microwave does not appear to be...
$24.15
In Stock

Microwave Damper
PartSelect #: PS3524148
Manufacturer #: 4900W1A001B
This metal vent damper door closes off the exhaust duct when the fan is not running to stop outside air from entering the microwave unit, and opens when the fan turns on to allow air to vent away from...
$17.55
In Stock
Door Handle
PartSelect #: PS3535307
Manufacturer #: MEB41908101
This part is the replacement door handle for your microwave. It is made of white plastic and is approximately 11 inches long and 1 inch wide. The door handle attaches to the microwave door and allows ...
$56.05
On Order


Charcoal Filter
PartSelect #: PS12713650
Manufacturer #: 5230W1A011E
This is the replacement charcoal filter for your microwave. It is approximately 8 inches by 5 inches. The charcoal filter removes cooking odors from the air that circulate through the microwave vent. ...
$28.95
In Stock

Microwave Door Latch Hook
PartSelect #: PS3522839
Manufacturer #: 4026W2A019C
The locker, also knows as a door latch assembly fits to the inside of the microwave door, and keeps the door closed. If the door on your microwave oven doesn’t appear to close properly, you may have a...
$13.15
In Stock
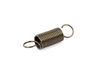
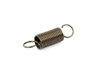
Spring
PartSelect #: PS3524607
Manufacturer #: 4970WRA001G
This spring provides tension or controlled movement within the appliance mechanism. Engineered for durability, it supports smooth operation and helps maintain proper alignment of connected components.
$13.15
In Stock

Common Symptoms of the LMV1680WW
[Viewing 5 of 5]No heat
Fixed by
these parts
these parts

Show All
Won’t turn on
Fixed by
these parts
these parts

Show All
Tray won’t turn
Fixed by
these parts
these parts


Show All
Door not closing properly
Fixed by
these parts
these parts


Show All
Doesn’t shut off
Fixed by
these parts
these parts
Show All
Keep searches simple. Use keywords, e.g. "leaking", "pump", "broken" or "fit".
Grill Vent Broken Tabs
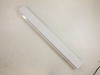
Piece of cake. Grill arrived quickly, was easily installed with a Phillips head screwdriver, needed for the two upper screws which most folks don't think about - Hence the need for this part, since the charcoal filter is behind the grill and most people don't think about replacing this. Easy installation of all filters. Thanks!
Parts Used:
-
David from Smithfield, VA
-
Difficulty Level:Really Easy
-
Total Repair Time:30 - 60 mins
-
Tools:Screw drivers
30 of 45 people
found this instruction helpful.
Was this instruction helpful to you?
Thank you for voting!
Broken door micro switch. (unit does not start heating)
Unplug the unit before servicing. Need phillips screwdriver. Open door. Use step ladder to access and remove 2 small screws from top of the room air diffuser at top of unit. Slide diffuser slightly to the left to align the diffuser's plastic tab on the left side to rotate toward you. (The wires for the front control panel are at the far left side of this difuser, but difuser is slotted for easy removal). Once the difuser is removed you will see 1 screw at the top that secures the pannel cover on the left side of the unit. Remove screw and slide this panel slightly up and out. This exposes the plastic frame that holds the upper and lower door switches. To locate the door switches and observe how they work, close and open the door and watch the door (bayonets) open and close the micro switches. Do the (red) buttons on top of the switches move up and down when the door bayonets push and release? If the buttons do not "pop" up when opened the switch is defective. The switch frame is secured with 2 screws. Remove screws and rotate the unit out for easy access to the micro switch(s). The internal (spring?) on my unit that is suposed to allow the red (visible) button on top of the switch to "pop" up when the door is opened was broken. Carefully pry the switch outward while being careful to lift the plastic holder-piece that holds the switch in place. Be careful, there is a small pin on the frame, so rotate the switch OUT toward you while lifting (carefully) the plastic holder-piece (you will see it on top of the switch). You can use an ohm meter to test the continuity of the switches. But if the buttons don't "pop" they are defective. Replace switch and reassemble.
Parts Used:
-
JAMES from BILLINGS, MT
-
Difficulty Level:Very Easy
-
Total Repair Time:30 - 60 mins
-
Tools:Screw drivers
37 of 68 people
found this instruction helpful.
Was this instruction helpful to you?
Thank you for voting!
The fan cover in top of the cooking area was burned.
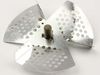
The original cover was burned and actually caught on fire. Research informed me that food can splatter and stick to the cover. The particle will get hot enough to ignite the plastic cover. I ordered the cover and included the fan since it was so cheap, Replacement was super easy. Done in 10 minutes and made my wife happy. She was ready to buy a new microwave because she thought something was wrong with ours but food splatter was the cause. Parts were less than $10 + $6 shipping. Keep the inside of the microwave clean!!
Parts Used:

-
Mike from PINEY FLATS, TN
-
Difficulty Level:Really Easy
-
Total Repair Time:Less than 15 mins
-
Tools:Pliers
13 of 18 people
found this instruction helpful.
Was this instruction helpful to you?
Thank you for voting!