This refrigerator water filter replacement is for 2010 LG refrigerators that have either forward French doors or are the four-door dispensing models. This filter is designed to minimize impurities tha...
Refrigerator door bin AAP73252202 is an original equipment manufacturer (OEM) part that fits some Kenmore Elite bottom-freezer refrigerators in the following series: 7957204, 7957205, 7957209, 7957218...
This handle screw, also known as a mounting bolt, is a mounting screw to help secure the door handle to your refrigerator door. If your handle is loose, you may just need to tighten the screw. If your...
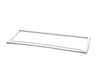
This refrigerator door shelf bin is a clear, gallon-sized storage accessory designed for installation on the right-side door of select refrigerator models. Crafted from durable, food-safe resin, it fe...
Having trouble with your LG fridge's ice or water dispenser? We have a solution: the Refrigerator Ice Water Line Tube Assembly is ready to get your fridge back in top shape. Why is this part crucial...
Are you tired of wrestling with a sagging freezer basket? Say goodbye to these days thanks to the Left Side Connector Rail, a genuine replacement part from LG. This freezer basket support rail speeds ...
Designed for efficient ice production, this ice maker assembly includes the ice mold and control unit that work together to freeze and release ice. Water enters through the inlet valve and is held in ...
For this model the ice maker is very easy to replace. All it takes is a phillips head screwdriver. There are two wire connections you have to unplug. Easy out easy in. You do not have to disconnect the water line, just make sure the line is lined up correctly when you reinstall the new icemaker. It seems to take approximately 8 hours before you start getting ice again. If you have this same model, you already know this ice maker is very slow in making ice and is not able to keep up with daily usage of ice for a household of 3.
Fortunately, others had left comments about this installation, so proved very helpful. First thing was laying out the gasket flag on the counter to allow it to unbend, get out the kinks from shipping. While the new gasket was laying out on the counter, started removing the old gasket. As it had been there for 11 years, needed pliers to get a corner started. I was slow and careful removing the old gasket in case I needed to put it back in. A very helpful suggestion from others was to lightly rub dishwashing soap on the gasket edge that fits in the groove in the door. Again, slow and careful, got it installed, wiped off any excess dishwashing liquid, and the door closed with a better seal in a long time. Pleasantly surprised how easy this was to do!