This refrigerator water filter replacement is for 2010 LG refrigerators that have either forward French doors or are the four-door dispensing models. This filter is designed to minimize impurities tha...
$101.75
In Stock
Order within the next 6 hrs and your part ships today!
Refrigerator door bin AAP73252202 is an original equipment manufacturer (OEM) part that fits some Kenmore Elite bottom-freezer refrigerators in the following series: 7957204, 7957205, 7957209, 7957218...
$95.12
In Stock
Order within the next 6 hrs and your part ships today!
This handle screw, also known as a mounting bolt, is a mounting screw to help secure the door handle to your refrigerator door. If your handle is loose, you may just need to tighten the screw. If your...
$18.96
In Stock
Order within the next 6 hrs and your part ships today!
This refrigerator door shelf bin is a clear, gallon-sized storage accessory designed for installation on the right-side door of select refrigerator models. Crafted from durable, food-safe resin, it fe...
$79.89
In Stock
Order within the next 6 hrs and your part ships today!
This left-side crisper drawer is designed for use in select LG refrigerators, offering a reliable solution for storing fruits, vegetables, and other perishables. Made from clear plastic, it features r...
$149.40
In Stock
Order within the next 6 hrs and your part ships today!
Are you tired of struggling with a broken or missing shelf in your LG refrigerator? We understand how frustrating that can be, especially when your fridge isn't as organized or reliable as it should b...
Is your refrigerator not cooling as it should? Our genuine LG DC Motor could be the solution you're seeking. Acting as the heart of your refrigerator, this crucial component ensures your appliance kee...
This fan assembly circulates air to regulate temperatures and support efficient operation. Proper airflow improves performance and helps protect internal components. Replacing a failing fan assembly r...
$56.26
In Stock
Order within the next 6 hrs and your part ships today!
Questions And Answers for LFXC24726S
Be the first to ask our experts a question about this model!
✖
Ask a Question
Ask our experts a question on this model and we'll respond as soon as we can.
Before you begin, I'd recommend unplugging the refrigerator. You have to slip the putty knife in around the edge of the dispenser panel and carefully release the tabs all the way around and the entire panel pulls straight out. There are three wiring harnesses to unplug. You'll have to remove several screws and release the tabs around the electronic panel and remove it from the main panel. It's a good idea to take note or even pictures of how the ice and water actuators are positioned on the panel, so you get them situated properly on the new panel. If the ice actuator is not fit correctly on a knob that sticks up it may dispense ice all the time (happened to me). After you transfer the actuators to the new panel and the ice and water dispensing levers, you can re-attach the electronic panel on the left side. make sure all of the wiring harnesses are plugged in and the wires situated out of the way, then re-install the panel by pushing it straight back in. Plug the refrigerator in and test it out.
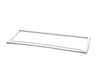
Watch YouTube videos on this topic if you are uncertain before tackling the job. The right door was easy to replace. Just pull the gasket with your fingers and it will come off easily. Place new gasket over door and use fingers to press it inside the groove few inches at a time. Pay attention to gasket orientation.
The left door is a bit harder because you need to remove the mullion at the door edge using a screw driver. Remove two screws on the center hinge and then slide the mullion up to disengage. Then unplug the wires to remove the mullion. Replace the gasket as described above and replace the mullion reversing the directions shown above.
Once I U tubed the the removal and replacement of the gaskets it was super easy. The right gasket change was easy without tools. The left gasket required me to remove the mullion first, which is why I used Utube.