Models > LFX25991ST00

LFX25991ST00 LG Refrigerator - Overview

Sections of the LFX25991ST00

[Viewing 7 of 7]
Keep searches simple, eg. "belt" or "pump".
Refrigerator Water Filter – Part Number: AGF80300702
Refrigerator Water Filter
★★★★★
★★★★★
(2)
PartSelect #: PS12724833
Manufacturer #: AGF80300702
This refrigerator water filter replacement is for 2010 LG refrigerators that have either forward French doors or are the four-door dispensing models. This filter is designed to minimize impurities tha...
$102.35
  In Stock
DOOR BASKET ASSEMBLY – Part Number: AAP73252202
DOOR BASKET ASSEMBLY
★★★★★
★★★★★
(1)
PartSelect #: PS3637058
Manufacturer #: AAP73252202
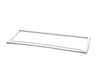
Refrigerator door bin AAP73252202 is an original equipment manufacturer (OEM) part that fits some Kenmore Elite bottom-freezer refrigerators in the following series: 7957204, 7957205, 7957209, 7957218...
$96.27
  In Stock
FILTER ASSEMBLY,AIR CLEANER – Part Number: ADQ73214408
FILTER ASSEMBLY,AIR CLEANER
PartSelect #: PS16222687
Manufacturer #: ADQ73214408
Refrigerator Air Filters are a key component for neutralizing odors and ensuring a fresh stream of air into your refrigerator. Swapping your old filter out for a fresh one isn’t difficult and should t...
$67.74
  In Stock
Water Inlet Valve Assembly – Part Number: AJU72992601
Water Inlet Valve Assembly
★★★★★
★★★★★
(1)
PartSelect #: PS3533117
Manufacturer #: AJU72992601
This includes the primary and secondary valves along with the wire harness.
$261.65
  In Stock
Handle Screw – Part Number: MJB63190001
Handle Screw
★★★★★
★★★★★
(1)
PartSelect #: PS8752913
Manufacturer #: MJB63190001
This handle screw, also known as a mounting bolt, is a mounting screw to help secure the door handle to your refrigerator door. If your handle is loose, you may just need to tighten the screw. If your...
$11.92
  In Stock
BASKET ASSEMBLY,DOOR – Part Number: AAP73252302
BASKET ASSEMBLY,DOOR
★★★★★
★★★★★
(1)
PartSelect #: PS3637059
Manufacturer #: AAP73252302
$154.06
  In Stock
ELBOW – Part Number: MDB61861102
ELBOW
PartSelect #: PS12716068
Manufacturer #: MDB61861102
$15.91
  In Stock
Tube Assembly,Ice Water – Part Number: AJR56656503
Tube Assembly,Ice Water
PartSelect #: PS3533046
Manufacturer #: AJR56656503
$36.17
  In Stock
TRAY ASSEMBLY, VEGETABLE – Part Number: AJP73334413
TRAY ASSEMBLY, VEGETABLE
PartSelect #: PS10061310
Manufacturer #: AJP73334413
$149.40
  In Stock
Cap Assembly,Head – Part Number: ABN73019101
Cap Assembly,Head
PartSelect #: PS3530706
Manufacturer #: ABN73019101
$40.68
  In Stock
SHELF,GLASS – Part Number: MHL42613229
SHELF,GLASS
★★★★★
★★★★★
(1)
PartSelect #: PS3649796
Manufacturer #: MHL42613229
$90.81
  In Stock
Refrigerator Compressor Overload Protector – Part Number: 6750CL0001D
Refrigerator Compressor Overload Protector
PartSelect #: PS3603394
Manufacturer #: 6750CL0001D
The compressor overload protector attaches to the compressor and shuts off the compressor if the compressor motor draws too much current.
$45.74
  In Stock

Questions And Answers for LFX25991ST00

Be the first to ask our experts a question about this model!

Common Symptoms of the LFX25991ST00

[Viewing 9 of 9]
Leaking
Fixed by
these parts
Fixing Fixing Fixing
Show All
Not dispensing water
Fixed by
these parts
Fixing Fixing
Show All
Door won’t open or close
Fixed by
these parts
Fixing
Show All
Door Sweating
Fixed by
these parts
Fixing Fixing
Show All
Ice maker won’t dispense ice
Fixed by
these parts
Fixing
Show All
Noisy
Fixed by
these parts
Fixing
Show All
Ice maker not making ice
Fixed by
these parts
Fixing
Show All
Frost buildup
Fixed by
these parts
Show All
Fridge and Freezer are too warm
Fixed by
these parts
Fixing
Show All
Keep searches simple. Use keywords, e.g. "leaking", "pump", "broken" or "fit".
replace leaking water inlet valve assembly
1. Shut off water to refrigerator. 2. Removed bottom sheet metal cover (6 screws). 3. Removed leaking water inlet valve assembly from refrigerator (1 screw). 4. Remove water inlet tube (loosen nut) and tube back to refrigerator (pull from water valve after remove cotter pin washer). 5. Detach two electrical wire harnesses. 6. Install new water inlet valve assembly to refrigerator (1 screw). 7. Replace both water tubes to water inlet assembly. 8. Re-attach both wiring harnesses. 9. Turn water to refrigerator on. 10. Check for leaks. 11. Re-attach bottom sheet cover (6 screws).
Parts Used:
Water Inlet Valve Assembly
  • Richard from JACKSONVILLE, FL
  • Difficulty Level:
    Really Easy
  • Total Repair Time:
    15 - 30 mins
  • Tools:
    Screw drivers
28 of 47 people found this instruction helpful.
Was this instruction helpful to you?
Thank you for voting!
Ice / water dispenser control panel cover discolored at bottom due to splashing water
I suggest turning off the water valve and power to the refrig before starting work. If this is not done the water dispenser will probably spray water down the front of the refrig. The whole icemaker assembly must be pulled out from the front. It is a friction fit--just insert fingers in the ice chute and pull out. The entire piece will pull out from the door. The control panel cover is held in by 8 screws that extend through the circuit board to the cover. It is a good idea to unplug the wiring to the circuit board when replacing the cover to prevent tension damage to the small guage wires. Once the new control panel cover is attached to the circuit board, the whole assembly can be reinstalled into the door.
Parts Used:
COVER,DISPLAY
  • James from ST AUGUSTINE, FL
  • Difficulty Level:
    A Bit Difficult
  • Total Repair Time:
    30 - 60 mins
  • Tools:
    Screw drivers
14 of 17 people found this instruction helpful.
Was this instruction helpful to you?
Thank you for voting!
Ice chute would not open.
Removed ice dispenser and display with small screwdriver from front of the fridge. Pried out the whole piece slowly. This exposed the motor that activates the chute. Plugged in the new motor before any removal to verify the motor was the problem. When it worked, removed old and installed new. 3 screws. Piece of cake.
Parts Used:
MOTOR,DC
  • Steve from MUKWONAGO, WI
  • Difficulty Level:
    Easy
  • Total Repair Time:
    30 - 60 mins
  • Tools:
    Screw drivers
12 of 24 people found this instruction helpful.
Was this instruction helpful to you?
Thank you for voting!