This handle screw, also known as a mounting bolt, is a mounting screw to help secure the door handle to your refrigerator door. If your handle is loose, you may just need to tighten the screw. If your...
$13.15
In Stock
Order within the next 6 hrs and your part ships today!
This is a genuine replacement switch. It is a push button style switch that is designed for use in your refrigerator. When the door of your appliance is opened the switch is released, and the light co...
$47.07
In Stock
Order within the next 6 hrs and your part ships today!
This ice maker assembly is for refrigerators. This Ice maker assembly contains the complete ice maker and housing. The assembly may include multiple parts; refer to your parts diagram for a complete ...
$180.02
In Stock
Order within the next 6 hrs and your part ships today!
Are you tired of wrestling with a sagging freezer basket? Say goodbye to these days thanks to the Left Side Connector Rail, a genuine replacement part from LG. This freezer basket support rail speeds ...
$27.45
In Stock
Order within the next 6 hrs and your part ships today!
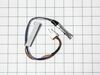
Keep your refrigerator running efficiently with this defrost sensor and thermistor assembly. It monitors the evaporator coil temperature to help regulate the defrost cycle, preventing frost buildup an...
$54.95
In Stock
Order within the next 6 hrs and your part ships today!
We know how inconvenient it can be when a minor issue affects the functioning of your LG refrigerator, so allow us to present the LG Refrigerator Light Lens Cover. Designed to secure the light bulb in...
Looking for a reliable solution to keep your LG refrigerator or freezer in prime condition? Our genuine OEM Defrost Sensor Assembly from LG could be just what you need. Designed specifically to fit ...
$57.15
In Stock
Order within the next 6 hrs and your part ships today!
Questions And Answers for LFC25770SB
Ask our experts a question about this model and we'll get back to you as soon as possible!
1 question answered by our experts.
< Prev
1
Next >
Sort by:
Search filter:
Clear Filter
Your search term must have 3 or more characters.
Keep searches simple. Use keywords, e.g. "leaking", "pump", "broken" or "fit".
Sorry, we couldn't find any existing answers that matched.Try using some different or simpler keywords, or submit your new question by using the "Ask a Question" button above!
David
December 10, 2019
My bottom freezer, two side by side refrigerator doors, is leaking water on the floor. It appears to be freezer related, as when we turn off the incoming water line, it seems to stop dripping. Any suggestion on what it could be, and how can i fix it myself?Thanks in advance!
david
For model number LFC25770SB
Hello David and thanks for writing.
It certainly sounds like a faulty water inlet valve PS3527440 and/or water inlet tube PS3526241 test and replace if needed. It is recommended to replace both parts at the same time. We hope this helps. Please contact us anytime.
This is a fairly easy straightforward repair, you would need a basic tool kit.
Video makes it look easy. Kenmore refrigerator does not have "groove" along the right hand side of switch that allows for pushing down on release. Used a thin screwdriver to get under to push while holding switch edge with pliers. Kept slipping. Tape sides to avoid scratching inside of refrigerator.
Turn off power, remove upper and lower drawers (may need to open upper refrigerator doors to remove large freezer bin,) remove drawer supports (upper and lower), remove rear freezer panel (trick is to loosen 4 screws on fan bumpout to get the panel to come free from the freezer side wall), test thermistor with multimeter (should have continuity or near zero resistance across 2 orange fuse wires) before cutting zip ties, cut zip ties holding Thermistor in place, remove old Thermistor, install new Thermistor, install new zip ties, replace rear freezer panel, install upper and lower drawer supports, install drawers, turn on power, should be fixed if error code doesn't return after 6 hours.
This couldn't have been easier. Two tiny screws in the front needed unscrewed, and then two plastic clips in the middle just had to be popped lose. Finally, you unplugged the power cord. Then, you just needed to reverse the process by plugging the new ice maker in, popping the clips in place, and screwing the two holes back in and turning the whole thing on. Voila! Perfect ice cubes again. And for only a little over $100.