The tumbler and motor belt in your dryer allows the drum to spin during the drying cycle. At 100 inches in length, this dryer drum belt is 3/8 of an inch wide and has five ridges. The belt is black in...
$37.35
In Stock
Order within the next 10 hrs and your part ships today!
This front glide kit comes with a blue plastic glide, a brown cork pad, and two metallic rivets. Two kits are required per appliance. A rivet tool is required for this installation.
$18.95
In Stock
Order within the next 10 hrs and your part ships today!
This idler pulley shaft washer is used with many clothes dryers. It is less than an inch long, and it is black in color.
$17.55
In Stock
Order within the next 10 hrs and your part ships today!
Questions And Answers for LDE7304ACE
Ask our experts a question about this model and we'll get back to you as soon as possible!
5 questions answered by our experts.
< Prev
1
Next >
Sort by:
Search filter:
Clear Filter
Your search term must have 3 or more characters.
Keep searches simple. Use keywords, e.g. "leaking", "pump", "broken" or "fit".
Sorry, we couldn't find any existing answers that matched.Try using some different or simpler keywords, or submit your new question by using the "Ask a Question" button above!
Sheila
October 1, 2025
Timer knob toward end of cycle kept ticking but dryer stopped. Clothes were dry. When I pushed start button get a buzz but nothing else. Timer/type of drying choice knob now turns to left better than the right.
For model number LDE7304ACE
Hi Sheila, thank you for reaching out. If the timer’s internal gears or contacts are worn, the cycle can stop mid-run even though the dial still moves. The dryer timer for your model is part number PS11757529. You may need to replace it to fix the issue. We hope this sorts out your problem!
Dryer sounds like the noice a baseball card makes in bike spokes.
For model number LDE7304ACE
Hello Gerry, thank you for contacting us. Check the drum rollers, part number PS1570070. The drum rollers might be worn out or loose, causing the drum to vibrate and produce the rattling noise. Also, check the idler pulley, part number PS11743028. A worn-out, damaged or a malfunctioning idler pulley, could be causing the noise. We hope this information helps!
Hello Stacy, thank you for getting in touch. To replace the belt, part number PS11757542, we have found a relevant video on how to replace it. Here is the link: We hope this helps.
Dryer will heat on setting more dry but not on time setting.
For model number LDE7304ACE
Hello Dale, Thank you for the question. this could indicate an issue with the Timer. This dryer timer is used to control the unit's cycles by regulating the length of time that power is directed to each setting and the Element. We hope this helps!
I replaced 2 belts in less than a week because my dryer keeps breaking them any suggestions?
For model number LDE7304ACE
Hello Wilfredo, thank you for contacting us. If your dryer is consistently breaking belts, there are a few potential issues you might want to investigate:
1. Alignment Issues: Ensure that the drum and pulleys are properly aligned. Misalignment can cause the belt to wear unevenly and break.
2. Overloading: Make sure you are not overloading the dryer. Excessive weight can put extra strain on the belt.
3. Obstructions: Inspect the drum for any obstructions or foreign objects that might be causing the belt to snag or wear prematurely.
4. Tension Issues: Ensure that the belt tension is correct. If the tension is too loose or too tight, it can lead to premature belt failure.
5. Compatibility: Ensure you are using belts that are compatible with your dryer model.
If you have checked these areas and the problem persists, then we would suggest checking the idler pulley wheel, part number PS11743028, to solve the problem. If the idler pulley wheel is worn out or not functioning smoothly, it can cause excessive friction on the belt. We hope this helps.
Removed the front cover (screws on bottom 0f face)...removed blower cover....spring pliers to remove and install blower fan. the rest of the time was spent cleaning the inside of the shell as well as the vent. Reassembled and dryer runs better than it has for many years.
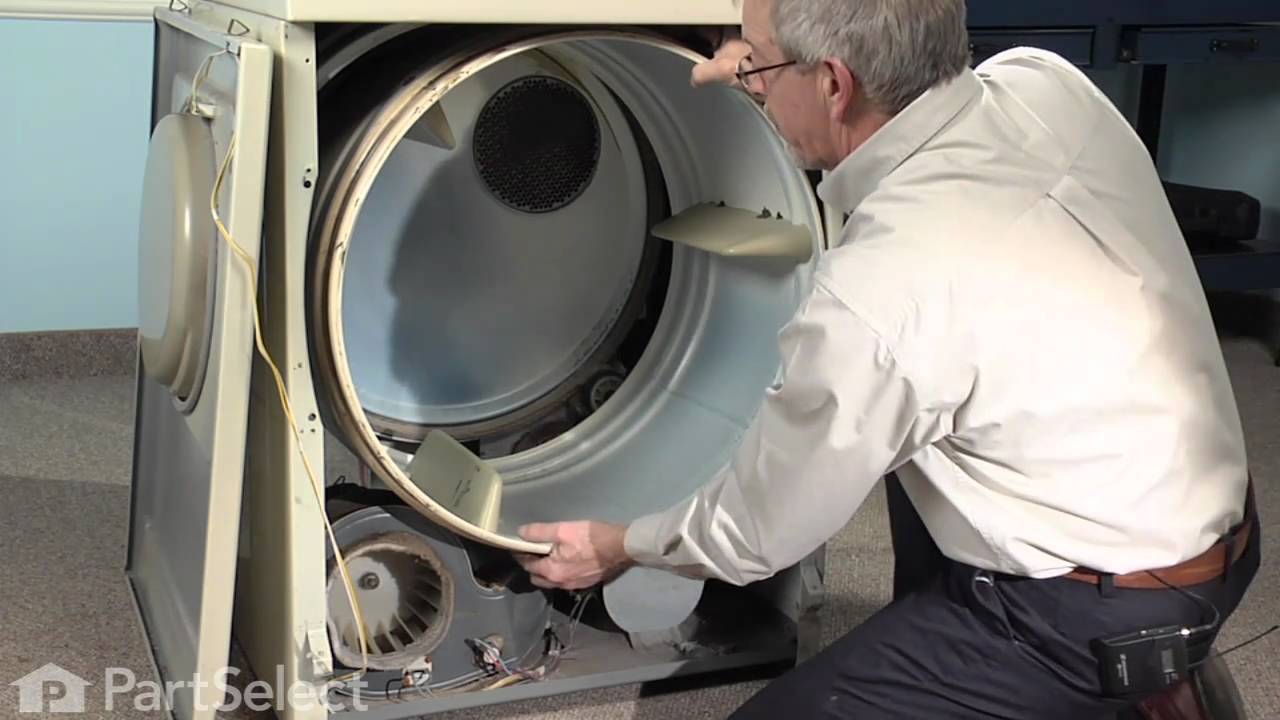
1. Removed front of machine (2 screws at the bottom). 2. Removed 4 screws from inside the dryer, to take off the blower housing. 3. Removed 4 screws and took out the large metal piece which supports the drum at the front. Removed the drum. 4. Replaced the two rollers that support the drum in the rear. Cleaned the pins they run on, and oiled very lightly. Also replaced the idler roller. I was surpirsed to see that these rollers use plain bearings, not ball bearings. 5. On the front support piece, drilled out the rivets for the glides, and replaced the worn out glides with new parts. Applied a little glue (3M weatherstrip adhesive) to the cork pieces, to glue them to the metal. Attached the plastic pieces over the cork pieces, and riveted in place using rivets that came with the glide kits. 6. Replaced front and rear felt seals. This was not as tricky as I expected it to be. They were held in by metal tabs. Glued the ends where they came together. 7. Replaced the felt blower seal. Glued to the blower housing. 8. Reinstalled the drum, installed new belt, which came with good instructions (luckily). 9. Reassembled front support piece and the front of the cabinet.
I also cleaned the lint from the cabinet and from the vent hose.
In general, the job went without a hitch, and the machine probably has quite a few years left, despite the fact that it's 18 years old. This gives me a good feeling.
I'd say this would be challenging, though, for someone who is not pretty experienced with machinery repair. Also, the cost of the parts was significant enough that it would not have been unreasonable to have opted for a new machine.