This kit includes the motor, fan blade, wire harness and screws.
NOTE: The manufacturer has changed the product to appear different than the original, but will still function the same as the origina...
$132.55
In Stock
Order within the next 6 hrs and your part ships today!
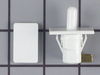
This is the replacement water tube kit for your refrigerator. This tubing is made of plastic, is 1/4 inch in diameter, and comes with 2 inserts. This tube may be longer than the original tube, and may...
$40.65
In Stock
Order within the next 6 hrs and your part ships today!
This ice maker bin thermistor is a precision sensor designed to monitor the temperature within the ice storage compartment. By continuously relaying temperature data to the refrigerator’s electronic c...
This is a high temperature adhesive that is used for gaskets and felt seals.
$72.48
In Stock
Order within the next 6 hrs and your part ships today!
Questions And Answers for KUIC18NNTS1
Ask our experts a question about this model and we'll get back to you as soon as possible!
3 questions answered by our experts.
< Prev
1
Next >
Sort by:
Search filter:
Clear Filter
Your search term must have 3 or more characters.
Keep searches simple. Use keywords, e.g. "leaking", "pump", "broken" or "fit".
Sorry, we couldn't find any existing answers that matched.Try using some different or simpler keywords, or submit your new question by using the "Ask a Question" button above!
Philippe
April 5, 2023
my stand alone kitchenaid icemaker will not stop filling up. When it overfills it makes a terrible noise . Could the overfilling be due to a faulty thermistor ? Could there be another reason ? Thank you.
For model number KUIC18NNTS1
Hello Philippe, thank you for contacting us. The issue can be caused by a faulty thermistor as it directly monitors and maintains the ice level in the bucket. A faulty thermistor can cause the wrong ice level detection and overfill the ice maker. You may need to replace the thermistor part number, PS11755741, to resolve the issue. A clogged water supply line can decrease the water pressure and cause the water inlet valve to not shut off properly and overfill the ice maker. We hope this helps.
which hole top or bottom does the water supply from house go into.
For model number KUIC18NNTS1
Hello Gary, thank you for reaching out. According to our research, the water supply line will go through the bottom hole. We hope this information helps!
1 personfound this helpful.
Was this helpful?
Thank you for voting!
Denis
August 7, 2025
Ice forms on evaporator plate, but does not release and drop onto cutter grid. Water continues to run over the top of the ice junk on the evaporator plate causing the ice chunk to become very thick
For model number KUIC18NNTS1
Hello Denis, thank you for getting in touch. A blocked drain line stops melted ice from draining, resulting in water freezing on the evaporator plate and causing the ice to adhere. Unclog the drain and the drain opening. Remove any ice or debris obstructing it. To verify adequate water flow, pour warm water down the drain to confirm it flows without obstruction. Limited airflow caused by a dirty evaporator coil or obstructed vents can lead to uneven freezing and ice accumulation on the plate. We hope this helps.
Was this helpful?
Thank you for voting!
< Prev
1
Next >
✖
Ask a Question
Ask our experts a question on this model and we'll respond as soon as we can.
The process to repair was very simple, I removed the back of the refrigerator to expose the motor area. I then removed three screws that held the condenser motor in place. once it was loose I detactched the electrical harness and removed the old motor. I then placed the new motor in place and secured it with the screws and reattached the new electrical harness that came with the new part. Once completed I reviewed it to make sure I didn't miss anything. I then replaced the cover over the motor area and enjoyed my success in repairing my own appliance with no added cost for labor, which would have been expensive I'm sure. The part purchased came with clear and consice instructions very easy to follow.
Took all the screws out of the plastic shroud that encloses the switch .There only four that I needed to remove, were the two in front where the switches that go,they go in horizontally and two in the back with large washers on them that hold the back to the top of the box that go in vertically.The switch was a snap ( make that two snaps ) the wiring is almost self explanatory. then it gos back to the way you took it off. OH! and don't forget to turn the light bulb all the way back in to the socket , so the light will work after you take the time to install it yourself.I had the water supply line from under the box to the water dispenser in the door and the total bill on that was one hundred thirty seven and a hand full of change.Don't be afraid to do it yourself the savings is enough on one one item to make several months payments on a new one Randy the "Handy Man'
We have a side-by-side fridge/freezer and we experienced a hot center post (where doors come together) and the fridge made loud noise. Also, the (old) fan motor would start, but then quit, so our issue was the motor.
For me the repair was very easy, but for an unexperienced person it may prove to be difficult. If you must order a motor/fan, do NOT order the metal fan as a plastic fan comes with the motor. What's strange is the new motor is different than the old one, but it still mounted without any required modifications. I did NOT use the wire harness that came with the motor either as it was different too, but my old one was still good.
Check all of your parts as my fan had a cracked blade, but I used "superglue" and it's fine now.
Fridge stays cold and my wife had to lower the temperature in the fridge as she was blasted by the cold!


 Diagram and Parts List for KitchenAid Ice Maker")