This OEM gray Dishwasher Lower Dishrack Wheel Assembly is a plastic kit that allows the rack to slide in and out of the dishwasher easily. If it breaks or becomes damaged. sliding will feel difficult....
$42.60
In Stock
Order within the next 10 hrs and your part ships today!
Sold individually. This part secures the upper side of the dishwasher to the underside of the counter or cabinet to prevent the dishwasher from moving, shaking, or tilting forward.
$20.95
In Stock
Order within the next 10 hrs and your part ships today!
The tine pivot clip, also known as the tine row pivot, is used in dishwashers and is located in the upper dishrack. At around 3 inches in length, the clip is used to keep the tine row in place in the ...
$13.95
In Stock
Order within the next 10 hrs and your part ships today!
This manufacturer-approved Rack Stop Clip is a gray plastic part which can be installed with a screwdriver. Measuring slightly over an inch in length, it prevents the rack from sliding too far and fal...
$18.95
In Stock
Order within the next 10 hrs and your part ships today!
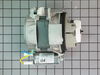
This drain pump is used in dishwashers to remove water from the dishwasher tub. If the impeller in the dishwasher is damaged or the motor has been shorted out and will not drain, it is possible the bo...
$93.36
In Stock
Order within the next 10 hrs and your part ships today!
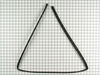
Prevent leaks and maintain optimal cleaning performance with this durable dishwasher door seal. It creates a secure barrier to keep water contained during wash cycles, ensuring reliable operation. Rep...
$75.91
In Stock
Order within the next 10 hrs and your part ships today!
This part is the replacement door seal for your dishwasher. It is approximately 22 inches long and 2 inches wide. This door seal is made of gray plastic and is found at the bottom the dishwasher. The ...
$15.95
In Stock
Order within the next 10 hrs and your part ships today!
Also known as rack adjuster. Sold individually.
This is an original part from KitchenAid, Kenmore, Whirlpool, Jenn-Air, and Maytag for use with Dishwashers. The dishrack adjuster arm positioner clip...
$56.05
In Stock
Order within the next 10 hrs and your part ships today!
This is also called the 3rd-level spinner. This part works like a little spray arm at the top of your dishwasher.
$35.15
In Stock
Order within the next 10 hrs and your part ships today!
Questions And Answers for KUDS30FXSS8
Ask our experts a question about this model and we'll get back to you as soon as possible!
4 questions answered by our experts.
< Prev
1
Next >
Sort by:
Search filter:
Clear Filter
Your search term must have 3 or more characters.
Keep searches simple. Use keywords, e.g. "leaking", "pump", "broken" or "fit".
Sorry, we couldn't find any existing answers that matched.Try using some different or simpler keywords, or submit your new question by using the "Ask a Question" button above!
Jon
July 4, 2023
The upper rack and track parts. Is item 12 sold separately?
For model number KUDS30FXSS8
Hi Jon, thank you for the question. Yes, based on our research, the part you are referring to is sold separately. Let us know if you have further questions!
1 personfound this helpful.
Was this helpful?
Thank you for voting!
James
September 15, 2025
Dishwashers start but when it starts to wash it pump the water out then turn it off
For model number KUDS30FXSS8
Hello James, thank you for getting in touch. If your dishwasher fills with water and then pumps it out before stopping, common causes include a clogged filter or drain hose, a faulty drain pump. Make sure the filter is clean, and the drain hose is not blocked. If this does not help, replace the drain pump, part number PS11753379, to fix the issue. We hope this helps.
Water is on water is leaving the return hose when I turn on dish washer
For model number KUDS30FXSS8
Hi Peter, thank you for the question. Check the drain hose for any blockage first. If it is fine, the issue could be with the drain pump, part number PS11753379. You may need to replace it to fix the issue. We hope this sorts out your problem!
Good morning. I’ve got a kitchen aid dishwasher model number listed above. Washer is receiving power and board lights up. Checked drain and replaced water inlet actuator valve . Still no water. It starts up and attempts to run through the normal motions but no water. It’s not the source I have verified. The board mode indicator lights have been acting up a bit. Do you think I need a new board? Or any other part of the circuit? Appreciate the advice I just want to get some expert feedback before I commit to purchase. I’m handy I would just appreciate some advice on this one. Thank you
For model number KUDS30FXSS8
Hi Alan, thank you for reaching out. Based on the description that you have provided, we would recommend checking the overfill control switch, part number PS11750031, before replacing the control board. We hope that helps!
Replacement was pretty easy after figuring out how to unsnap/unlock the old pieces. Tools only used to do a little prying and poking, but really aren't needed. Everything either snaps or slides together. Piece of cake
Pulled dishwasher from under counter, attached link to spring, hooked spring back into frame/chassis, threaded link through pulleys, attached other end of link onto door, reinstalled dishwasher under counter. All's well. Note-I purchased an extra link anticipating that the other one will fail. They're cheap enough.
I took the broken basket adjuster off and then attached the new one. It wasn't too difficult, however some removal instructions and re-install instructions( or just a picture supplied) would have been helpful. This isn't an issue for a mechanically inclined person, but would be a challenge for someone that isn't. Thanks.


 Diagram and Parts List for KitchenAid Dishwasher")