




















KUDE20IXWH8 KitchenAid Dishwasher - Instructions
Keep searches simple. Use keywords, e.g. "leaking", "pump", "broken" or "fit".
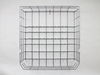
Replace lower dishwasher rack due to broken tines
Although the lower rack was a slightly different style than our original, it fit the dishwasher perfectly. We needed to transfer the silverware racks to the new rack and insert one set of removable tines. About 5 minutes and we are very happy with the repair.
Parts Used:
-
Daniel from River Falls, WI
-
Difficulty Level:Really Easy
-
Total Repair Time:Less than 15 mins
12 of 16 people
found this instruction helpful.
Was this instruction helpful to you?
Thank you for voting!
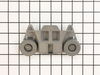
wheel fell off
-
Richard from BOSTON, MA
-
Difficulty Level:Really Easy
-
Total Repair Time:Less than 15 mins
13 of 19 people
found this instruction helpful.
Was this instruction helpful to you?
Thank you for voting!
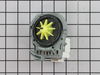
Water didn’t drain
The repair was really easy. First disconnected electricity staring with fuses and removing wires from dishwasher, then disconnected drain hose and water hose. Pulled it out and removed pump turning clockwise no need for tools and same way installed new one. Very easy
Parts Used:
-
Ilir from WETHERSFIELD, CT
-
Difficulty Level:Really Easy
-
Total Repair Time:30 - 60 mins
-
Tools:Nutdriver, Screw drivers
12 of 16 people
found this instruction helpful.
Was this instruction helpful to you?
Thank you for voting!
Dishwasher wasn’t draining
1.Check the lines for any obstruction. Gunk can easily build up. I have used the dishwasher for approx. 10 years. I do rinse/scrap dishes prior to loading.
2. Drain all remaining water.
3. Unplug the dishwasher.
4. Grab a towel and proper screw driver. Unscrew the bottom protective plate. Remove the insulation plate.
5. The drain pump is located to the bottom left. Have your towel under it. Unplug it gently. Turn counter clockwise to remove.
6. Install the new drain pump (reverse order)
7. Return the insulation plate. Screw back the bottom protective plate.
8. Plug in
2. Drain all remaining water.
3. Unplug the dishwasher.
4. Grab a towel and proper screw driver. Unscrew the bottom protective plate. Remove the insulation plate.
5. The drain pump is located to the bottom left. Have your towel under it. Unplug it gently. Turn counter clockwise to remove.
6. Install the new drain pump (reverse order)
7. Return the insulation plate. Screw back the bottom protective plate.
8. Plug in
Parts Used:
-
Kelly from WALNUT CREEK, CA
-
Difficulty Level:Easy
-
Total Repair Time:15 - 30 mins
-
Tools:Screw drivers
11 of 13 people
found this instruction helpful.
Was this instruction helpful to you?
Thank you for voting!
Wheel assembly broken
Very easy to repair with the replacement wheel assembly. Popped out the broken one, popped in the new one. Price was nothing compared to having an professional repair person come to the home. Glad I found you on line!
Parts Used:
-
Daryle from WEYMOUTH, MA
-
Difficulty Level:Very Easy
-
Total Repair Time:Less than 15 mins
11 of 14 people
found this instruction helpful.
Was this instruction helpful to you?
Thank you for voting!
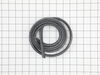
water leaking from this appliance onto the floor
removed old gasket, installed new.
No Leaks!!
Saved the cost of a new dishwashers
No Leaks!!
Saved the cost of a new dishwashers
Parts Used:
-
Raymond from AVONDALE, AZ
-
Difficulty Level:Really Easy
-
Total Repair Time:Less than 15 mins
10 of 12 people
found this instruction helpful.
Was this instruction helpful to you?
Thank you for voting!
Lower rack was rusting, staining dishes.
-
Hugh from ESCONDIDO, CA
-
Difficulty Level:Really Easy
-
Total Repair Time:Less than 15 mins
11 of 16 people
found this instruction helpful.
Was this instruction helpful to you?
Thank you for voting!
Lower dish rack needed replaced
Removed new from box and installed rollers as instructed that's all there was , very easy.
Parts Used:
-
Lester from HARLINGEN, TX
-
Difficulty Level:Really Easy
-
Total Repair Time:30 - 60 mins
-
Tools:Screw drivers
9 of 10 people
found this instruction helpful.
Was this instruction helpful to you?
Thank you for voting!
Water coming out both sides of the bottom of the door.
Replaced Arm spray...
Turn it left and it comes off......place new spray in .. turn it right...and it's in...make sure it moves freely.......Arm wasn't turning and water was consistently hitting the front door.....I also replaced the door seal...
Turn it left and it comes off......place new spray in .. turn it right...and it's in...make sure it moves freely.......Arm wasn't turning and water was consistently hitting the front door.....I also replaced the door seal...
Parts Used:

-
Michael from HAMILTON, NJ
-
Difficulty Level:Really Easy
-
Total Repair Time:Less than 15 mins
9 of 11 people
found this instruction helpful.
Was this instruction helpful to you?
Thank you for voting!
I had cleaned the filter on my dishwasher and neglected to reattach the lower spray arm. It went through the next wash/dry cycle resting on a coil and was burned and deformed beyond being able to use it.
The new lower spray arm fit right into place. All set, and I will always check to see if it is sitting properly!
Parts Used:
-
Wendy from LINCOLN, MA
-
Difficulty Level:Very Easy
-
Total Repair Time:Less than 15 mins
8 of 8 people
found this instruction helpful.
Was this instruction helpful to you?
Thank you for voting!
Bottom rack wheels needed to be replaced
all 4 wheel units needed to be replaced, popped them off and installed need wheel units in roughly 10 minutes, no tools needed.
Parts Used:
-
Raymond from BELLINGHAM, MA
-
Difficulty Level:Very Easy
-
Total Repair Time:Less than 15 mins
10 of 14 people
found this instruction helpful.
Was this instruction helpful to you?
Thank you for voting!
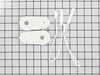
door spring cable broken
You need to pull the unit out to get access to the spring connected to the rear leg frame. Use the everything in the kit. The rollers are upgraded and will guid the cable better.
Parts Used:
-
garret from Fair Haven, NJ
-
Difficulty Level:A Bit Difficult
-
Total Repair Time:30 - 60 mins
-
Tools:Pliers, Screw drivers
8 of 8 people
found this instruction helpful.
Was this instruction helpful to you?
Thank you for voting!
Broken bottom rack
Removed old rack and and removed old rollers and installed old rollers on new rack as they work better than the new rollers sent with new rack
Parts Used:
-
Charles from CONVOY, OH
-
Difficulty Level:Very Easy
-
Total Repair Time:Less than 15 mins
-
Tools:Screw drivers
8 of 9 people
found this instruction helpful.
Was this instruction helpful to you?
Thank you for voting!
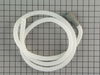
Unwanted water.
A Mouse friend had seen fit to chew through the original drain line. I used my Model Number, and was able to order the correct part . It arrived the next day. The job itself is fairly straight forward. You will need to access the rear of the machine. This may include shutting off, and disconnecting the water supply line. (Adjustable wrench). Mine is under the sink, on the "Hot" side. You may also need to un-plug the unit. (recommended) . A pair of (Pliers) will be needed for the spring clamp.
Parts Used:
-
David from PITTSBURGH, PA
-
Difficulty Level:Easy
-
Total Repair Time:30 - 60 mins
-
Tools:Pliers, Screw drivers, Wrench (Adjustable)
8 of 9 people
found this instruction helpful.
Was this instruction helpful to you?
Thank you for voting!
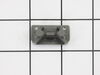
The rack stop clip on the upper right rail broke. I ordered two replacements and installed the part in about 15 minutes!
I pulled the upper rack out of the dishwasher. I then removed the broken rack clip stop on the right side and reinstalled the new replacement clip. I then put the rack back onto the rollers and voila, the upper rack no longer fell down off of the tracks!! Problem solved and the replacement clip only cost $8.95!!
Parts Used:
-
Patricia from MC CORMICK, SC
-
Difficulty Level:Easy
-
Total Repair Time:15 - 30 mins
7 of 7 people
found this instruction helpful.
Was this instruction helpful to you?
Thank you for voting!