This an authentic OEM 40-Watt replacement light bulb, used in a number of household appliances. It is specially designed to withstand extreme temperatures, which is why these replacement bulbs are mos...
This 18 ml bottle of white appliance touch-up paint is used to cover scratches or marks on your appliance. The white touch-up paint can be used on refrigerators, microwaves, ranges, clothes dryers, an...
This is a multi-use and multi-appliance screw. It can be used on a microwave, refrigerator, range/oven, air conditioner, dehumidifier, washer, or dryer. The measurements of this screw are 8 x 1/2 inch...
The light socket on your electric range connects the power source to the light bulb. If your oven light is malfunctioning, you may need to replace the light socket. The light socket is located in the ...
This replacement burner knob is designed for use with a variety of range models and offers a reliable solution for restoring control over your cooktop. Measuring approximately 1.75 inches in diameter,...
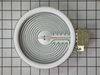
Having trouble with the heat control on your Whirlpool cooking range? This 6-Inch Infinite Switch Surface Element Control is made just for you. Crafted from top-drawer materials, this real OEM part is...
This cooktop cleaner will cut through tough grease and baked-on residue. The cleaner will leave a protective coating of silicone on the cooktop surface as it cleans. This 10oz bottle is safe for all g...
$21.75
Special Order
Questions And Answers for KFED500ESS06
Be the first to ask our experts a question about this model!
✖
Ask a Question
Ask our experts a question on this model and we'll respond as soon as we can.
Took 2 screws under front edge of smooth top. Unscrewed ground wire from back of smooth top unit. Unplugged 2 wire bundles, from back. Took bad element out , put in new one. Put back together. About 10 min's tops. Easy peasy.
Socket Lite come with clips attached to the outside of the housing. After you unhook the 3 lead wires that are attached to the unit. All you have to do is push in on the clips and release the unit. Then you snap in the new unit. Attach the 3 wire leads, put a oven bulb in the socket end, and the install the light cover


 Diagram and Parts List for KitchenAid Range")


 – Part Number: W11665456")