Sold individually. This part secures the upper side of the dishwasher to the underside of the counter or cabinet to prevent the dishwasher from moving, shaking, or tilting forward.
$18.59
In Stock
Order within the next 5 hrs and your part ships today!
This hose clamp extends from half an inch to an inch in diameter. It is made entirely of metal and is intended for use with Maytag brand washing machines.
$11.80
In Stock
Order within the next 5 hrs and your part ships today!
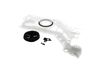
This part has a swivel gooseneck fitting and that allows it to be installed closer to the wall. This part has a 3/4" hose thread on one side and a 3/8" copper tubing on the other side.
$28.52
In Stock
Order within the next 5 hrs and your part ships today!
This replacement heating element is designed to heat water during the wash and rinse cycles in compatible dishwasher models, helping to improve cleaning performance. Positioned at the bottom of the tu...
$83.55
In Stock
Order within the next 5 hrs and your part ships today!
Is your dishwasher not performing like it used to? It may be the water inlet assembly that needs replacing. We offer you the OEM Water Inlet Assembly direct from Whirlpool, a brand trusted for its hig...
$79.50
In Stock
Order within the next 5 hrs and your part ships today!
This lower door seal is a flexible rubber gasket designed to create a watertight barrier at the bottom of your dishwasher door, preventing leaks, steam, and detergent from escaping during wash cycles....
$58.70
In Stock
Order within the next 5 hrs and your part ships today!
If you're having problems with the dishrack of your dishwasher, we've got the perfect solution. Our genuine OEM Front Dishrack Stop Clip from Whirlpool ensures your dishrack won't slide off the rail, ...
$29.21
In Stock
Order within the next 5 hrs and your part ships today!
Order within the next 5 hrs and your part ships today!
Questions And Answers for KDFE204KBL0
Ask our experts a question about this model and we'll get back to you as soon as possible!
2 questions answered by our experts.
< Prev
1
Next >
Sort by:
Search filter:
Clear Filter
Your search term must have 3 or more characters.
Keep searches simple. Use keywords, e.g. "leaking", "pump", "broken" or "fit".
Sorry, we couldn't find any existing answers that matched.Try using some different or simpler keywords, or submit your new question by using the "Ask a Question" button above!
Carolyn
February 24, 2023
Need to replace right door hinge but not sure of part #
For model number KDFE204KBL0
Hello Carolyn, thank you for asking. The Right Door Hinge is PS16660570. The Left Hinge is PS16660571. We are pleased to have been able to help.
Normal cycle button does not work, reset failed. Wondering if I can fix at home by replacing UI panel? I have seen you tube videos on the subject for other models.
For model number KDFE204KBL0
Hello Perry, thank you for contacting us. According to our research, the issue is most likely with the user interface. You can easily replace it at home. We are providing you with instructions that will help you replace the user interface. Open the dishwasher door and use the t15 torx bit to unthread the eight side screws and the top right screw holding the inner and outer door panels together. Unthread the top right door latch screw last with the screws unthreaded. You can lift the outer door panel to detach it. Disconnect the user interface wire connector and detach the wire retainer to remove the panel. Now, you have access to the user interface. Remove the screws that hold the panel and remove the old user interface. Place the new user interface and tighten the screws. Reinstall the outer door panel by first connecting the user interface wire connector and securing the wire retainer. Make sure the console seal is in place, then slide the side edges of the outer panel behind the retaining brackets, then lift the panel to join it with the inner door panel. Re-thread the screws to secure the top right door latch screw, and the two upper side screws are longer than the six remaining side screws with all the screws secured. We hope this helps, good luck with this repair!
Was this helpful?
Thank you for voting!
< Prev
1
Next >
✖
Ask a Question
Ask our experts a question on this model and we'll respond as soon as we can.
I called an experienced plumber, who balanced and installed my new dishwasher properly, using the brackets I ordered from Parts Select, after an INEXPERIENCED plumber had tossed the factory-provided mounting brackets out with the shipping carton. Relief!
After pulling the dishwasher out, I was able to determine the leak was occurring around the plastic nuts on the end of the heating element. I removed the heating element and saw that even though there were washers on the ends that protruded through the backside of the machine, they really weren't sealing the holes the element was sticking through. Looking at YouTube videos on the installation procedure, I noticed the element being installed had a sort of metal grommet permanently affixed to each end and the rubber washers were between the grommet and the dishwasher body. I ordered the new part and saw this to be when I received the new part. This grommet allowed the washer to seal the hole, once the plastic nuts were installed on the backside of the dishwasher. This seems to have stopped the leak. I don't know how the original part ever worked correctly, since the washers freely sat on the element with nothing to force them up against the body of the dishwasher and seal the holes. It may have been leaking long before I discovered the problem.
The valve has a plastic fitting to attach the the water line with a hose fitting. Was not carful enough with the original and damaged it attaching the water line. Ordered a replacement fitting. While it is possible to replace the water inlet valve without pulling the dishwasher out from the cabinet found it was easier to get at with the machine out. The video does and good job of showing the removal and replacing the valve. Easy job, don't be like me and be careful attaching the water line.


 Diagram and Parts List for Whirlpool Dishwasher")


 – Part Number: W11664713")