




















JP940BK2BB General Electric Cooktop - Instructions
Keep searches simple. Use keywords, e.g. "leaking", "pump", "broken" or "fit".
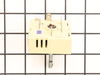
cooktop switch broken
Really easy. Part came in rapid time and was the right part. Went on web and got instructions with video how to install.
Parts Used:
-
kathleen from Wynantskill, NY
-
Difficulty Level:Really Easy
-
Total Repair Time:30 - 60 mins
-
Tools:Screw drivers, Socket set
1 person
found this instruction helpful.
Was this instruction helpful to you?
Thank you for voting!
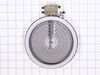
needed burner replacement
There are 18 sheetmetal screws not 8
The GE SREWS HAVE AN INTEGRATED WASHER which causes the philips head to STRIP these needed to be drilled out!!!
The glass top was GLUED to the sheetmetal box and did not come off without a fight
The GE SREWS HAVE AN INTEGRATED WASHER which causes the philips head to STRIP these needed to be drilled out!!!
The glass top was GLUED to the sheetmetal box and did not come off without a fight
Parts Used:
-
anthony g from MOUNT PLEASANT, SC
-
Difficulty Level:Difficult
-
Total Repair Time:1- 2 hours
-
Tools:Pliers, Screw drivers, Socket set
1 of 2 people
found this instruction helpful.
Was this instruction helpful to you?
Thank you for voting!
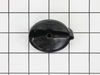
finish on stovetop knobs were abraded.
Replaced them with 2 new knobs. They arrived almost immediately; terrific service.
Parts Used:
-
Diane from SaddleBrooke, AZ
-
Difficulty Level:Really Easy
-
Total Repair Time:Less than 15 mins
1 of 2 people
found this instruction helpful.
Was this instruction helpful to you?
Thank you for voting!
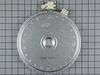
only the inner/smaller part of the dual burner is working
I ordered a new burner assuming As is turns out: nothing wrong with the burner.
Parts Used:
-
Albert from South Boston, VA
-
Difficulty Level:Really Easy
-
Total Repair Time:Less than 15 mins
2 of 5 people
found this instruction helpful.
Was this instruction helpful to you?
Thank you for voting!
small (inner) burner was not 'burning'
turn off the power at the breaker first
remove the 2 screws under the 'lip' of the stove top (open the oven door to get to them)
prop up the stove top on the cardboard box the part came in
pull off the wires one by one and attach to the new burner OR record where each wire goes first
remove the old burner (2 screws) and attach the new burner
screw down the stove top
try the burner - when it does not work flip the power breaker back on and then try again
bask in the joy, admiration and wonder directed your way by various family members
remove the 2 screws under the 'lip' of the stove top (open the oven door to get to them)
prop up the stove top on the cardboard box the part came in
pull off the wires one by one and attach to the new burner OR record where each wire goes first
remove the old burner (2 screws) and attach the new burner
screw down the stove top
try the burner - when it does not work flip the power breaker back on and then try again
bask in the joy, admiration and wonder directed your way by various family members
Parts Used:
-
Jerry from Tierra Verde, FL
-
Difficulty Level:Easy
-
Total Repair Time:Less than 15 mins
-
Tools:Pliers, Screw drivers
1 of 2 people
found this instruction helpful.
Was this instruction helpful to you?
Thank you for voting!
cooktop inner ring did not work
Dear PartSelect:
I am very impressed by your service and company. My order arrived in less than 24 hours. It was a perfect match and is currently in service. I am very satisfied with the entire experience and will use your company again.
I simply opened up the cooktop with a screwdriver and disconnected the wires to the affected burner. After the part arrived, I reconnected them. I had to swap over two brackets from the old burner, so don't throw it away until the new one arrives. It went back together very easily and worked immediately.
Matt Brennan
I am very impressed by your service and company. My order arrived in less than 24 hours. It was a perfect match and is currently in service. I am very satisfied with the entire experience and will use your company again.
I simply opened up the cooktop with a screwdriver and disconnected the wires to the affected burner. After the part arrived, I reconnected them. I had to swap over two brackets from the old burner, so don't throw it away until the new one arrives. It went back together very easily and worked immediately.
Matt Brennan
Parts Used:
-
Matthew from Lexington Park, MD
-
Difficulty Level:Really Easy
-
Total Repair Time:15 - 30 mins
-
Tools:Screw drivers
1 of 3 people
found this instruction helpful.
Was this instruction helpful to you?
Thank you for voting!
Two stage burner was not working on the outer part of burner.
Locate breaker box and turn off breaker to stove. Removed the two screw in front that hold the top in place. Raised the top and supported it with the box the new burner came in. Removed two screws that held the burner in place and the 5 wires one at a time an installed them on the new burner. Put new burner in place and installed two mounting screws. Reinstalled the two screws in the front to hold the top in place then turned the breaker back on and tested burner. Worked great. Received part in 2 days.
Parts Used:
-
Gregory from Pleasant Valley, MO
-
Difficulty Level:Really Easy
-
Total Repair Time:15 - 30 mins
-
Tools:Nutdriver, Pliers, Screw drivers
0 of 1 people
found this instruction helpful.
Was this instruction helpful to you?
Thank you for voting!
Two burners were not working
I got someone to look at the stove. They told me what I needed. I looked all over the Internet and couldn't find the part. One guy told me just to buy a new stove top because mine was an antique. It still looked good and two burners were still working. I didn't give up. I found the part on partselect bsite and was thrilled. It shipped fast and was exactly the right part. Now my stove works like new.
Parts Used:
-
Terri from Leesburg, FL
-
Difficulty Level:Really Easy
-
Total Repair Time:15 - 30 mins
-
Tools:Screw drivers
3 of 10 people
found this instruction helpful.
Was this instruction helpful to you?
Thank you for voting!
Twisting of stuck cook-top killed the event
The age of the system resulted in the cook top being heavily stuck by food-stuff to the range surface. The result was a twisting of the top when breaking it free. It caused the cooktop (a $500+ part) to crack diagonally across the whole surface. Thus ended the quick do-it-yourself process, and out to buy a new range. Parts-select was very good about the return process of the un-used and un-opened burner element.
Parts Used:
-
James from Kingsville, MD
-
Difficulty Level:Difficult
-
Total Repair Time:30 - 60 mins
-
Tools:Screw drivers
Was this instruction helpful to you?
Thank you for voting!
Cooktop cleaner was sprayed on top of dial causing short circuit
A cleaning spray was allowed to caused a short circuit of the infinite control switch. Here is the sequence of a very easy way to repair it: Turn off the power to the unit. Take the bottom metal cover off. You should be able to find the one that was burnt out (my was the bigger surface burner switch). Take photos of how each colored wire are connected ( I used my cell phone). Review the photos!! You will see that the switch has two clamps holding the metal cover to the plastic casing on the sides. Using a narrow screw driver, pop loose the plastic casing from the metal clamps. This way you don't have to take the unit totally apart. The metal casing should be fine. Clean it well, making sure it is dry. Take the new switch and also take the plastic casing from the metal top cover. Replace the metal pin and the plastic casing only. Make sure you line it up the same way with the little blue box in the same orientation. You may not have enough room for your hand and your view. By feel, you should be able to place it there and pop it in. Check the taken photos and connect the wires following the same diagram. Replace back the metal cover. Turn the power on. Enjoy dinner!!! Michael.
Parts Used:
-
Michael from Jacksonville, FL
-
Difficulty Level:Really Easy
-
Total Repair Time:15 - 30 mins
-
Tools:Screw drivers
Was this instruction helpful to you?
Thank you for voting!
The large front right burner of the radiant cooktop did not work
Turned off the power at the breaker. Then I lifted the cooktop by pressing up from the bottom, while my wife slid two boards over the recess. I lowered the cooktop onto the boards, removed 12 screws around the perimeter of the case and carefully lifted the glass top and placed it on a towel on the DR table. (remove the control knobs first) removed the wires leading to the infinite control, marking which color when where, removed the two screws holding the infinite control, and replaced the old with the new. Reattached the wires, replaced the cooktop, replaced the screws, held it up while my wife removed the boards and then carefully lowered the cooktop into the recess. Attached the knobs, flipped the breaker back on and turned control to hi. It worked!
Parts Used:
-
Arthur from Sarasota, FL
-
Difficulty Level:Easy
-
Total Repair Time:Less than 15 mins
-
Tools:Nutdriver, Screw drivers
Was this instruction helpful to you?
Thank you for voting!
Burner knob had broken
Just replaced the knob, no tools needed. The knob I ordered was the exact type of my old one so was no problem. Thanks for fast shipping and correct item.
Parts Used:
-
Hazel C. from Jonesborough, TN
-
Difficulty Level:Really Easy
-
Total Repair Time:Less than 15 mins
Was this instruction helpful to you?
Thank you for voting!
8 inch burner was burnt out
replacement was easy. pulled away the stove from wall. unplug the stove. open oven door. remove the two hex head screws holdings stove top. raise the stove top in the front. supported stove top with a 16 inch piece of wood. place New Burner under old burner. remove old burner remove wires remove old burner and place it on top of new burner connected the wires from burner to new burner. install new burner. remove support lowered top down. plugged in stove tested. .burner. burner w.ork fine. reinstall hex head screws back top. pushback stove back into the wall. testes over again. all the stove work done.
Parts Used:
-
Luis from Kissimmee, FL
-
Difficulty Level:Really Easy
-
Total Repair Time:Less than 15 mins
-
Tools:Nutdriver, Screw drivers
Was this instruction helpful to you?
Thank you for voting!
large burner on the dual element not working
The part arrived much sooner than I anticipated. The job was a little harder and took a little longer for me because I'm not good at repairing things. I usually have to call someone. However, I followed the step by step instructions that were provided both on the website and with the mailed item and had no problems. The instructions were clear and easy to follow. The tools needed were very basic - all of which I had on hand. If I could do it - anyone can.
Parts Used:
-
Alan from Medina, OH
-
Difficulty Level:A Bit Difficult
-
Total Repair Time:30 - 60 mins
-
Tools:Pliers, Screw drivers
Was this instruction helpful to you?
Thank you for voting!
burner worked on high only
Followed directions from Rodney of Erath La. Directions were perfect and helped me to decide to under take this job. Job took a little longer spending some time to clean the glass top on both sides and around the counter top where it mounts. The actual repair time was quick and easy thanks to Rodney. Price of the part was reasonable and delivery got here quick. Will deal with parts select again! Carl from Florida
Parts Used:
-
Carl from Delray Beach, FL
-
Difficulty Level:Really Easy
-
Total Repair Time:30 - 60 mins
-
Tools:Screw drivers, Socket set
Was this instruction helpful to you?
Thank you for voting!