




















JMW2327WS00 Jenn-Air Microwave - Overview
Sections of the JMW2327WS00
[Viewing 9 of 9]


Keep searches simple, eg. "belt" or "pump".
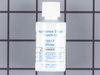
Touch-Up Paint - White
PartSelect #: PS385132
Manufacturer #: 72017
This 18 ml bottle of white appliance touch-up paint is used to cover scratches or marks on your appliance. The white touch-up paint can be used on refrigerators, microwaves, ranges, clothes dryers, an...
$17.95
In Stock

Microwave Turntable Tray
PartSelect #: PS12728515
Manufacturer #: W11373838
This tray rotates in your microwave ensuring more even temperatures.
$96.24
In Stock

Light Bulb
PartSelect #: PS11749457
Manufacturer #: WPW10169757
This is a replacement light bulb to illuminate the inside of your oven. It is 25 watts and 120 volts. Please wear gloves during replacement if your existing bulb is shattered. Consider ordering a spar...
$58.44
In Stock
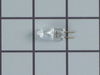
Halogen Light Bulb
PartSelect #: PS11765655
Manufacturer #: W10886919
This part is the replacement halogen light bulb for your range. The bulb is 10 watts and 12 volts. The halogen lamp lights up the inside of the oven you can see the cooktop more effectively in darknes...
$34.44
In Stock
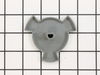
Turntable Coupler
PartSelect #: PS11757403
Manufacturer #: WPW10776938
This part connects the motor to the glass tray to rotate the tray.
$35.08
In Stock

Range Sensor
PartSelect #: PS11744233
Manufacturer #: WP74008369
This sensor detects the temperature within the oven cavity.
$153.16
In Stock

Dryer Screw
PartSelect #: PS11746840
Manufacturer #: WP90767
This screw is sold individually.
$9.85
In Stock
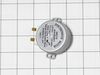
Turntable Motor
PartSelect #: PS11769794
Manufacturer #: W10911403
Are you tired of unevenly heated meals from your microwave? The Whirlpool Turntable Motor is the solution you need. This genuine OEM part is crucial for your microwave's performance, with its main rol...
$116.74
In Stock
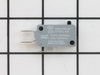
Door Switch - 250V
PartSelect #: PS2338920
Manufacturer #: W10211972
This small but important switch helps keep your microwave safe by making sure it won’t run unless the door is properly closed. It tells the microwave’s control system whether the door is open or shut,...
$57.15
In Stock
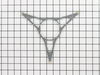
Microwave Turn Ring
PartSelect #: PS12074822
Manufacturer #: W11110134
This roller is located underneath the glass turntable. With the help of the motor, this roller helps to rotate the glass tray. This part takes the place of the coupling.
$72.55
In Stock
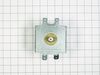
MAGNETRON
PartSelect #: PS12717479
Manufacturer #: W11346197
This part is used to generate microwave energy/heat.
$308.48
In Stock
Common Symptoms of the JMW2327WS00
[Viewing 8 of 8]Tray won’t turn
Fixed by
these parts
these parts


Show All
Won’t turn on
Fixed by
these parts
these parts


Show All
No heat
Fixed by
these parts
these parts


Show All
Little to no heat when baking
Fixed by
these parts
these parts


Show All
Oven not heating evenly
Fixed by
these parts
these parts
Show All
Noisy
Fixed by
these parts
these parts
Show All
Element will not heat
Fixed by
these parts
these parts

Show All
Door not closing properly
Fixed by
these parts
these parts
Show All
Keep searches simple. Use keywords, e.g. "leaking", "pump", "broken" or "fit".
Microwave glass turntable when pop
After popping the last few kernals of popcorn, we hear a different kind of pop sound come from our microwave oven. When we looking inside, we found that the glass turntable had broken unevenly in half. Although we didn't understand why it had happned, we did know we'd be without the use of the microwave without a new one. After less than 10 minutes surfing online, I had found the correct part on PartSelect.com and had arranged to have it shipped to me by speedy delivery. Once it arrived, I just popped the new turntable into the microwave and used the box to dispose of the broken one. It could not have been easier and it saved me the cost of a service call and likely further delay.
Parts Used:
-
Liza from Monterey, CA
-
Difficulty Level:Really Easy
-
Total Repair Time:Less than 15 mins
35 of 42 people
found this instruction helpful.
Was this instruction helpful to you?
Thank you for voting!
The display kept asking me to close the door, even though the door was closed. The interior light stayed on.
I used a Google search to show how to access the area behind the front panel. There was a folded paper copy with a schematic and wiring diagram in that space.Then I used a multi-meter to determine which of the THREE micro-switches was causing the problem. I called your help line and ordered a replacement switch. The switch was delayed in transit so your agent credited me with the cost of shipping.
When the part arrived, it had three terminals instead of two as shown in the on-line picture but that did not cause any difficulty in using it. It took about 20 minutes to remove and replace the old switch.
All seems to be working well now.
Finding which of the THREE switches was the problem was the most difficult part of the repair. All three "clicked" but the defective one did not click as easily. It needed to be depressed more than the door latch can would provide. Old age?
When the part arrived, it had three terminals instead of two as shown in the on-line picture but that did not cause any difficulty in using it. It took about 20 minutes to remove and replace the old switch.
All seems to be working well now.
Finding which of the THREE switches was the problem was the most difficult part of the repair. All three "clicked" but the defective one did not click as easily. It needed to be depressed more than the door latch can would provide. Old age?
Parts Used:
-
E G from SILVERDALE, WA
-
Difficulty Level:A Bit Difficult
-
Total Repair Time:30 - 60 mins
-
Tools:Pliers, Screw drivers
16 of 21 people
found this instruction helpful.
Was this instruction helpful to you?
Thank you for voting!
oven temp wrong
Remove the oven door. Remove 3 self tappers on rear wall of oven to take off a round access panel. Pull out a pre-cut rectangle of insulation. Next I removed the 2 screws holding the sensor in place. Pulling the sensor out a bit told me I was "touching" the correct wires in the SMALL rectangular opening. The wires are not visable and 2 hands do not fit in this small opening.I looked at the NEW sensor to see the release on the sensor plug. Slip the angled needle nose into the opening and grasp the plug/release side. The plug pulled apart easily. The sensor wire pulls out with a little bit of twisting to fit it out the hole. The new plug pushes in and has to be worked down to where you can reach it. The same angled plier works to re-attach it. It takes longer to read this than to do the job. Best of luck, Al
Parts Used:
-
Alan from Wallkill, NY
-
Difficulty Level:Easy
-
Total Repair Time:Less than 15 mins
-
Tools:Nutdriver, Pliers
12 of 13 people
found this instruction helpful.
Was this instruction helpful to you?
Thank you for voting!