




















JMP28BA1AD Range - Instructions
Keep searches simple. Use keywords, e.g. "leaking", "pump", "broken" or "fit".
Lower Oven Door End Knobs Cracked And Split
Open door lift door off hinges lay door face down on flat surface remove 6 phillip head screws 3 on each side lift housing out of door case remove end knob phillip head screws installed one knob insert bar attch second knob and tighten screws lay housing back into casing attach screws doing one at a time on each side slide door back on to hinges and test operate, you are done!
Parts Used:
-
JOHN from CLIFTON, VA
-
Difficulty Level:Really Easy
-
Total Repair Time:30 - 60 mins
-
Tools:Screw drivers
1 person
found this instruction helpful.
Was this instruction helpful to you?
Thank you for voting!
a segment of the broil element took on fire
-
maria from great neck, NY
-
Difficulty Level:Really Easy
-
Total Repair Time:15 - 30 mins
-
Tools:Nutdriver, Pliers, Screw drivers
2 of 4 people
found this instruction helpful.
Was this instruction helpful to you?
Thank you for voting!
The broil element broke.
We removed the two very tiny screws that held the plate through which the element was connected to the wiring. It was extremely difficult to do so, because the screws were so tiny. Our socket set did not have such a small attachment, and we had to use an adjustable wrench. Once we accomplished that, we unhooked the old broil element from the wires. At that point, the wires snapped back into the wall. There was almost no slack to pull the wires back out into the oven so that we could hook the new broil element up. It took more than an hour of maneuvering before we were able to get hold of enough of the wires so that we could grab onto each one and hook up the new broil element. One we did that, it was easy to place the broil element back into its brackets.
Parts Used:
-
hollis from Clarksville, MD
-
Difficulty Level:Difficult
-
Total Repair Time:More than 2 hours
-
Tools:Pliers, Socket set, Wrench (Adjustable)
1 person
found this instruction helpful.
Was this instruction helpful to you?
Thank you for voting!
The broiler element burned out in the oven.
As with all of my orders from Part Select the part was as correct and arrived in a timely manner. The installation was easy. Remove two screws, unplug the old element from the wires, install wires on new element and reinstall the element. Restored power and everything worked fine.
Thanks,
Ken Fuelleman
Thanks,
Ken Fuelleman
Parts Used:
-
Ken from Mayfield, NY
-
Difficulty Level:Really Easy
-
Total Repair Time:Less than 15 mins
-
Tools:Screw drivers
1 person
found this instruction helpful.
Was this instruction helpful to you?
Thank you for voting!
Heating element broke
First turn circuit breaker off. Remove two retaining screws, disconnect two connectors at the end of the element, toss old element and reverse the procedure
to install.
to install.
Parts Used:
-
Ronald from Indianapolis, IN
-
Difficulty Level:Easy
-
Total Repair Time:15 - 30 mins
-
Tools:Pliers, Socket set
1 person
found this instruction helpful.
Was this instruction helpful to you?
Thank you for voting!
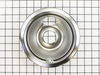
Needed New Burner Bowls
Removed the old burner bowls, replacing them with the new ones.
Parts Used:
-
Carolyn from Garden City, ID
-
Difficulty Level:Really Easy
-
Total Repair Time:Less than 15 mins
2 of 4 people
found this instruction helpful.
Was this instruction helpful to you?
Thank you for voting!
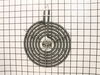
Burner worked intermittently
Lined up the prongs and slid it right in, took 30 seconds.
Parts Used:
-
Mike from Rowlett, TX
-
Difficulty Level:Really Easy
-
Total Repair Time:Less than 15 mins
1 person
found this instruction helpful.
Was this instruction helpful to you?
Thank you for voting!
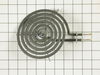
broken heating element
-
Sherry from BLUFFTON, SC
-
Difficulty Level:Very Easy
-
Total Repair Time:Less than 15 mins
1 person
found this instruction helpful.
Was this instruction helpful to you?
Thank you for voting!
Old drip bowls were badly tarnished . . . shine could not be restored.
1) Make sure unit switches are turned off. 2) Lift Calrod unit up and pull it from electrical receptacle. 3) Withdraw Calrod unit from old bowl. 4) Insert Calrod unit through large hole in new bowl. 5) Push Calrod electrical connectors into receptacle under range top. 6) Seat Calrod unit on bowl rim and insert the assembled Calrod unit and bowl into the hole in the range top.
Parts Used:
-
Paul from PROVO, UT
-
Difficulty Level:Really Easy
-
Total Repair Time:Less than 15 mins
1 person
found this instruction helpful.
Was this instruction helpful to you?
Thank you for voting!
Shorted out the burner... fat gets into the receptors on these old stoves.
The only hard part about putting in a new terminal block (and this time I had to replace the burner too, because that fried too) is stripping the stove wires, because that thermal insulation is very hard to get off. Otherwise, it's simple. In this case, I had already replaced this one (sigh), so had already cut & stripped the wires, so it was all easy. Frankly, the sane thing to do is buy a new stove, but wife is too cheap.
Parts Used:
-
Todd from Mountain View, CA
-
Difficulty Level:Easy
-
Total Repair Time:Less than 15 mins
-
Tools:Pliers, Screw drivers
1 person
found this instruction helpful.
Was this instruction helpful to you?
Thank you for voting!
a plug on the element broke off while cleaning and replacing
Absolutely no tools required for this task. Simply align the prongs to the female portion on the stove top. Carefully push in until the element is in place then line up with the drip pan slot. No instructions are necessary!!
Parts Used:
-
David from WEST WARWICK, RI
-
Difficulty Level:Very Easy
-
Total Repair Time:Less than 15 mins
1 person
found this instruction helpful.
Was this instruction helpful to you?
Thank you for voting!
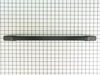
Oven door handle broke
Removed 2 torx screws from enter oven skin then Removed 4 quarter hex head screws to remove handle and installed in reverse and the people at partselect were nice and the parts came quickly. Thanks
Parts Used:
-
donnie from SAN ANTONIO, FL
-
Difficulty Level:Really Easy
-
Total Repair Time:15 - 30 mins
-
Tools:Nutdriver, Screw drivers, Socket set
1 person
found this instruction helpful.
Was this instruction helpful to you?
Thank you for voting!
Old Terminal Block was arcing.
Cut Wires to old terminal block and wired in new Terminal Block
Parts Used:
-
Robert from HOUSTON, TX
-
Difficulty Level:Really Easy
-
Total Repair Time:15 - 30 mins
-
Tools:Screw drivers
1 person
found this instruction helpful.
Was this instruction helpful to you?
Thank you for voting!
Broken plastic handle end caps
Step #1: Remove 2 screws at the inside top of the oven door that holds the inner/outer oven door together. Step #2: Remove the screws from the inner door that hold the plastic handle end caps to the door. Tip: Use a file to dress up the tips of the metal handle bar so that it fits easily into the new plastic handle end caps. Step #3: Install the first new plastic handle end cap. Step #4: Slide the metal handle bar into the plastic handle end cap that was just installed on the outer oven door. Step #5: Place the other plastic handle end cap on the metal handle bar. Step #6: Install the second plastic handle end cap on the outer oven door. Step #7: Reassemble the oven door by installing the screws that were removed in step #1.
Parts Used:
-
Joseph from PITTSBURGH, PA
-
Difficulty Level:Easy
-
Total Repair Time:15 - 30 mins
-
Tools:Nutdriver, Screw drivers
1 of 2 people
found this instruction helpful.
Was this instruction helpful to you?
Thank you for voting!
Drip bowls had deteriorated after years of use
Removed burners and existing drip bowls and installed new drip bowls and existing burners took approximately 15 minutes
Parts Used:
-
Stuart from UNION SPRINGS, NY
-
Difficulty Level:Very Easy
-
Total Repair Time:Less than 15 mins
1 of 2 people
found this instruction helpful.
Was this instruction helpful to you?
Thank you for voting!