




















JKP90DP1WW General Electric Microwave Oven Combo - Overview
Sections of the JKP90DP1WW
[Viewing 8 of 8]


Manuals & Care Guides for JKP90DP1WW
Click to downloadKeep searches simple, eg. "belt" or "pump".

Microwave Fuse
PartSelect #: PS1481237
Manufacturer #: WB27X10928
This ceramic microwave fuse is just over an inch in length. It is white in the center, and metal on both ends. This is a 20-amp fuse, and is used to power your microwave. If the touch pad on the micro...
$25.31
Special Order

Temperature Sensor
PartSelect #: PS10059162
Manufacturer #: WB21X22134
The temperature sensor detects the temperature within the oven cavity. If your oven is too hot, not heating evenly, or has little to no heat when baking, you may need to replace the temperature sensor...
$36.73
Special Order

Halogen Bulb Kit
PartSelect #: PS12342510
Manufacturer #: WB49X29679
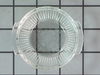
This light bulb is used in the interior oven. NOTE: This bulb has looped pins, not the straight pins.
No Longer Available
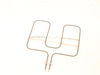
ELEMENT BROIL Assembly
PartSelect #: PS2370378
Manufacturer #: WB44T10099
If your oven isn’t broiling like it used to, this broil element might be the fix. It sits at the top of your oven and gives off strong, even heat to help brown and cook food from above. It’s perfect f...
$144.43
Special Order
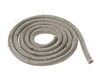
GASKET OVN Door
PartSelect #: PS783572
Manufacturer #: WB32T10012
Struggling to keep the heat in your oven? Our GE Oven Door Gasket is here to help. It's more than just a spare part; it's your solution to creating a tight seal between your oven door and the oven ope...
$81.06
Special Order
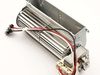

Range Screw
PartSelect #: PS222157
Manufacturer #: WB01T10008
This part is a replacement screw for your oven. It is made of black metal and is sold individually. This screw is approximately 1/4 inch in diameter and about 1/2 inch in length. It is designed to con...
$13.95
Special Order

Range Upper Limit Switch Lock
PartSelect #: PS236782
Manufacturer #: WB24T10060
$27.85
Special Order
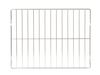
Wall Oven Rack
PartSelect #: PS1765903
Manufacturer #: WB48T10045
The wall oven rack provides a stable surface for cookware in the oven.
$99.08
Special Order
Diode
PartSelect #: PS239740
Manufacturer #: WB27X10597
This part allows power to go one way only.
$72.08
Special Order
Window Frame Assembly
PartSelect #: PS250767
Manufacturer #: WB55T10086
Are you struggling with a cloudy oven door? Get your oven back to its best with the GE Door Middle Glass. Crafted with high heat-resistance, this crucial element rests in the heart of your wall oven d...
$270.48
Special Order
Common Symptoms of the JKP90DP1WW
[Viewing 10 of 10]No heat
Fixed by
these parts
these parts


Show All
Won’t turn on
Fixed by
these parts
these parts
Show All
Little to no heat when baking
Fixed by
these parts
these parts

Show All
Oven not heating evenly
Fixed by
these parts
these parts
Show All
Tray won’t turn
Fixed by
these parts
these parts

Show All
Oven is too hot
Fixed by
these parts
these parts
Show All
Touchpad does not respond
Fixed by
these parts
these parts
Show All
Element will not heat
Fixed by
these parts
these parts

Show All
Will Not Start
Fixed by
these parts
these parts
Show All
Little to no heat when broiling
Fixed by
these parts
these parts
Show All

Keep searches simple. Use keywords, e.g. "leaking", "pump", "broken" or "fit".
Microwave completely stopped working
Turned out the issue was easily solved by replacing a single, inexpensive fuse.
First off, UNPLUG THE MICROWAVE.
The fuse is located under the plastic grill at the top of the microwave. It's held on by two screws. Once you've removed the screws and taken off the plastic grill, you go to the right side of the microwave and remove another screw that holds a small metal grill in place. Removing the small metal grill is probably the toughest part of this repair. You kind of have to rock it back and forth a bit to get it to release. Once that's off, you can get to the fuse. I removed the burnt out one with a pair of needle nose pliers. I also put a small piece of cardboard under the fuse when I did this so I didn't accidentally drop it into the innards of the microwave. I did the same thing when I replaced the new fuse. I then plugged the appliance back in and made sure it worked. Once that was confirmed, I replaced both grills.
First off, UNPLUG THE MICROWAVE.
The fuse is located under the plastic grill at the top of the microwave. It's held on by two screws. Once you've removed the screws and taken off the plastic grill, you go to the right side of the microwave and remove another screw that holds a small metal grill in place. Removing the small metal grill is probably the toughest part of this repair. You kind of have to rock it back and forth a bit to get it to release. Once that's off, you can get to the fuse. I removed the burnt out one with a pair of needle nose pliers. I also put a small piece of cardboard under the fuse when I did this so I didn't accidentally drop it into the innards of the microwave. I did the same thing when I replaced the new fuse. I then plugged the appliance back in and made sure it worked. Once that was confirmed, I replaced both grills.
Parts Used:
-
Kim from Cliffside Park, NJ
-
Difficulty Level:Really Easy
-
Total Repair Time:15 - 30 mins
-
Tools:Screw drivers
966 of 1262 people
found this instruction helpful.
Was this instruction helpful to you?
Thank you for voting!
Oven would go in to a F2 Error
Removed six 1/4" hex nuts on rear of oven. Then through front/inside removed a single 1/4" hex nut to actually remove sensor. Unplug sensor connector, remove. Reversed steps, push oven back in place and plugged in. Tested oven function.
Parts Used:
-
Peter from stamford, CT
-
Difficulty Level:Really Easy
-
Total Repair Time:15 - 30 mins
-
Tools:Nutdriver
148 of 226 people
found this instruction helpful.
Was this instruction helpful to you?
Thank you for voting!
Not working as far as heating or cooking
Replaced High Voltage Diode. Very carfully due to the extream danger of a electrical shock.
Parts Used:
-
Theodore from Medical Lake, WA
-
Difficulty Level:Really Easy
-
Total Repair Time:Less than 15 mins
-
Tools:Screw drivers
151 of 361 people
found this instruction helpful.
Was this instruction helpful to you?
Thank you for voting!