




















JGBS04BPMW General Electric Range - Instructions
Keep searches simple. Use keywords, e.g. "leaking", "pump", "broken" or "fit".
gas flame flared and blackened pots; gas jets clogged
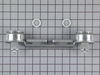
raised the range top so the supports locked in place. carefully lifted off the old burner assemblies. used a paper towel to remove any black soot from gas jets. opened the plastic package of the new burner assemblies, pulled out the new parts and carefully put them in place. turned on the flame to test... took less than 5 minutes to fix a problem that's been annoying for 3 years!!
Parts Used:
-
Patricia A from Newport, NH
-
Difficulty Level:Really Easy
-
Total Repair Time:Less than 15 mins
Was this instruction helpful to you?
Thank you for voting!
3 of 4 Burners would not light
Open the stove top pulled old burners out dropped new set in place. Theyclick right in NO TOOLS REQUIRED!!!!
Parts Used:
-
David from Cincinnati, OH
-
Difficulty Level:Really Easy
-
Total Repair Time:Less than 15 mins
Was this instruction helpful to you?
Thank you for voting!
oven door seal gasket broken.
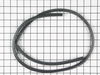
removed old gasket and clips, replaced with new gasket that came with clips. easy. worked well.
Parts Used:
-
Frank from Ventura, CA
-
Difficulty Level:Really Easy
-
Total Repair Time:Less than 15 mins
-
Tools:Pliers, Screw drivers
Was this instruction helpful to you?
Thank you for voting!
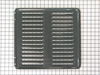
missing parts
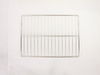
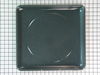
placed them in propper position we had been to apliance stores and told they would need to order them and it may take up to two weeks to get them. we ordered them from you and they were here in a matter of days, and the price was the best we had been quoted. thank you so much
Parts Used:
-
mary from battle mountian, NV
-
Difficulty Level:Really Easy
-
Total Repair Time:Less than 15 mins
Was this instruction helpful to you?
Thank you for voting!
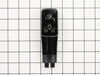
The original oven handle end caps were cracked
I disassembled parts and panels from the oven door as needed to remove the handle end caps. It was not clear to me what the best disassembly method was, because I used a different method when assessing the problem as when I performed the actual part replacement. The quickest way is to take the top two screws on the inside oven panel loose, but leave them in their retainers. Remove the side trim screws on the plastic upper side pieces. Remove the four sheet metal screws on the bottom of the door, located the far right and left (two on each side). Carefully split the inner and outer oven panels to access the mounting screws for the oven handle. Replace the oven handle and reverse the disassembly process.
Parts Used:
-
Chris from New Ulm, MN
-
Difficulty Level:A Bit Difficult
-
Total Repair Time:15 - 30 mins
-
Tools:Nutdriver, Screw drivers
Was this instruction helpful to you?
Thank you for voting!
handles broken on oven door
removed old handles and slid door apart align new handles and re-installed new handles. One person job.
Parts Used:
-
Rita from Yadkinville, NC
-
Difficulty Level:Really Easy
-
Total Repair Time:15 - 30 mins
-
Tools:Pliers, Screw drivers
Was this instruction helpful to you?
Thank you for voting!