




















JES9860CCS01 Jenn-Air Range - Instructions
Keep searches simple. Use keywords, e.g. "leaking", "pump", "broken" or "fit".
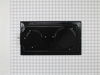
Changed out Element
First i lifted the old cartridge out then i put the new one in and turned it on and it worked fabulously.
took no more than 30 seconds
took no more than 30 seconds
Parts Used:
-
Kevin from Mount GIlead, OH
-
Difficulty Level:Really Easy
-
Total Repair Time:Less than 15 mins
9 of 12 people
found this instruction helpful.
Was this instruction helpful to you?
Thank you for voting!
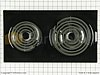
heat elements quit working
I unplugged the old unit and plugged in the new unit. Done in less than 1 minute. It took more time to open the shipping box.
Parts Used:
-
Janet from Spring, TX
-
Difficulty Level:Really Easy
-
Total Repair Time:Less than 15 mins
8 of 9 people
found this instruction helpful.
Was this instruction helpful to you?
Thank you for voting!
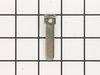
cook top module would not heat.
The contact spades were burned from 10+ years of use and the cook top module was worn. I disassembled the module, taped the top to protect the creamic cook top, sanded the metal and spray painted to restore the original white finish. On the bottom half I replaced one missing pop rivet and cleaned and spray painted the bottom to restore to the original black. When the contact spades arrived, I replaced the contact spades and reassembled the module. It now works and looks like it did when it was new.
Parts Used:
-
Daryl from Olathe, KS
-
Difficulty Level:A Bit Difficult
-
Total Repair Time:More than 2 hours
-
Tools:Nutdriver, Screw drivers
8 of 10 people
found this instruction helpful.
Was this instruction helpful to you?
Thank you for voting!
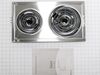
my wife wanted matching coil elements.
removed grill cartridge and replaced it with the new coil element cartridge.
It was like having a brand new range.
Thank you for your fast and reasonable service.
YOU WILL ALWAYS HAVE MY BUSINESS!
It was like having a brand new range.
Thank you for your fast and reasonable service.
YOU WILL ALWAYS HAVE MY BUSINESS!
Parts Used:
-
Morris from Yazoo City, MS
-
Difficulty Level:Really Easy
-
Total Repair Time:Less than 15 mins
7 of 8 people
found this instruction helpful.
Was this instruction helpful to you?
Thank you for voting!
glass pane was cracked during the cleaning process
needed to completely dis assemble the oven door to get to the inner pane of glass...took some time...I was able to do it on my own...could possibly go a little quicker with two people for a few of the steps...but possible by one...then reinserted the glass pane...and then need to re assemble the door layer by layer...up and working again...would have cost several hundred dollars if need to call a repair person in...this way was the cost of the piece..less than $70 ... and my time...well worth it....thanks
Parts Used:

-
Ellen from Shelton, CT
-
Difficulty Level:Easy
-
Total Repair Time:More than 2 hours
-
Tools:Screw drivers
8 of 11 people
found this instruction helpful.
Was this instruction helpful to you?
Thank you for voting!
Oven would stop heating after a few minutes of operation
Heat escaping from the top of the over door would overheat the electronics and cause the system to show error codes F1 and F3-1. Error code F3-1 suggests that the oven temperature sensor was bad. I replaced the sensor but that did not stop the problem. Replacing the oven door gasket stop the heat leak and solved the problem. I simply pull the old gasket off the door (it stuck a bit at the bottom but a pair of pliers solved that problem, then push the new gasket into place without any tools. The old gasket was very hard and non-complient where food had spilled on it and baked hard.
Parts Used:

-
John from Ashland, OR
-
Difficulty Level:Easy
-
Total Repair Time:Less than 15 mins
-
Tools:Pliers
6 of 6 people
found this instruction helpful.
Was this instruction helpful to you?
Thank you for voting!
We are renting a house with a stove that only had two burners on one side and a grill element on the other. We needed four burners.
This was an extremely simple repair. No screws, no nothing. If you can plug in a lamp, you can swap out this part just as easily.
Parts Used:
-
Michael from Palo Alto, CA
-
Difficulty Level:Really Easy
-
Total Repair Time:Less than 15 mins
7 of 9 people
found this instruction helpful.
Was this instruction helpful to you?
Thank you for voting!
My old element finally went out
Easy peasy...1. Take 2 screws out to remove the back cover. 2. Unplug the 2 wires from the element. 3. Remove the 2 screw holding the element from inside the oven and take out the old element. Repeat the steps above in reverse order.
Parts Used:

-
Ricky from JASPER, TX
-
Difficulty Level:Very Easy
-
Total Repair Time:Less than 15 mins
-
Tools:Screw drivers
6 of 6 people
found this instruction helpful.
Was this instruction helpful to you?
Thank you for voting!
replace element cartridge
I placed my order online and received the replacement parts the very next day - thank you so much!!
The hardest part of this repair job was removing it from the boxes! Pulling out the old cartridge and inserting the new was as easy as could be!
The hardest part of this repair job was removing it from the boxes! Pulling out the old cartridge and inserting the new was as easy as could be!
Parts Used:
-
Kathleen from Ledyard, CT
-
Difficulty Level:Really Easy
-
Total Repair Time:Less than 15 mins
6 of 6 people
found this instruction helpful.
Was this instruction helpful to you?
Thank you for voting!
my oven would not heat to proper temp
I slide the range out and unplugged it from the outlet. I removed the back of the oven ( 8 screws ) using a cordless drill and phillips bit then with a phillips screwdriver I removed the oven sensor (2 screws) then I installed the new sensor , reinstalled the oven back , plugged the range in , slide it back into place and that was it. This repair took about 10 mins and the oven works perfectly. Thanks !
Parts Used:

-
mark from CHAMBERLAIN, SD
-
Difficulty Level:Very Easy
-
Total Repair Time:Less than 15 mins
-
Tools:Screw drivers
6 of 6 people
found this instruction helpful.
Was this instruction helpful to you?
Thank you for voting!
The Burners on the stove stopped working
I was told that we needed a new stove at an estimated cost of $3900. I decided to google the parts that were not working after I was able to identify the Part number & model. I was first advised to look at Lowes, which I did and was not successful. I did another web search the Part Select site came up. At first I was able to find the part, but the color. A simple phone call and a helpful (Human) voice at the other end gave me a new model number and in less than 5 minutes I had made my order. Total cost $368.00 including shipping and handling. My stove is working like new. Total savings $3500 and change. Satisfaction 100%. I have placed the web site in the must have category.
Parts Used:
-
Horacio from Laredo, TX
-
Difficulty Level:Really Easy
-
Total Repair Time:Less than 15 mins
6 of 7 people
found this instruction helpful.
Was this instruction helpful to you?
Thank you for voting!
inner glass on oven door cracked.
Repair was very simple. Took the door apart in layers, replaced the glass and put everything else back. it took longer to clean the stove than it did to actually take it apart and put it back together. guess i didnt need to be that much of a clean freak!
Parts Used:
-
valerie from lanoka harbor, NJ
-
Difficulty Level:Really Easy
-
Total Repair Time:30 - 60 mins
-
Tools:Pliers, Screw drivers
6 of 8 people
found this instruction helpful.
Was this instruction helpful to you?
Thank you for voting!
Oven sensor caused cooling fan to run continuously. Had to flip breaker to get it to turn off..
Left oven off. Located sensor in pdf manual. Unscrewed mount, pulled sensor out to access connector. Disconnected old sensor, checked continuity(resistance) on ohms with multimeter. No continuity; connected new sensor, screwed mount back into place, turned on oven and baked cookies to check operation & it worked perfectly.
Parts Used:
-
Aubrey from EADS, TN
-
Difficulty Level:Really Easy
-
Total Repair Time:Less than 15 mins
-
Tools:Screw drivers
5 of 5 people
found this instruction helpful.
Was this instruction helpful to you?
Thank you for voting!
needed to replace the old burner cartridges
1. Lifted out the old burner cartridges
2. Opened the box from PartSelect
3. Inserted the new burner cartridges
It's plug and play. No tools required !
2. Opened the box from PartSelect
3. Inserted the new burner cartridges
It's plug and play. No tools required !
Parts Used:
-
Michael from Crysta Lake, IL
-
Difficulty Level:Really Easy
-
Total Repair Time:Less than 15 mins
5 of 5 people
found this instruction helpful.
Was this instruction helpful to you?
Thank you for voting!
heating coils (burners) were not working
when the new cartridges came in all I did was unplug the old and plug in the new and I had a new stove
Parts Used:
-
Carol from Holbrook, NY
-
Difficulty Level:Really Easy
-
Total Repair Time:Less than 15 mins
6 of 8 people
found this instruction helpful.
Was this instruction helpful to you?
Thank you for voting!