




















JES9860CCS00 Jenn-Air Range - Instructions
Keep searches simple. Use keywords, e.g. "leaking", "pump", "broken" or "fit".
Plastic ends on old cover broke.

-
HElen from Pawleys Island, SC
-
Difficulty Level:Really Easy
-
Total Repair Time:Less than 15 mins
6 of 8 people
found this instruction helpful.
Was this instruction helpful to you?
Thank you for voting!
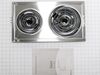
part was just looking old and worn
Really simple just had to remove the old part by simply pulling it out of the socket and then insert the new cartridge. It looks great it was shipped in a matter of days I was surprised to get it so soon.
Parts Used:
-
Geri from El Dorado, CA
-
Difficulty Level:Really Easy
-
Total Repair Time:Less than 15 mins
5 of 6 people
found this instruction helpful.
Was this instruction helpful to you?
Thank you for voting!
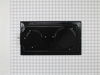
Old stove burners were rusted out and hard to clean
Unplugged old units and plugged in new units. They fit perfectly and it was all so easy. I have been very happy with PartSelect services.
Parts Used:
-
Pamela from Kerrville, TX
-
Difficulty Level:Really Easy
-
Total Repair Time:15 - 30 mins
6 of 9 people
found this instruction helpful.
Was this instruction helpful to you?
Thank you for voting!
Cartridge was in need of replacement unit
Unplugged unit,cleaned stove and replaced new cartridge.
Parts Used:
-
Marion from Center Point, IA
-
Difficulty Level:Really Easy
-
Total Repair Time:Less than 15 mins
5 of 6 people
found this instruction helpful.
Was this instruction helpful to you?
Thank you for voting!
Glass on inside of oven door cracked
I took the oven door apart, pulled out the broken fragments of glass and replaced it with the new glass. I should have taken notes as I took the door apart because it was a bit tricky to remember how all the pieces fit back together.
I was very impressed with how quickly the parts were shipped and the quality of the packing materials to protect the glass as it was shipped.
I was very impressed with how quickly the parts were shipped and the quality of the packing materials to protect the glass as it was shipped.
Parts Used:

-
Tim from Athens, OH
-
Difficulty Level:A Bit Difficult
-
Total Repair Time:30 - 60 mins
-
Tools:Screw drivers
5 of 6 people
found this instruction helpful.
Was this instruction helpful to you?
Thank you for voting!
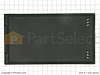
Original non stick griddle was scraped and used.
Just removed olriginal griddle and ireplaced new one. No tools needed.
Parts Used:
-
Rebecca from Simpsonville, SC
-
Difficulty Level:Really Easy
-
Total Repair Time:Less than 15 mins
7 of 12 people
found this instruction helpful.
Was this instruction helpful to you?
Thank you for voting!
Oven would not heat past 200
First be sure to unplug stove or turn off from breaker switch. I Removed racks from oven . Using screwdriver I loosened the back plate in the oven that held the wires connected to heating element , being careful not to let wires fall through holes . Gently pull element tip apart from wire. Snap end of new element to wires, screw plates back to tighten
Turn oven on and check to assure heating properly. Very simple
Turn oven on and check to assure heating properly. Very simple
Parts Used:

-
Desmona from GONZALES, LA
-
Difficulty Level:Very Easy
-
Total Repair Time:15 - 30 mins
-
Tools:Screw drivers
4 of 4 people
found this instruction helpful.
Was this instruction helpful to you?
Thank you for voting!
Burners not working
-
Wendel from Marietta, GA
-
Difficulty Level:Really Easy
-
Total Repair Time:Less than 15 mins
6 of 10 people
found this instruction helpful.
Was this instruction helpful to you?
Thank you for voting!
One burner ,of a 2 burner cartridge, was burned out. I called an appliance dealer. no help. Went on line, typed in Jenn-air cooktopand several choices came up. Clicked on yours, went thru about375 parts. Spotted what I thought was was the right one. Called in. It had three flat prongs and one ro
I lifted the old old cartridge on one end and slid it out. Then I shoved new cartridge in place, tried the burners. Perfect! Saved me from getting a entire new cooktop. Would recommend PartSelect to anyone looking to repair an old stove.
Parts Used:
-
Wayne from Brandon, WI
-
Difficulty Level:Easy
-
Total Repair Time:Less than 15 mins
5 of 7 people
found this instruction helpful.
Was this instruction helpful to you?
Thank you for voting!
Door gasket was hard and brittle from baked-on grease - heat leaking around door
Waited for my husband to do it, but when he didn't, I tried it. Very simple! Just pulled the old gasket out of the pinch pin holes in the door, then replaced it. Tuck the one end into the hole at the bottom of the door, then match up the little pinch pins on the gasket with the holes in the door - matches up perfectly! Be sure to tuck in each of pinch pins till they sort of "snap" into each hole. Took me 5 minutes, tops. Works great now, no more lost heat around the edge of the door.
Parts Used:

-
Harlen from Spring Creek, NV
-
Difficulty Level:Really Easy
-
Total Repair Time:Less than 15 mins
4 of 5 people
found this instruction helpful.
Was this instruction helpful to you?
Thank you for voting!
Oven was not correctly heating to set temperature
Removed the approximatly 10 screws that hold on both the upper and lower pieces of sheet metal that cover the back of the oven. Removed the screw holding in the temp sensor. Unplugged and removed the old sensor. Plugged in and installed the new sensor (using one of the included adapter wires supplied with the sensor). Put the 2 pieces of sheet metal back on and plugged in the oven.
Parts Used:

-
Trace from Ofallon, MO
-
Difficulty Level:Really Easy
-
Total Repair Time:Less than 15 mins
-
Tools:Nutdriver
4 of 5 people
found this instruction helpful.
Was this instruction helpful to you?
Thank you for voting!
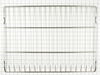
Racks were dark and dirty
The first set of racks did not fit. I called the Service rep, gave him the model number and exchanged the racks for the new ones. The new ones fit perfectly and the service was excellent. I would definitely recommend PartSelect.com to anyone who wants to deal with a company with excellent service, parts and representatives who know their stuff.
Parts Used:
-
Geraldine from Germantown, NY
-
Difficulty Level:Really Easy
-
Total Repair Time:Less than 15 mins
6 of 11 people
found this instruction helpful.
Was this instruction helpful to you?
Thank you for voting!
Cooktop/grill scratched up
I bought 2 covers, they are great, I can put them on and the cook top looks wonderful. I bought an older home and the Jennn-Air top was scratched up, now you cant tell at all when I put the covers on. I was thrilled to find them. I thank you
Parts Used:
-
Terry from Brighton, MI
-
Difficulty Level:Really Easy
-
Total Repair Time:Less than 15 mins
4 of 5 people
found this instruction helpful.
Was this instruction helpful to you?
Thank you for voting!
Needed to replace the oven door gasket/seal
Removed door from oven by pulling up at the first stop point after opening the door. Removed the outer shell by removing 5 screws. Disassembled the inner door by removing 6 screws. Be careful with the insulation blanket (fits in a molded portion of the inner door). Glass windows can be removed (for cleaning) via a couple screws. Old gasket/seal is held in-place via spring-clips; just squeezed each clip, pushed each thru their respective holes, and pulled off the worn-out gasket. New gasket snapped in-place by pushing the clips thru the respective holes. Reverse the process to reassemble the door. You can do this job in 15-20 minutes. Took us longer because it took some elbow-grease (and patience) to clean the crud off the glass windows.
Parts Used:
-
Daniel from Katy, TX
-
Difficulty Level:Easy
-
Total Repair Time:30 - 60 mins
-
Tools:Pliers, Screw drivers
4 of 5 people
found this instruction helpful.
Was this instruction helpful to you?
Thank you for voting!
door seal contaminated by a boil-over, not flexible
From reading other reviews i thought I would have to dis-assemble the door but when I saw the new part I realized I would not have to, simply pop the beveled clips w/pocket knife and pop in the new seal clips. the ends tucked very nicely, an 80+ yr. old would have no trouble if they had their wits.
Parts Used:
-
Rob from Yakima, WA
-
Difficulty Level:Really Easy
-
Total Repair Time:Less than 15 mins
3 of 3 people
found this instruction helpful.
Was this instruction helpful to you?
Thank you for voting!