




















JES9860BAB18 Jenn-Air Range - Instructions
Keep searches simple. Use keywords, e.g. "leaking", "pump", "broken" or "fit".
Inner glass pane broke during self-cleaning operation
I removed all the screws that held the trim and inner frame to the outside window unit first. Then, I removed a protective glass from over the two inner panes. Next after removing the frame that held the two inner glass panes together, I took the broken inner glass pane out and replaced it with the new one. Then basically I just retraced my steps and had the door put back together in about 45 minutes. You just need to pay close attention to your disassembly so that you are able to put the pieces back together quickly.
Parts Used:

-
Mark from Abingdon, VA
-
Difficulty Level:Easy
-
Total Repair Time:30 - 60 mins
-
Tools:Screw drivers
4 of 7 people
found this instruction helpful.
Was this instruction helpful to you?
Thank you for voting!
ovens wouldn't maintain temperature after preheat cycle
unplugged oven. removed 2 screws that hold the sensor in place, then removed the dozen or so screws that hold on the rear panel, unplugged sensor and fed wire through insulation. identified and installed correct harness adapter then fed new wire and connecter through insulation and connected to adapter. installed sensor retaining screws.plugged oven back in and tested function.no dice. unplugged oven once again. removed oven control panel and upon inspection of printed circuit board discovered 3 solder joints had failed. dang. resoldered failed joints and also sweetened up a few others that looked suspect. reinstalled controller, replaced all retaining hardware, and plugged in the oven. tah-dah!! works like a charm now. moral of the story is check the pc board first and save $50 for unneeded pats!!! or buy the controller from parts direct for $260ish. btw a roll of solder and soldering iron from an auto parts store cost around $10, learned to solder on you-tube $0. amazing all the home appliances yo can fix if you're not afraid to take a few screws out and poke around a bit. CHEERS!
Parts Used:

-
sherri from elk horn, IA
-
Difficulty Level:A Bit Difficult
-
Total Repair Time:30 - 60 mins
-
Tools:Screw drivers
3 of 4 people
found this instruction helpful.
Was this instruction helpful to you?
Thank you for voting!
Burner knob cracked in two
Pulled the knob off the stove (in two pieces); replaced it with new knob with no difficulty.
Parts Used:

-
Grace from Sierra Vista, AZ
-
Difficulty Level:Really Easy
-
Total Repair Time:Less than 15 mins
5 of 10 people
found this instruction helpful.
Was this instruction helpful to you?
Thank you for voting!
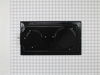
The original grill didn't work well, and I needed 4 eyes to cook on. I received the new module quickly, and had it installled in 20 seconds. Immediate heat and good looks. It really transfors this old range!! Thanks!!
Lifted out and unplugged grill. Plugged in and put in place new module. I tested it right then and it worked great!
Parts Used:
-
Frederick from Birmingham, AL
-
Difficulty Level:Really Easy
-
Total Repair Time:Less than 15 mins
5 of 10 people
found this instruction helpful.
Was this instruction helpful to you?
Thank you for voting!
Bake element blew up
took the old one out (two phillips head screws)and put the new one in. done. took about 5-6 minutes.
Parts Used:

-
Kevin from Norfolk, VA
-
Difficulty Level:Easy
-
Total Repair Time:Less than 15 mins
-
Tools:Screw drivers
4 of 7 people
found this instruction helpful.
Was this instruction helpful to you?
Thank you for voting!
bake element needed replacement
-
svetlana from chicago, IL
-
Difficulty Level:Really Easy
-
Total Repair Time:Less than 15 mins
-
Tools:Screw drivers
4 of 7 people
found this instruction helpful.
Was this instruction helpful to you?
Thank you for voting!
element burn out
-
steve from mcminnville, OR
-
Difficulty Level:Easy
-
Total Repair Time:Less than 15 mins
-
Tools:Pliers, Screw drivers
4 of 7 people
found this instruction helpful.
Was this instruction helpful to you?
Thank you for voting!
eyes burned out on old cartridge
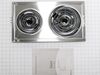
Simply unpluged the old cartridges and plugged in the new ones, it could not have been easier. My 18 year old cooktop looks brand new. My old cartridges were black and the new ones are stainless, but, the look is good, since most new appliances are now stainless. The best part is that it cost less than half of what a new cooktop would have cost plus all of the mess that would have been made tearing out the old one and installing a new one. Thanks PartSelect, A Very Satisfied Customer.
Parts Used:
-
Dwayne from Minden, LA
-
Difficulty Level:Really Easy
-
Total Repair Time:Less than 15 mins
3 of 4 people
found this instruction helpful.
Was this instruction helpful to you?
Thank you for voting!
Replaced griddle with burner cartridges
First of all the part arrived a day and a half after ordering which we thought was remarkable. We unplugged the griddle unit and plugged in the cartridge with two burners. It is beautiful.
Thanks.
Thanks.
Parts Used:
-
Judith from Andersonville, GA
-
Difficulty Level:Really Easy
-
Total Repair Time:Less than 15 mins
3 of 4 people
found this instruction helpful.
Was this instruction helpful to you?
Thank you for voting!
Oven heat loss, door gasket needed replacement
The entire "project" took me less than 3 minutes, and required no tools at all! First, the saleswoman over the phone pointed me to the correct product for my problem ($30 less than what I thought I needed), and it arrived at my home within 4 days. Then, it was just a matter of pulling off the old gasket, and snapping the new one in place! Simple!
Parts Used:

-
Stephen from Chapell Hill, NC
-
Difficulty Level:Really Easy
-
Total Repair Time:Less than 15 mins
3 of 4 people
found this instruction helpful.
Was this instruction helpful to you?
Thank you for voting!
Oven would over heat and produce a F2 error code on the display. It would not turn off or cool down until I switched the circuit breaker off.
I switched the oven sensor easily enough, but it did not remedy the problem, so we are in the process of replacing the oven since it's about 20 yrs. old.
Parts Used:
-
richard from SAINT MARYS, KS
-
Difficulty Level:Very Easy
-
Total Repair Time:Less than 15 mins
-
Tools:Screw drivers
2 of 2 people
found this instruction helpful.
Was this instruction helpful to you?
Thank you for voting!
Cracked glass top
-
PHYLLIS from CAMANO ISLAND, WA
-
Difficulty Level:Very Easy
-
Total Repair Time:Less than 15 mins
2 of 2 people
found this instruction helpful.
Was this instruction helpful to you?
Thank you for voting!
Bad burner on surface module.
Remove old module and insert new one. Took longer to get out of box than to install.
Parts Used:
-
Russell from CHAMPAIGN, IL
-
Difficulty Level:Very Easy
-
Total Repair Time:Less than 15 mins
2 of 2 people
found this instruction helpful.
Was this instruction helpful to you?
Thank you for voting!
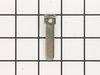
A local repair shop informed the individual that the burner unit could not be repaired and she would have to replace the cooktop..
After examining the burner unit I noticed that one of the male contact spades was burned and look deformed. After removing the spade I discovered that it had been originally manufactured incorrectly. I went on line to try and find the part. I found it at this site . I ordered 2 of the spades and replaced the deformed spade and another one that looked like it had gotten a little hot. She tried the unit and it worked perfectly. She had not used that burner unit for a very lengthy time. The investigation of the problem took a little time, but the repair went very fast. Moral is :" If a spade doesn't look right, it probably isn't", but either the individual spade or plug can be replaced. This site is now my "GO TO" place for parts.
Parts Used:
-
Sonny from MOUNT VERNON, GA
-
Difficulty Level:Very Easy
-
Total Repair Time:Less than 15 mins
-
Tools:Screw drivers, Socket set
2 of 2 people
found this instruction helpful.
Was this instruction helpful to you?
Thank you for voting!
Replace the oven Sensor
The sensor is mounted in the top right side of the oven.An extra long screw driver helps to avoid damage to the sensor when replacing it.The connectors were the opposite to the old sensor and I did not see that there were adapter cables included. It might help to connect or tie these together as I only expected the sensor and did not look for adapters.I had cut the wires and used wire nuts when I found the adapters.The repairs works fine.
Mike
Mike
Parts Used:
-
Michael from Exeter, NH
-
Difficulty Level:Really Easy
-
Total Repair Time:15 - 30 mins
-
Tools:Nutdriver, Pliers, Screw drivers
3 of 5 people
found this instruction helpful.
Was this instruction helpful to you?
Thank you for voting!