




















JCD2289AEG Jenn-Air Refrigerator - Instructions
Keep searches simple. Use keywords, e.g. "leaking", "pump", "broken" or "fit".
Condenser fan motor seized
While investigating a water leak I discovered the condenser fan seized. I removed the fan to prevent a fire and ordered the part. The hardest part was identifying the correct fan. That took longer than the installation.
I cut the wires and spliced in the new motor. It rotated correctly and I replaced the crill.
Done
Total time of ice maker water leak repair and fan replacement about 1 hour.
I cut the wires and spliced in the new motor. It rotated correctly and I replaced the crill.
Done
Total time of ice maker water leak repair and fan replacement about 1 hour.
Parts Used:

-
Benjamin from Daytona Beach, FL
-
Difficulty Level:Really Easy
-
Total Repair Time:30 - 60 mins
-
Tools:Nutdriver, Pliers
9 of 9 people
found this instruction helpful.
Was this instruction helpful to you?
Thank you for voting!
Freezer was overfrosting and not defrosting. Frig. was not getting cold.
This was very easy. I removed all the shelves in the freezer compartment. I removed two nutscrews to remove the back wall. Then I removed the little radiator looking part by removing two more nutscrews. I unplugged the old thermostat assembly and installed the new one exactly like I removed it, then I reversed the procedure to put it all back together. Very easy my wife could have done it. ThANKS!! to Parts Select for the help of all the blogs I read before doing the job.
Parts Used:
-
Daniel O. from Gilroy, CA
-
Difficulty Level:Really Easy
-
Total Repair Time:30 - 60 mins
-
Tools:Nutdriver
9 of 9 people
found this instruction helpful.
Was this instruction helpful to you?
Thank you for voting!
Freezer Door Seal Leak
Installing the seal was fairly easy. the seal as arrived from vendor was very deformed. It came with no instructions. I was able to use a hair dryer to heat the seal and soften the rubber. While softened I pressed the seal into the frame. It slowly began to hold and take shape. Some areas where the seal had been folded in the carton took foam filler to hold into position.
Parts Used:
-
Nancy from Dallas, TX
-
Difficulty Level:A Bit Difficult
-
Total Repair Time:More than 2 hours
-
Tools:Screw drivers, Socket set
9 of 9 people
found this instruction helpful.
Was this instruction helpful to you?
Thank you for voting!
burnt out bulb
took cover off, installed bulb.
lost the owners manual,
part select's schematics were very helpful
thanks
lost the owners manual,
part select's schematics were very helpful
thanks
Parts Used:
-
THOMAS from STOW, OH
-
Difficulty Level:Really Easy
-
Total Repair Time:Less than 15 mins
27 of 63 people
found this instruction helpful.
Was this instruction helpful to you?
Thank you for voting!
Leaking water tube connector/union
Received the union I ordered, then discovered that the tubes were different sizes, so I had the wrong part. I had read elsewhere that it was necessary to trim the two ends of the tubes with a box cutter to stop the leaks - I did this, and the leaking stopped. I was then able to go to a local hardware store and get a 5/16 to 1/4 union and replace it. The leaking is stopped, and the water supply in the door is now working like new. No problem with partselect, but I did buy a caliper so that I can check tube diameters if I ever have a similar problem! This is a great site to find instructions - well worth the time to search!
Parts Used:

-
Roderick from NEWTOWN, PA
-
Difficulty Level:Easy
-
Total Repair Time:15 - 30 mins
-
Tools:Pliers, Screw drivers
10 of 12 people
found this instruction helpful.
Was this instruction helpful to you?
Thank you for voting!
condenser fan stopped working
1. Removed the cardboard cover.
2. Removed the terminal block and unplugged the old motor.
3. Removed three screws that held old motor to the bracket.
4. Removed the fan blade from the old motor.
5. Installed the fan blade (after cleaning) to the new motor.
6. Crimped on new wire terminals onto the leads on the new motor.
7. Installed the new motor using the fasteners provided.
8. Plugged the new motor wires onto the proper terminals in the terminal block.
9. remounted the terminal block.
10. reinstalled the cardboard cover.
2. Removed the terminal block and unplugged the old motor.
3. Removed three screws that held old motor to the bracket.
4. Removed the fan blade from the old motor.
5. Installed the fan blade (after cleaning) to the new motor.
6. Crimped on new wire terminals onto the leads on the new motor.
7. Installed the new motor using the fasteners provided.
8. Plugged the new motor wires onto the proper terminals in the terminal block.
9. remounted the terminal block.
10. reinstalled the cardboard cover.
Parts Used:
-
Steven from Brigham City, UT
-
Difficulty Level:Really Easy
-
Total Repair Time:15 - 30 mins
-
Tools:Nutdriver
10 of 12 people
found this instruction helpful.
Was this instruction helpful to you?
Thank you for voting!
Freezer Cooling Problems - would get too warm then too cold. Condenser fan would run sometime but not always
Unplug
Remove entire back panel (both chipboard and metal fan grill)
Unscrew both fan mount plate screws - fan won't be able to come out because it is still plugged in
When looking at back of fridge, locate a small plastic box to the immediate left of the condenser. It's a circuit block. Release the metal spring clip holding the plastic cover in place, and trace the fan wire connections back to the fan. Make a note of which wire is connected to which terminal (1 of the fan wires has white lettering and 1 is just black)
Unplug both fan wire connects from circuit block to release the fan power cable.
Remove the fan mounting plate
Release fan blade clip by pressing fan against motor and unscrewing and remove fan blades
Unscrew motor from brackets - note alignment of motor on brackets
Mount new motor on brackets. Leave plug wire disconnected (replacement motor has a harnessed plug wire)
Connect new plug wire to the circuit block keeping wires connected to the proper terminals
Snake new plug wire behind condenser like the old wire was and run through cable bracket to the back right of the condenser
Plug wire harness into motor and re-mount fan mount plate
Reattach fan blade and secure using blade mount kit
Replace back panels
Remove entire back panel (both chipboard and metal fan grill)
Unscrew both fan mount plate screws - fan won't be able to come out because it is still plugged in
When looking at back of fridge, locate a small plastic box to the immediate left of the condenser. It's a circuit block. Release the metal spring clip holding the plastic cover in place, and trace the fan wire connections back to the fan. Make a note of which wire is connected to which terminal (1 of the fan wires has white lettering and 1 is just black)
Unplug both fan wire connects from circuit block to release the fan power cable.
Remove the fan mounting plate
Release fan blade clip by pressing fan against motor and unscrewing and remove fan blades
Unscrew motor from brackets - note alignment of motor on brackets
Mount new motor on brackets. Leave plug wire disconnected (replacement motor has a harnessed plug wire)
Connect new plug wire to the circuit block keeping wires connected to the proper terminals
Snake new plug wire behind condenser like the old wire was and run through cable bracket to the back right of the condenser
Plug wire harness into motor and re-mount fan mount plate
Reattach fan blade and secure using blade mount kit
Replace back panels
Parts Used:
-
JAMES from Middleboro, MA
-
Difficulty Level:A Bit Difficult
-
Total Repair Time:30 - 60 mins
-
Tools:Nutdriver, Screw drivers, Socket set
10 of 13 people
found this instruction helpful.
Was this instruction helpful to you?
Thank you for voting!
broken light switch

-
Richard from West Warwick, RI
-
Difficulty Level:Really Easy
-
Total Repair Time:Less than 15 mins
-
Tools:Screw drivers
12 of 20 people
found this instruction helpful.
Was this instruction helpful to you?
Thank you for voting!
Light switch rocker broke, disabling freezer internal light, water dispenser, and ice dispenser
Very simple. Matched female plugs with respective male color coded prong; pushed together then inserted unit in slot of freezer sidewall and rotated into position...job done.
Parts Used:
-
Kenneth from Newton Grove, NC
-
Difficulty Level:Really Easy
-
Total Repair Time:Less than 15 mins
10 of 14 people
found this instruction helpful.
Was this instruction helpful to you?
Thank you for voting!
Bottom of freezer compartment was icing up/freezer was leaking water
UNPLUG YOUR FRIDGE BEFORE YOU START> First I removed the shroud covering the lights and controls in the top of the refrigerator side. This was the hardest part, actually. Their are two indentations on the back of the cover and it is really hard to pull that cover off. Anyhow, once you do that, their are two screws, one by each light bulb in the top of the fridge that need to be removed. Their are also three hex head screws that need to be removed, two in the front corners of the assembly, one in the center, back of the fridge. Take those out and the whole assembly drops down. In the back right had corner of the assembly is the adaptive defrost control. Unplug it and set it aside. Plug the new one in. Put everything back together and you are back in business.
Parts Used:
-
Jason from Clarkston, MI
-
Difficulty Level:A Bit Difficult
-
Total Repair Time:1- 2 hours
-
Tools:Screw drivers
8 of 8 people
found this instruction helpful.
Was this instruction helpful to you?
Thank you for voting!
fan had stopped-freezer not performing etc.
simply removed old motor and replaced new. I'm over 82 and it was hard to get down and up to floor level!! One thing was a little puzeling -that was to insert the right screws which had a nitch in the end of the threds to keep it from loosening- I thought I was spoiling the threds cause I had to use a little pressure to start the screws and thought I had the wrong screws--they had sent several sets of them for different name brands- but II got it and everything seems to be allright - Could you tell me if I could purchase a replacement compressor and some refrigerent -the new kind. thank you, George Erlandson Only if my comp. goes out!!!
Parts Used:
-
George from Glenwood, MN
-
Difficulty Level:A Bit Difficult
-
Total Repair Time:1- 2 hours
-
Tools:Nutdriver, Pliers
8 of 8 people
found this instruction helpful.
Was this instruction helpful to you?
Thank you for voting!
Ice maker not dispensing ice
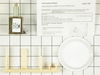
Removed about 6 screws. Replaced the solenoid and door kit. Replaced the screws. These parts were easy to replace. They were also super easy to identify and order from the site. I received them two days after I placed my order.
Thanks partselect.com!
Thanks partselect.com!
Parts Used:
-
Travis from Westchester, CA
-
Difficulty Level:Easy
-
Total Repair Time:15 - 30 mins
-
Tools:Nutdriver, Pliers
9 of 11 people
found this instruction helpful.
Was this instruction helpful to you?
Thank you for voting!
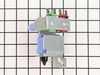
Broken (froze) ice maker water valve.
1. Turn off fridge and Pull plug from wall.
1a. Turn OFF water supply!
2. Remove rear dust cover to gain access to water valve.
3. Mark power connectors(red/green) attached to water valve before removing them. Remove connectors.
4. Remove supply line from old valve.
5. loosen mounting screw holding old valve in place.
6. remove valve.
7. disconnect two plastic water lines from valve.
8. Cut 1/2 inch off the end of each plastic line to get to un-streached line. Make sure you have enough line to still reach valve!
9. Insert plastic lines FIRMLY into outlets of NEW VALVE to lock in place. outlets are different sizes so you can't reverse them!
10. Install new valve and tighten mounting screw.
11. replace/tighten supply line to new valve.
13. Replace dust cover!
14. Plug in, Turn on fridge.
15. Turn on water supply, bleed air out by drawing a glass of water at door, and check for leaks!
All Done!
1a. Turn OFF water supply!
2. Remove rear dust cover to gain access to water valve.
3. Mark power connectors(red/green) attached to water valve before removing them. Remove connectors.
4. Remove supply line from old valve.
5. loosen mounting screw holding old valve in place.
6. remove valve.
7. disconnect two plastic water lines from valve.
8. Cut 1/2 inch off the end of each plastic line to get to un-streached line. Make sure you have enough line to still reach valve!
9. Insert plastic lines FIRMLY into outlets of NEW VALVE to lock in place. outlets are different sizes so you can't reverse them!
10. Install new valve and tighten mounting screw.
11. replace/tighten supply line to new valve.
13. Replace dust cover!
14. Plug in, Turn on fridge.
15. Turn on water supply, bleed air out by drawing a glass of water at door, and check for leaks!
All Done!
Parts Used:
-
richard from Little Suamico, WI
-
Difficulty Level:Easy
-
Total Repair Time:15 - 30 mins
-
Tools:Nutdriver, Wrench (Adjustable)
9 of 12 people
found this instruction helpful.
Was this instruction helpful to you?
Thank you for voting!
Freezer worked fine but the Refrig. wasn't getting cold
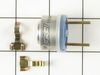
My husband first replaced the Defrost heater and the fridge still didn't stay cold. We had to defrost the freezer once a week and the fridge would stay cold for a few days, but after we replaced the Thermostat Assembly it worked GREAT! Thank you all for your comments and suggestions it saved us hundreds of dollars having to replace an, otherwise, perfectly fine fridge. Good luck to you if you have this problem, it was sooo fast and easy to replace these parts and totally worth the money.
Parts Used:
-
Lucy from Menifee, CA
-
Difficulty Level:Really Easy
-
Total Repair Time:15 - 30 mins
-
Tools:Nutdriver, Screw drivers
8 of 9 people
found this instruction helpful.
Was this instruction helpful to you?
Thank you for voting!
replacing thermostat did not help
Icecubes came out half-way, and refrooze. I figured out, that the melter does not work (HEATER in the icemaker) Voltage measured 105V no load. Studied the Internet, and folloved an advice: shorted the back wire and the blackwire with white stripes.these go to relay contacts. It seems, that the relay contacts are no good on Infrared receiver boaed. I turn off manually the icemaker, when needed
Parts Used:
-
John from Rocky River, OH
-
Difficulty Level:Difficult
-
Total Repair Time:More than 2 hours
-
Tools:Pliers, Screw drivers, Socket set
10 of 15 people
found this instruction helpful.
Was this instruction helpful to you?
Thank you for voting!