




















JB940TD1WW General Electric Range - Instructions
Keep searches simple. Use keywords, e.g. "leaking", "pump", "broken" or "fit".
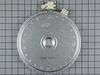
Burner element was burnt
It was very easy. First turn off the power. Remove two screws to pick up the hood then remove two screws holding the element. Tag the wires with number. Unplug the old burner attach the wires to new burner. Attach two screws with spring to hold the burner, put the hood down and put the screws holding the top hood.
Parts Used:
-
Chandra from Naugaeuck, CT
-
Difficulty Level:Really Easy
-
Total Repair Time:Less than 15 mins
-
Tools:Screw drivers, Socket set
4 of 5 people
found this instruction helpful.
Was this instruction helpful to you?
Thank you for voting!
Incorrect oven temperature due to defective temperature sensor.

-
Anthony from FARMINGVILLE, NY
-
Difficulty Level:Really Easy
-
Total Repair Time:Less than 15 mins
-
Tools:Nutdriver
3 of 3 people
found this instruction helpful.
Was this instruction helpful to you?
Thank you for voting!
Grease spilled on old gasket----gasket hardened
Simply pulled old gasket from door and pushed new gasket clips into existing holes and tucked in ends at bottom of door.
Parts Used:
-
Delores from Rocksprings, TX
-
Difficulty Level:Really Easy
-
Total Repair Time:Less than 15 mins
5 of 9 people
found this instruction helpful.
Was this instruction helpful to you?
Thank you for voting!
The dual burnner had somthing drop on it and it went out
I pulled out the range from the wall unplugged it from the wall then i opened the oven door and removed the two small screws on the front off the range and lifted the glass top and supported it with a 1/2" X 18inc wooden dowel, then i removed the two burner retaining screws with a small Phillips screw driver and removed the wires from the burner,
then i replaced the burner with the new one and reconnected the wires and placed the burner in to the two retaining clips and then tightened the two screws then i removed the wooden dowel and installed the two screws on the front bottom side on the range then i plugged in the range in and tested the burner then put the range back against the wall.
then i replaced the burner with the new one and reconnected the wires and placed the burner in to the two retaining clips and then tightened the two screws then i removed the wooden dowel and installed the two screws on the front bottom side on the range then i plugged in the range in and tested the burner then put the range back against the wall.
Parts Used:
-
Thad from Layton, UT
-
Difficulty Level:A Bit Difficult
-
Total Repair Time:15 - 30 mins
-
Tools:Screw drivers
3 of 3 people
found this instruction helpful.
Was this instruction helpful to you?
Thank you for voting!
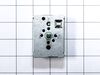
Installed a new switch
Took off cover plate and removed screws from housing to switch. Connected each wire from old switch to new one. No problems.
Parts Used:
-
Vilas from Hanover Township, PA
-
Difficulty Level:Really Easy
-
Total Repair Time:15 - 30 mins
-
Tools:Screw drivers, Wrench set
3 of 3 people
found this instruction helpful.
Was this instruction helpful to you?
Thank you for voting!
Inside burner would no longer heat
I went online and ordered the part after reading other people's repair experiences, confident that I could do it because the part was quite pricey. First, be sure you're circuit breaker to your range is off. Next, open the oven door and locate and remove two screws with a socket, that are just under the top surface which will allow you to lift up the glass top which is actually hinged...no need to pull the range out. Securely prop up the glass surface area and the burners are exposed. With a marker, mark where each color wire goes on the burner you are going to remove and also mark where the two holding brackets are. This way you can reference the locations to connect to the new one. Carefully remove the wires and brackets and install new burner with brackets and connections. Close up the top, replace two screws, turn on breaker, and if there were no other faulty components,it'll work great. P.S Be gentle getting the very snug wires off. Good Luck
Parts Used:
-
John from CHARLESTOWN, NH
-
Difficulty Level:Easy
-
Total Repair Time:15 - 30 mins
-
Tools:Screw drivers, Socket set
3 of 3 people
found this instruction helpful.
Was this instruction helpful to you?
Thank you for voting!
Small front burner on our glass top stove died.
Robert did not do the repairs. I did! 70 year old housewife. I watched a Utube video and thought I could certainly handle that. Ordered my part from your site. It came in two days. Burnet was replaced in under 20 minutes by me! Anyone can do this. Super easy, parts just plug in.
Parts Used:

-
Robert from FLEMING ISLE, FL
-
Difficulty Level:Really Easy
-
Total Repair Time:15 - 30 mins
-
Tools:Screw drivers
3 of 3 people
found this instruction helpful.
Was this instruction helpful to you?
Thank you for voting!
drwer slide under stove broke off.
recieved part the next day. looked different but I followed instructions and the part worked perfect.
Parts Used:

-
paul from sewell, NJ
-
Difficulty Level:Really Easy
-
Total Repair Time:Less than 15 mins
-
Tools:Screw drivers
3 of 4 people
found this instruction helpful.
Was this instruction helpful to you?
Thank you for voting!
Burner Was Not Working
Removed the two screws that hold the range top down. Lifted up yhe range top and propped with a stick. Proceeded to mark the wires connected to the old burner so that the new one would be connected correctly. Removed the wires and then the two brackets that hold the burner in place. Removed the old burner and installed the new one. Connected the wires and resecured top to base. Turned on the current and it worked beautifully.
Parts Used:
-
Roland from Miami, FL
-
Difficulty Level:Easy
-
Total Repair Time:15 - 30 mins
-
Tools:Nutdriver, Pliers, Screw drivers
3 of 4 people
found this instruction helpful.
Was this instruction helpful to you?
Thank you for voting!
Broken interior oven window
It took a bit of head scratching to remove the oven door. I had read another user saying he'd removed the hinge screws unneccessarily, so I left them alone. I eventually was able to locate the locks on each hinge. Once they were disengaged, it was a simple matter to lift off the door. After that, I removed all the screws (except the hinge screws) and took the door apart. Once it was disassembled, I found two loose triangular pieces, about 1 1/2" long. I later discovered these were spacers for the two top srews. They were placed on end, and the top screws passed through them. All in all, a relatively simple repair, which absolutely amazed my wife, landlord, faily, etc.
Parts Used:
-
George from Bowie, MD
-
Difficulty Level:Easy
-
Total Repair Time:15 - 30 mins
-
Tools:Nutdriver, Screw drivers
3 of 4 people
found this instruction helpful.
Was this instruction helpful to you?
Thank you for voting!
the small burner was burnt out
after removing the two screws that are just inside the oven, I propted the top open with the box that the part came in. I drew and labeled the wires as I took them off using a color coding. next I removed the two clips that held the burner in place and marked on the new burner exactly where the clips were attached. Replacing the clips was possibly the hardest part of the whole operation. When you replace the burner, don't forget to replace the insulation pad that is stuck one the metal where the conections are. I missed this and had to reopen the stovetop and slid it on after I was finished. Otherwise it went pretty smooth.
Parts Used:
-
Jack from Columbiaville, MI
-
Difficulty Level:Easy
-
Total Repair Time:15 - 30 mins
-
Tools:Screw drivers, Socket set
2 of 2 people
found this instruction helpful.
Was this instruction helpful to you?
Thank you for voting!
Outer burner was not working
Very simple repair. Remove two screws to lift the range top. Then remove the two screws holding the element in place. Disconnect the wires from the old element, connect the wires to the new element. Reverse the procedure and you are done. Total time is anywhere from 15 to 30 minutes.
Parts Used:
-
Kevin from Leominster, MA
-
Difficulty Level:Easy
-
Total Repair Time:15 - 30 mins
-
Tools:Nutdriver, Screw drivers
2 of 2 people
found this instruction helpful.
Was this instruction helpful to you?
Thank you for voting!
Replace Thermostat
Pull oven out away from the wall, unplugged from outlet, removed center cover by removing 5 sheet metal screws. disconnected thermostat sensor from control cable. Opened oven door and removed screw that holds thermostat sensor. Pulled thermostat sensor out replaced with new sensor. Plugged sensor in to control cable. Replace panel and screws. Then my wife made me clean the oven. I recommend making the repair when your wife is not home.
Parts Used:
-
Russell from Morgantown, WV
-
Difficulty Level:Really Easy
-
Total Repair Time:Less than 15 mins
-
Tools:Socket set
2 of 2 people
found this instruction helpful.
Was this instruction helpful to you?
Thank you for voting!
The light inside the oven had burned out
0. As a safety precaution, unplug the range or hit the relevant fuse breaker before you start. You might also want to grab a flashlight. Definitely do not try to do this while the oven is hot.
1. Pinch the wire over the light bulb cap to remove it. This is inside the oven at the back.
2. Pop off the hemispherical glass cap.
3. Unscrew the old light bulb, and screw the new light bulb in its place.
4. Put the cap back.
5. Secure the cap by putting the wire back in its slots on the cap.
No tools needed, the cap is just held in place with pressure from the wire.
1. Pinch the wire over the light bulb cap to remove it. This is inside the oven at the back.
2. Pop off the hemispherical glass cap.
3. Unscrew the old light bulb, and screw the new light bulb in its place.
4. Put the cap back.
5. Secure the cap by putting the wire back in its slots on the cap.
No tools needed, the cap is just held in place with pressure from the wire.
Parts Used:

-
Catherine from SEATTLE, WA
-
Difficulty Level:Very Easy
-
Total Repair Time:Less than 15 mins
3 of 5 people
found this instruction helpful.
Was this instruction helpful to you?
Thank you for voting!
Overheating dual element
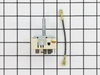
Not only did we (my wife did help) replace the dual element but afterwards we realized the control switch was not functioning properly and so that was replaced as well, and now our appliance works as intended. Also the instructions, are helpful as well. We used care not to force or over tighten anything and with two sets of eyes and the extra hands everything went much better. Anything that was removed was noted as to it's location and replaced .
Parts Used:
-
Alberto from TUCSON, AZ
-
Difficulty Level:Really Easy
-
Total Repair Time:30 - 60 mins
-
Tools:Nutdriver, Pliers, Screw drivers, Wrench (Adjustable)
2 of 2 people
found this instruction helpful.
Was this instruction helpful to you?
Thank you for voting!