




















JB655DK1WW General Electric Range - Instructions
Keep searches simple. Use keywords, e.g. "leaking", "pump", "broken" or "fit".
Bottom channel trim rusted
Removed door from range(see manual for instructions). Set door face down on protective cloth material .Remove two top screwws, 3 bottom screws and lift back of door off. Remove two screws on each side of door bottom channel and remove channel. Put in new trim on bottom of glass window and put screws back in. Set back of door on top of front cover and screw two top screws and 3 bottom screws back in. Set door back into range. Lock clips on both hinges.
Parts Used:

-
Arthur from TORRANCE, CA
-
Difficulty Level:Really Easy
-
Total Repair Time:30 - 60 mins
-
Tools:Nutdriver, Screw drivers
2 of 2 people
found this instruction helpful.
Was this instruction helpful to you?
Thank you for voting!
Burner spontaneously cycled without knob activation
First I cut the circuit at the breaker, and then pulled the range from wall to access the access panel. This top panel was held with 4 screws and removable with a standard phillips head screwdriver.
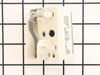
I then removed the 5 wire-crimped fasteners from the defective surface burner switch. (I first labeled these wires to ensure correct placement to the new switch). There were an additional two screws behind the corresponding knob that needed to be removed in order to completely remove the old switch.
The new switch was installed in reverse order to the steps indicated above (two screws behind knob, 5 wire-crimped fasteners, 4 screws to panel). Range was pushed back into position and breaker turned on.
I then removed the 5 wire-crimped fasteners from the defective surface burner switch. (I first labeled these wires to ensure correct placement to the new switch). There were an additional two screws behind the corresponding knob that needed to be removed in order to completely remove the old switch.
The new switch was installed in reverse order to the steps indicated above (two screws behind knob, 5 wire-crimped fasteners, 4 screws to panel). Range was pushed back into position and breaker turned on.
Parts Used:
-
Anil from Milpitas, CA
-
Difficulty Level:Easy
-
Total Repair Time:Less than 15 mins
-
Tools:Screw drivers
2 of 3 people
found this instruction helpful.
Was this instruction helpful to you?
Thank you for voting!
Broken rear drawer support
Installed the new brackets at the back of the drawer with the 2 screws provided. The new rear mount design is much better than than the old side mount.
Parts Used:

-
Jesse from Knob Noster, MO
-
Difficulty Level:Really Easy
-
Total Repair Time:Less than 15 mins
-
Tools:Nutdriver
2 of 3 people
found this instruction helpful.
Was this instruction helpful to you?
Thank you for voting!
Element blew hole in self then no power to burner.
Replaced burned element, did not fix no power problem. Ordered receptor replacement, replaced it, took less than 10 mminutes, but still no power to burned. Then ordered replacement switch, replacement too less than 10 minutes again and burner works fine.
Parts Used:
-
Melvin from Portland, TN
-
Difficulty Level:Easy
-
Total Repair Time:Less than 15 mins
-
Tools:Screw drivers, Socket set
2 of 4 people
found this instruction helpful.
Was this instruction helpful to you?
Thank you for voting!
oven door gasket needed replaced
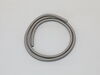
Ordered the part, it arrived and 5 minutes later it a complete installation
Parts Used:
-
Mary from LONGS, SC
-
Difficulty Level:Very Easy
-
Total Repair Time:Less than 15 mins
1 person
found this instruction helpful.
Was this instruction helpful to you?
Thank you for voting!
Bad Line fault displayed on range clock
1. Unplug the range power cord from the outlet.
2. Moved range away from the wall and countertop.
3.Using a nut driver removed the 2 screws on each side of the removable panel on the back side of the control knobs and clock.
4. Using a phillips head screwdriver remove 2 screws on top side of the back side panel.
5. Using a nut driver remove 4 screws that secure the main control board in place.
6. Take photo of the wiring on the main control board if not color coded.
7. My control board, and the replacement board were both color coded with the color with the wire placement on the rear of the board.
8. Remove wires with needle nose pliers.
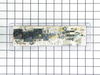
9. Using a hair dryer, heat the plastic control panel face plate that fits onto the front of the old control board.
10.With a putty knife carefully pry the face plate from the old control board.
11. Install the control board face plate onto the new control board.
12. Install the color coded wiring in place on the back side of the control board.
13. Replace the control board into the range, and install screws, and rear panel of the range.
14. Plug cord into outlet and test range for proper operation.
2. Moved range away from the wall and countertop.
3.Using a nut driver removed the 2 screws on each side of the removable panel on the back side of the control knobs and clock.
4. Using a phillips head screwdriver remove 2 screws on top side of the back side panel.
5. Using a nut driver remove 4 screws that secure the main control board in place.
6. Take photo of the wiring on the main control board if not color coded.
7. My control board, and the replacement board were both color coded with the color with the wire placement on the rear of the board.
8. Remove wires with needle nose pliers.
9. Using a hair dryer, heat the plastic control panel face plate that fits onto the front of the old control board.
10.With a putty knife carefully pry the face plate from the old control board.
11. Install the control board face plate onto the new control board.
12. Install the color coded wiring in place on the back side of the control board.
13. Replace the control board into the range, and install screws, and rear panel of the range.
14. Plug cord into outlet and test range for proper operation.
Parts Used:
-
Vincent J Paola, from GREENWEL SPGS, LA
-
Difficulty Level:Very Easy
-
Total Repair Time:Less than 15 mins
-
Tools:Nutdriver, Screw drivers
1 person
found this instruction helpful.
Was this instruction helpful to you?
Thank you for voting!
when turn on the larger element would not come on, as the switch moves to the different settings it would light but not staying up.
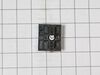
remove the 4 screw from the back of the control panel take the knob from the front and remove the two screws then raise the rear panel cover up. you can pull the switch from there make picture note of where the plug ups are for replacement its cool
Parts Used:
-
ivan from SNELLVILLE, GA
-
Difficulty Level:Really Easy
-
Total Repair Time:15 - 30 mins
-
Tools:Screw drivers, Socket set
1 person
found this instruction helpful.
Was this instruction helpful to you?
Thank you for voting!
The storage drawer came without supports.
I just removed the drawer and installed the rear supports as instructed on paper included with the part.
Parts Used:
-
Dock from Aurora, CO
-
Difficulty Level:Really Easy
-
Total Repair Time:Less than 15 mins
-
Tools:Nutdriver
2 of 4 people
found this instruction helpful.
Was this instruction helpful to you?
Thank you for voting!
Oven board went out
One wire at at time then used my razor blade to get front off stuck right back on
Parts Used:
-
Jackie from TICKFAW, LA
-
Difficulty Level:Very Easy
-
Total Repair Time:15 - 30 mins
-
Tools:Pliers
1 person
found this instruction helpful.
Was this instruction helpful to you?
Thank you for voting!
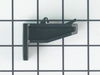
Plastic guide Broken
-
NICK from Vernon, CA
-
Difficulty Level:Easy
-
Total Repair Time:15 - 30 mins
-
Tools:Pliers, Screw drivers
9 of 25 people
found this instruction helpful.
Was this instruction helpful to you?
Thank you for voting!
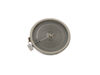
Outside portion of Element broken
First unplug range from electrical outlet!
Removed screws under front edge of stove top, propped it open with long paint stick, pried clips off of the element, unplugged and plugged in new element, push element back into clips, closed top on stove, plug back into socket, tested new burner, put screws back in under top front edge of stove top!!!
Removed screws under front edge of stove top, propped it open with long paint stick, pried clips off of the element, unplugged and plugged in new element, push element back into clips, closed top on stove, plug back into socket, tested new burner, put screws back in under top front edge of stove top!!!
Parts Used:
-
Tiffany from Lexington, OH
-
Difficulty Level:Really Easy
-
Total Repair Time:30 - 60 mins
-
Tools:Pliers, Screw drivers, Socket set
1 person
found this instruction helpful.
Was this instruction helpful to you?
Thank you for voting!
Oven no longer working after running the self clean option. Only Stove top burners worked
I began by turning off the breaker in the panel.
Slide the oven out into the open area.
Removed 3 screws in order to remove rear top panel.
Took 2 pictures of the wiring location on the PCB
Removed all wiring going to the circuit board total of 8.
Removed 4 screws in order to remove bad PCB.
Remove faceplate from bad PCB (you will need to place this faceplate on the new PCB.
To Install.
Reverse steps above
Slide the oven out into the open area.
Removed 3 screws in order to remove rear top panel.
Took 2 pictures of the wiring location on the PCB
Removed all wiring going to the circuit board total of 8.
Removed 4 screws in order to remove bad PCB.
Remove faceplate from bad PCB (you will need to place this faceplate on the new PCB.
To Install.
Reverse steps above
Parts Used:
-
Dominick from THORNWOOD, NY
-
Difficulty Level:Really Easy
-
Total Repair Time:30 - 60 mins
-
Tools:Nutdriver, Pliers, Screw drivers
1 person
found this instruction helpful.
Was this instruction helpful to you?
Thank you for voting!
THE FACE PLATE IS HARD TO GET OFF THE OLD CONTROL BOARD. USE A THIN KNIFE
THE INSTRUCTIONS THAT COME IN THE EMAIL ARE VERY GOOD. BE SURE TO TAKE A PICTURE OF THE WIRING.
Parts Used:
-
Melvin from WEBSTER, TX
-
Difficulty Level:Really Easy
-
Total Repair Time:15 - 30 mins
-
Tools:Nutdriver, Pliers
1 person
found this instruction helpful.
Was this instruction helpful to you?
Thank you for voting!
Only one Burner was heating
Disconnect plug from outlet from stove.Remove nob from control switch rem 2 small screws to release switch.Go to the back and proceed to rem back panel with 1/4 nut driver.Pull out switch and replace one lead a time.
Parts Used:
-
David from RIVERVIEW, FL
-
Difficulty Level:Really Easy
-
Total Repair Time:15 - 30 mins
-
Tools:Nutdriver, Screw drivers
1 person
found this instruction helpful.
Was this instruction helpful to you?
Thank you for voting!
Replaced oven door gasket
-
Paul from JACKSONVILLE, FL
-
Difficulty Level:Really Easy
-
Total Repair Time:15 - 30 mins
-
Tools:Screw drivers
1 person
found this instruction helpful.
Was this instruction helpful to you?
Thank you for voting!