




















JB625DK9BB General Electric Range - Instructions
Keep searches simple. Use keywords, e.g. "leaking", "pump", "broken" or "fit".
Broken inner window
-
randy from LORETTO, TN
-
Difficulty Level:Very Easy
-
Total Repair Time:15 - 30 mins
-
Tools:Nutdriver, Screw drivers
5 of 7 people
found this instruction helpful.
Was this instruction helpful to you?
Thank you for voting!
Element broket
1.- going online to orden part 2 disconnect the power from the aplaince shoot Dow the power 3 tear down the appliance and disconnect the four terminals from the damage part reconnect the terminals to th new part reensamble the appliance and ready to go save $275 bucks in handy man labor
Parts Used:

-
Marco Antonio from CORP CHRISTI, TX
-
Difficulty Level:Really Easy
-
Total Repair Time:Less than 15 mins
-
Tools:Nutdriver
4 of 5 people
found this instruction helpful.
Was this instruction helpful to you?
Thank you for voting!
would not get hot
Remove 2 screws and 2 wires- took the coil, then installed the wires and put the screws in--works fine. Thanks for the fast service.
Parts Used:
-
Janice from PENSACOLA, FL
-
Difficulty Level:Easy
-
Total Repair Time:30 - 60 mins
-
Tools:Nutdriver
3 of 3 people
found this instruction helpful.
Was this instruction helpful to you?
Thank you for voting!
Switch started arcing in the dial range of 2 to 8 in about a year.
Pulled the range out and unplugged it. Removed the back panel. Removed one wire at a time and plugging it in on the new switch. unscrewed the existing switch from the front panel (Two screws). Screwed the new one in, replaced the panel, plugged in the range and tested it. The new switch was a perfect OEM replacement and worked perfectly.
Parts Used:
-
Brian from HONEA PATH, SC
-
Difficulty Level:Very Easy
-
Total Repair Time:Less than 15 mins
-
Tools:Screw drivers
3 of 3 people
found this instruction helpful.
Was this instruction helpful to you?
Thank you for voting!
The burner coil had shorted out and actually burnt a hole in my non stick pan and after I replaced that, it would not heat up again. I actually swapped the wires from the back burner, but the small coils use a different watt switch and it would barely boil water with the big coil. So I ordered this
First turn off the breaker, and test with my milti meter. Raise the top panel where the coils are and prop it open high enough to use a screwdriver to open the front panel.
Then unscrew the three screws on the inside of the top panel, then open the oven door and you will see 4 screws across the bottom of thefront control board panel and two more on each side of the sides of the panel facing straight up. Unscrew those 6 screws and then pull the front control panel forward and out. You might need something or someone to hold the panel, I just let the wires hold the weight, but not highly recommend. Then pull the switch knob off and behind it there are two little bitty screws that hold the switch in place. Unscrew them and pull the switch out of its place. I put the new switch close to the old one and just used the needle nose pliers to unplug one wire at a time and plug it in on the same place as the old one.
Then screw the itty bitty screws in the front that hold the switch in place and put tbe knob back on. Reposition the front panel back into place abs screw in the 9 screws removed for disassembly. Now would be a good time to clean under the burner panel if you haven’t done so yet ( it gets pretty nasty under there). Then put your burner top back down into place and turn your breaker back on. You can either test with your multi meter or like I did, just put the burner on high and watct the coils glow. Such a beautiful sight. Easy fix.
Then unscrew the three screws on the inside of the top panel, then open the oven door and you will see 4 screws across the bottom of thefront control board panel and two more on each side of the sides of the panel facing straight up. Unscrew those 6 screws and then pull the front control panel forward and out. You might need something or someone to hold the panel, I just let the wires hold the weight, but not highly recommend. Then pull the switch knob off and behind it there are two little bitty screws that hold the switch in place. Unscrew them and pull the switch out of its place. I put the new switch close to the old one and just used the needle nose pliers to unplug one wire at a time and plug it in on the same place as the old one.
Then screw the itty bitty screws in the front that hold the switch in place and put tbe knob back on. Reposition the front panel back into place abs screw in the 9 screws removed for disassembly. Now would be a good time to clean under the burner panel if you haven’t done so yet ( it gets pretty nasty under there). Then put your burner top back down into place and turn your breaker back on. You can either test with your multi meter or like I did, just put the burner on high and watct the coils glow. Such a beautiful sight. Easy fix.
Parts Used:
-
sherman from OPELOUSAS, LA
-
Difficulty Level:Really Easy
-
Total Repair Time:Less than 15 mins
-
Tools:Pliers, Screw drivers
4 of 6 people
found this instruction helpful.
Was this instruction helpful to you?
Thank you for voting!
previous owner self cleaned and left oven racks in the oven
-
Judith from San Antonio, FL
-
Difficulty Level:Really Easy
-
Total Repair Time:Less than 15 mins
3 of 3 people
found this instruction helpful.
Was this instruction helpful to you?
Thank you for voting!
Incorrect oven temperature due to defective temperature sensor.

-
Anthony from FARMINGVILLE, NY
-
Difficulty Level:Really Easy
-
Total Repair Time:Less than 15 mins
-
Tools:Nutdriver
3 of 3 people
found this instruction helpful.
Was this instruction helpful to you?
Thank you for voting!
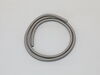
Needed to replace oven door gasket
-
Jayne from EAST PEORIA, IL
-
Difficulty Level:Very Easy
-
Total Repair Time:15 - 30 mins
-
Tools:Screw drivers
3 of 3 people
found this instruction helpful.
Was this instruction helpful to you?
Thank you for voting!
drwer slide under stove broke off.
recieved part the next day. looked different but I followed instructions and the part worked perfect.
Parts Used:

-
paul from sewell, NJ
-
Difficulty Level:Really Easy
-
Total Repair Time:Less than 15 mins
-
Tools:Screw drivers
3 of 4 people
found this instruction helpful.
Was this instruction helpful to you?
Thank you for voting!
Oven drawer open and close incorrectly
First I removed the oven drawer. Verified that the support clips would rest correctly on rail, then review installation document with supports to locate alternate location for replacement supports. I did have to personally locate 2 fastners not provided with the supports ot complete installation. After installation, oven drawer opens and closes smoothly.
Parts Used:
-
James from Goldsboro, NC
-
Difficulty Level:Easy
-
Total Repair Time:Less than 15 mins
-
Tools:Screw drivers
2 of 2 people
found this instruction helpful.
Was this instruction helpful to you?
Thank you for voting!
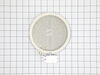
Stovetop radiant burner went out
Turned off power at circuit breaker. Disconnected electrical connections from stove and lifted stove top out of counter. Removed glass top by removing about 8 screws from side of stove top.Replaced burner element and replaced glass top.
Parts Used:
-
Frank from Marietta, GA
-
Difficulty Level:Easy
-
Total Repair Time:15 - 30 mins
-
Tools:Screw drivers
4 of 8 people
found this instruction helpful.
Was this instruction helpful to you?
Thank you for voting!
Surface burner stopped working & light indicator remained on
It took my son very little time to install control switch. Using a screw driver he removed the back panel directly behind burner units & replaced the control switch. Very easy.
Parts Used:
-
Cynthia from BALDWINSVILLE, NY
-
Difficulty Level:Very Easy
-
Total Repair Time:15 - 30 mins
-
Tools:Screw drivers
2 of 2 people
found this instruction helpful.
Was this instruction helpful to you?
Thank you for voting!
Bottom element burned out.i ordered the part.from partselect.
I took the racks out . took the two screws out holding the element.removed the two wires remove the element.then cleaned the oven.put the wires on new element. Put element back in holes.replaced screws.replaced racks.worked like new. I would recommend partselect to any one thanks Lewis
Parts Used:
-
Lewis from ZIRCONIA, NC
-
Difficulty Level:Really Easy
-
Total Repair Time:15 - 30 mins
-
Tools:Wrench (Adjustable)
2 of 2 people
found this instruction helpful.
Was this instruction helpful to you?
Thank you for voting!
Mostly Easy
I replaced the element by taking out the screws that held the old element. Removed the old element but the wires went back into the insulation and I tried fishing them out. They just wouldn't come back down after much prying. I ended up taking the back panel off and pushing them back into the oven. Once I did that the replacement was easy.
Parts Used:
-
Sharon from HUNTINGDON, PA
-
Difficulty Level:Easy
-
Total Repair Time:30 - 60 mins
-
Tools:Nutdriver, Pliers
2 of 2 people
found this instruction helpful.
Was this instruction helpful to you?
Thank you for voting!
Was burned out
-
BRINDIA from DOVER, TN
-
Difficulty Level:Really Easy
-
Total Repair Time:30 - 60 mins
-
Tools:Screw drivers, Socket set
2 of 2 people
found this instruction helpful.
Was this instruction helpful to you?
Thank you for voting!