




















J313*R1 General Electric Range - Instructions
Keep searches simple. Use keywords, e.g. "leaking", "pump", "broken" or "fit".
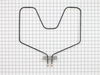
Took forever to preheat
When I told my husband I ordered the part and was going to fix it myself, he laughed and said I might not have ordered the right part for the problem and I should just buy a new stove.
The part was delivered the day before Christmas, just 3 days after I placed the order! I had read the stories of others fixing theirs and gave it a shot. It took me longer to find the tools then it did to replace the element!
I took the screws out , pulled the element toward me and disconnected the wires. Put it back the way I found it. Oven heated up in less then 5 minutes!
The part was delivered the day before Christmas, just 3 days after I placed the order! I had read the stories of others fixing theirs and gave it a shot. It took me longer to find the tools then it did to replace the element!
I took the screws out , pulled the element toward me and disconnected the wires. Put it back the way I found it. Oven heated up in less then 5 minutes!
Parts Used:
-
Terri from Edgewater, FL
-
Difficulty Level:Really Easy
-
Total Repair Time:Less than 15 mins
-
Tools:Screw drivers, Socket set
1 person
found this instruction helpful.
Was this instruction helpful to you?
Thank you for voting!
No heat on bake.
The first thing I did wrong was order the wrong part. Then later I did find the Model number on the side of the bottom drawer. I reordered the right part and turned off the electrical breaker. Removed the old element. I then installed the element in the oven with 2 screw nuts and pulled out the stove, took off the back panel and slipped the wire nuts onto the element. Very simple. I am really thankful there is a place to order the part and it came the next day after I ordered it. WHOW!
Parts Used:
-
Marian from Inglis, FL
-
Difficulty Level:Really Easy
-
Total Repair Time:Less than 15 mins
-
Tools:Nutdriver
1 person
found this instruction helpful.
Was this instruction helpful to you?
Thank you for voting!
No heat from bake element
Ordered part, took old bake element out, installed new bake element. It was real easy.
Parts Used:
-
Roberta from Southampton, NJ
-
Difficulty Level:Really Easy
-
Total Repair Time:Less than 15 mins
-
Tools:Socket set
1 person
found this instruction helpful.
Was this instruction helpful to you?
Thank you for voting!
bake element disintegrated
At 76 I no longer do my repairs so I asked my daughter's friend to do it for me.
Parts Used:
-
Susan from New Lebanon, NY
-
Difficulty Level:Really Easy
-
Total Repair Time:15 - 30 mins
1 person
found this instruction helpful.
Was this instruction helpful to you?
Thank you for voting!
Halogen element staying on
removed the end caps from the stove panel, unscrewed the back, unscrewed the old switch, CAREFULLY noting which wire went to which terminal, removed the wires.
Reversed the process. took a little longer because I felt compelled to do a thorough cleaning while I was there.
Reversed the process. took a little longer because I felt compelled to do a thorough cleaning while I was there.
Parts Used:

-
Arthur from Indian Harbour Beach, FL
-
Difficulty Level:Easy
-
Total Repair Time:30 - 60 mins
-
Tools:Pliers, Screw drivers
2 of 4 people
found this instruction helpful.
Was this instruction helpful to you?
Thank you for voting!
Bottom element had burnt out.
Unplugged stove, removed front door, carefully removed two screws holding the cover plate of the element. Gently pulled the element out about 3-4 inches removed the two screw attaching the electrical wires to the element , making sure the wires did not pull back into the stove. Removed old element, attached new element to the electrical wires with the new screws received with the new element. Carefully pushed the wires and element back into place making sure the insulation was also in place. Re-attached the cover plate with the two screws I had removed. Plugged the stove back in and tested the element. Replaced the front door .... job complete!
Just wanted to add that the part came in two days, super mailing time, thanks!!
Just wanted to add that the part came in two days, super mailing time, thanks!!
Parts Used:
-
Robert from Harrisburg, PA
-
Difficulty Level:Easy
-
Total Repair Time:15 - 30 mins
-
Tools:Screw drivers, Socket set
1 person
found this instruction helpful.
Was this instruction helpful to you?
Thank you for voting!
bake element burned out
took cover off back of stove. Removed two screws and wires that were attached to the element. Removed old element and installed new element. An easy repair.
Parts Used:
-
Dave from Maryville, OH
-
Difficulty Level:Easy
-
Total Repair Time:15 - 30 mins
-
Tools:Nutdriver, Screw drivers
1 person
found this instruction helpful.
Was this instruction helpful to you?
Thank you for voting!
Old Reliable
This range is about 30 years old and I was thrilled to still be able to get the bake element, which burned out about a month ago. I was doing research to buy a new stove when a cousin, from out of town, called to say they were going to visit the following week. No time now to get a new one installed. "partselect.com" was the fastest way. THANK YOU!
First off, I want you to know I'm an obese 56-year female without tools. But, I knew where to borrow those.
I first shut the power off to the range. I then disconnected the 2 screws that hold the element and pulled it out to reveal the 2 screws which connected the wires. I unscrewed those and removed the bake element. I double checked the stove model and bake element part # at the GE website and ordered it from "Partselect.com". It came in about 3 days. I then reversed the order of the above and it was done.
Here are some challenges I encountered..
1) The oven door was in the way making it uncomfortabe to get to the back of the stove.
2) Those $#%& screws are so short I kept dropping them.
3) The wires in the back bend easily. Be careful.
That's about it. It was a pill but not a real problem. It sure beat buying a new range before I've decided on which one to buy.
First off, I want you to know I'm an obese 56-year female without tools. But, I knew where to borrow those.
I first shut the power off to the range. I then disconnected the 2 screws that hold the element and pulled it out to reveal the 2 screws which connected the wires. I unscrewed those and removed the bake element. I double checked the stove model and bake element part # at the GE website and ordered it from "Partselect.com". It came in about 3 days. I then reversed the order of the above and it was done.
Here are some challenges I encountered..
1) The oven door was in the way making it uncomfortabe to get to the back of the stove.
2) Those $#%& screws are so short I kept dropping them.
3) The wires in the back bend easily. Be careful.
That's about it. It was a pill but not a real problem. It sure beat buying a new range before I've decided on which one to buy.
Parts Used:
-
Laura from Crofton, MD
-
Difficulty Level:A Bit Difficult
-
Total Repair Time:15 - 30 mins
-
Tools:Wrench set
1 person
found this instruction helpful.
Was this instruction helpful to you?
Thank you for voting!
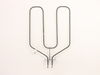
Broken broiler element
Replacing the part was fairly simple. Do not forget to dis-connect the element from the back.
Parts Used:
-
Michael from Medford, NY
-
Difficulty Level:Easy
-
Total Repair Time:15 - 30 mins
-
Tools:Nutdriver, Screw drivers
1 of 2 people
found this instruction helpful.
Was this instruction helpful to you?
Thank you for voting!
Oven would not heat, but broiler, burners and thermostat was clicking, so we figured it was the bake element.
Had to take back panel off of the inside of the oven to get to the screws to remove the old element and attache the new. Removed the two screws to remove the old, pulled it out unattached the wires and attached the new one.
Parts Used:
-
Patricia from Reading, MA
-
Difficulty Level:Easy
-
Total Repair Time:15 - 30 mins
-
Tools:Nutdriver, Screw drivers
1 of 2 people
found this instruction helpful.
Was this instruction helpful to you?
Thank you for voting!
Lower oven element burnt out
I first removed the two hex head screws, pulled the element slowly forward about four to five inches and disconected the two wires on the old element.
I removed the old element and attached the wires to the new element. I then slowly pushed it back into the rear wall of the oven, carefull not to disturb the insulation around the opening and replaced the two screws that hold the element to the back wall of the oven. It was easy enough to do, even for a woman. I turned on the oven and it worked great. No problems so far.
I removed the old element and attached the wires to the new element. I then slowly pushed it back into the rear wall of the oven, carefull not to disturb the insulation around the opening and replaced the two screws that hold the element to the back wall of the oven. It was easy enough to do, even for a woman. I turned on the oven and it worked great. No problems so far.
Parts Used:
-
Brenda from Elida, OH
-
Difficulty Level:Easy
-
Total Repair Time:15 - 30 mins
-
Tools:Nutdriver, Screw drivers, Socket set
1 of 2 people
found this instruction helpful.
Was this instruction helpful to you?
Thank you for voting!
Replace cracked broiler element
Unplugged Stove, pulled away from wall. With smaller wrenches, took the two screw-nuts off the inside back and above that hold the broiler element in place. Since it is an older stove...took the back panel off the stove with philips screw-driver which consisted of 10 screws. Once that was removed was able to unscrew the broiler element from the two wires that provide the electricity. Used the flash light when I had to unfasten the screw-nuts inside the stove because kitchen lighting wasn't strong enough.
Parts Used:
-
Deborah from Middletown, CT
-
Difficulty Level:Easy
-
Total Repair Time:30 - 60 mins
-
Tools:Screw drivers, Wrench set
1 of 2 people
found this instruction helpful.
Was this instruction helpful to you?
Thank you for voting!
Both the baking and the broiling element had gone bad.
1. Found and turned off the breaker to the oven.
2. Removed the 2 screws holding the baking element in place.
3. Pulled the baking element out from its' mount.
4. Disconnected the electric leads to the baking element.
5. Connected the electric leads to the new baking element.
6. Replaced the new baking element in its' mount.
7. Replaced and tightened the 2 screws to hold the new baking element in place.
8. Repeated steps 2-7 for the broiling element.
9. Turned the breaker back on.
10. Successfully tested both elements.
2. Removed the 2 screws holding the baking element in place.
3. Pulled the baking element out from its' mount.
4. Disconnected the electric leads to the baking element.
5. Connected the electric leads to the new baking element.
6. Replaced the new baking element in its' mount.
7. Replaced and tightened the 2 screws to hold the new baking element in place.
8. Repeated steps 2-7 for the broiling element.
9. Turned the breaker back on.
10. Successfully tested both elements.
Parts Used:
-
John from Basking Ridge, NJ
-
Difficulty Level:Easy
-
Total Repair Time:30 - 60 mins
-
Tools:Pliers, Screw drivers
1 of 2 people
found this instruction helpful.
Was this instruction helpful to you?
Thank you for voting!
no power going to burner when switch is on, switch bad
I followed the easy instructions and everything went well. I had the new switch installed in about 30 minutes. My wires were different colors than on the instructions but it was still easy to figure out where the wires went on the new switch. Just do not be in a hurry and make sure you measure before you break off the extension bar. My knob fit on the new switch without any of the parts that came with the switch.
Parts Used:
-
Robert from Woolwich Twp., NJ
-
Difficulty Level:Easy
-
Total Repair Time:15 - 30 mins
-
Tools:Pliers, Screw drivers
2 of 5 people
found this instruction helpful.
Was this instruction helpful to you?
Thank you for voting!
lower element did not heat
First shut off power to the store and used a socket set to remove 2 screws and disconnnect the element. Connected the new element but had to use the old screws as the new ones did not work with my appliance.
Parts Used:
-
mary from cape coral, FL
-
Difficulty Level:Easy
-
Total Repair Time:15 - 30 mins
-
Tools:Screw drivers, Socket set
1 of 2 people
found this instruction helpful.
Was this instruction helpful to you?
Thank you for voting!