




















HTDP120GD5WW Hotpoint Dryer - Instructions
Keep searches simple. Use keywords, e.g. "leaking", "pump", "broken" or "fit".
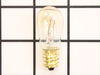
Bulb was intermittently working
Inspected door switch operation and was working properly and simply looked for bulb in the dryer drum housing and located it immediately above the door opening,unscrewed it and noticed the broken elements inside. The bulb is a 10w/120V. Installed bulb problem solved.
Parts Used:
-
Peter from LEOMINSTER, MA
-
Difficulty Level:Very Easy
-
Total Repair Time:Less than 15 mins
1 person
found this instruction helpful.
Was this instruction helpful to you?
Thank you for voting!
Knob broke

-
CAROLINE from SAN ANTONIO, TX
-
Difficulty Level:Really Easy
-
Total Repair Time:Less than 15 mins
1 person
found this instruction helpful.
Was this instruction helpful to you?
Thank you for voting!
The small clip in the Timer Knob was broken and the Knob would not turn the timer.
First I took the system apart which I did not have to do. However, by doing that I was able to figure out which parts make the timer run. Anyhow, you simply place the new timer knob on the small shaft and it worked like magic. It was very easy to do.
Parts Used:
-
Michael from TAMPA, FL
-
Difficulty Level:Very Easy
-
Total Repair Time:Less than 15 mins
-
Tools:Pliers
1 person
found this instruction helpful.
Was this instruction helpful to you?
Thank you for voting!
Broken knob
-
Cheryl from LIMA, OH
-
Difficulty Level:Very Easy
-
Total Repair Time:Less than 15 mins
1 person
found this instruction helpful.
Was this instruction helpful to you?
Thank you for voting!
Timer knob fell off. Had a crack in it.
Opened the package. pushes the new knob on and voila it worked! It was very easy.
Parts Used:
-
Mary from LEONARDTOWN, MD
-
Difficulty Level:Really Easy
-
Total Repair Time:Less than 15 mins
1 person
found this instruction helpful.
Was this instruction helpful to you?
Thank you for voting!
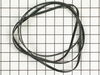
Dryer Belt Broke
After unplugging the dryer, I removed 2 metal screws up under the dryer sill rim, and removed the dryer top. Then, removed two more at the top of the front (door) section to remove it.
I wasn't careful enough when removing the door, and the wiring connectors popped loose from their connections. No harm done, though. Disconnect the wires once you remove the front panel.
I had to loosen the bottom metal screws on one side panel to have enough give to pull the dryer drum out.
The only way to replace the belt is to bend over the side of this unit and with one hand put the belt around the motor drive shaft, pull the tension pulley back, and put the belt on the wheel.
The hard part is working the drum back into place while VERY carefully slipping the belt into the drum goove. Many attempts were made only to have the belt slip off of the tension pulley or motor driveshaft. Be care full to turn the drum clock wise if the belt twists while working it into the drum groove. It was very disappointing to finally get the belt on, and work the drum back into place only to discover I had twisted the belt with the smooth side making contact on the driveshaft. Thus, I started over.
Aiming the drum into the back of the dryer is a tough task. I recommend a 1" X 4 " X 12" board to slip under the drum when beginning this process to help stablize, and guide the drum. It helped me tremendously, and was easy to remove out from under the drum once everything was back in place.
Use gloves. Yes, tough to work with in small places, and I did take them off to replace the belt around the tension pulley, however, there are too many sharp edges on the metal body of the dryer and especially the drum to do so without gloves.
Wires were easy to reattach and reassembly was smooth except for the top...check out the tabs, and spring tabs before you try and just plop the top back on. It goes a certain way...You'll know what i am talking about when you do this task.
I truly hope you have L O N G arms to do this task, and that the new belt lasts a long, long time!
I wasn't careful enough when removing the door, and the wiring connectors popped loose from their connections. No harm done, though. Disconnect the wires once you remove the front panel.
I had to loosen the bottom metal screws on one side panel to have enough give to pull the dryer drum out.
The only way to replace the belt is to bend over the side of this unit and with one hand put the belt around the motor drive shaft, pull the tension pulley back, and put the belt on the wheel.
The hard part is working the drum back into place while VERY carefully slipping the belt into the drum goove. Many attempts were made only to have the belt slip off of the tension pulley or motor driveshaft. Be care full to turn the drum clock wise if the belt twists while working it into the drum groove. It was very disappointing to finally get the belt on, and work the drum back into place only to discover I had twisted the belt with the smooth side making contact on the driveshaft. Thus, I started over.
Aiming the drum into the back of the dryer is a tough task. I recommend a 1" X 4 " X 12" board to slip under the drum when beginning this process to help stablize, and guide the drum. It helped me tremendously, and was easy to remove out from under the drum once everything was back in place.
Use gloves. Yes, tough to work with in small places, and I did take them off to replace the belt around the tension pulley, however, there are too many sharp edges on the metal body of the dryer and especially the drum to do so without gloves.
Wires were easy to reattach and reassembly was smooth except for the top...check out the tabs, and spring tabs before you try and just plop the top back on. It goes a certain way...You'll know what i am talking about when you do this task.
I truly hope you have L O N G arms to do this task, and that the new belt lasts a long, long time!
Parts Used:
-
Michael E from Victoria, TX
-
Difficulty Level:A Bit Difficult
-
Total Repair Time:More than 2 hours
-
Tools:Screw drivers
2 of 4 people
found this instruction helpful.
Was this instruction helpful to you?
Thank you for voting!
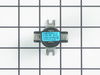
Dryer was over heating and shutting off after like 5 minutes, the back was hot to touch..got the cycling thermostat problem solved
4 screws to open it up,pull out the wheel and there it is on back . Pretty easy..
Parts Used:
-
Bruce from CHANUTE, KS
-
Difficulty Level:Easy
-
Total Repair Time:30 - 60 mins
-
Tools:Screw drivers
1 person
found this instruction helpful.
Was this instruction helpful to you?
Thank you for voting!
unable to select anything on the wash cycle selector
the original knob had cracked and I ordered a new one and replaced it, all is well, thank you
Parts Used:
-
Rodney from BATESVILLE, IN
-
Difficulty Level:Very Easy
-
Total Repair Time:Less than 15 mins
1 person
found this instruction helpful.
Was this instruction helpful to you?
Thank you for voting!
Reversing the dryer door.
-
Chris from WACO, TX
-
Difficulty Level:Easy
-
Total Repair Time:15 - 30 mins
-
Tools:Screw drivers
1 person
found this instruction helpful.
Was this instruction helpful to you?
Thank you for voting!
Timer Knob
-
Sharon from FARMERVILLE, LA
-
Difficulty Level:Very Easy
-
Total Repair Time:Less than 15 mins
1 person
found this instruction helpful.
Was this instruction helpful to you?
Thank you for voting!
The door handle was comming off had broken hook
I pulled the old handle off and pushed the new one on.
No problem at all.
No problem at all.
Parts Used:
-
John C. from Cincinnati, OH
-
Difficulty Level:Really Easy
-
Total Repair Time:Less than 15 mins
1 person
found this instruction helpful.
Was this instruction helpful to you?
Thank you for voting!
knob broke
-
Jim from CRAWFORDVILLE, FL
-
Difficulty Level:Very Easy
-
Total Repair Time:Less than 15 mins
1 person
found this instruction helpful.
Was this instruction helpful to you?
Thank you for voting!
Replace knob
-
Dave from DOUGLAS, WY
-
Difficulty Level:Very Easy
-
Total Repair Time:Less than 15 mins
1 person
found this instruction helpful.
Was this instruction helpful to you?
Thank you for voting!
The old dryer knob broke
-
Charlie from KILGORE, TX
-
Difficulty Level:Very Easy
-
Total Repair Time:Less than 15 mins
1 person
found this instruction helpful.
Was this instruction helpful to you?
Thank you for voting!
Dryer didn't turn on
The part came today…and I installed it in 10 minutes. The only time consuming part was locating a torx screwdriver which was needed to remove the panel.
Lifted the panel, extracted the existing switch and
disconnected the wires and used a flathhead screwdriver to lift off the existing switch. Reconnected the new piece, and voila my dryer worked!
Your site is great!
Lifted the panel, extracted the existing switch and
disconnected the wires and used a flathhead screwdriver to lift off the existing switch. Reconnected the new piece, and voila my dryer worked!
Your site is great!
Parts Used:
-
Rachel from Monsey, NY
-
Difficulty Level:Really Easy
-
Total Repair Time:Less than 15 mins
-
Tools:Screw drivers
2 of 4 people
found this instruction helpful.
Was this instruction helpful to you?
Thank you for voting!