




















HTDP120ED4WW Hotpoint Dryer - Instructions
Keep searches simple. Use keywords, e.g. "leaking", "pump", "broken" or "fit".
WAITING ON PART
Still waiting for your parts. over two weeks to get part which was a hinge for something, I don't know what, but not my dryer seal. You said you would refund shipping and wrong part and charge me for a new order. End result was I got charged extra shipping for your mistake. The part still is MIA and it has been 5 weeks since I originally ordered. Will never do business with you again.
Parts Used:
-
MARTIN from MOUNTAIN VIEW, WY
-
Difficulty Level:Very Difficult
-
Total Repair Time:More than 2 hours
2 of 2 people
found this instruction helpful.
Was this instruction helpful to you?
Thank you for voting!
Dryer leaving stains on clothes
Shortly after a piece of felt (the duct felt seal) was visible on the drum intererior, the dryer started making metal-on-metal squeaks. A few weeks later it started leaving'machine part' type brown/black marks on clothes. With the model # it was quite easy to find and order the correct part, which arrived a few days later. The accompanying video made installation quite straightforward, even for someone who's NEVER worked on a dryer before - even though the model used wasn't the same. Over half the repair time was to clean out lint and dirt from the various exposed parts. Overall, an easy and effective repair that solved the staining issue. Follow the video and you won't go wrong.
Parts Used:
-
Tahir from ARLINGTON, MA
-
Difficulty Level:Easy
-
Total Repair Time:1- 2 hours
-
Tools:Screw drivers
3 of 5 people
found this instruction helpful.
Was this instruction helpful to you?
Thank you for voting!
Dryer turns on as soon as door is closed.
Gently pull off all knobs and put aside. Remove the panel screws using the star bit. Tip panel forward. Remove three wires from old switch and put them on same terminals on new switch. Use the screwdriver to gently pull up the old switch's locking arm from the slot in the front panel and rotate the old switch until it pops out of the front panel. Insert the new switch into the panel and rotate until the locking arm clicks into place. Replace front panel making sure no wires are pinched. Re-install the front panel screws and control knobs.
Parts Used:
-
Douglas from ETOWAH, NC
-
Difficulty Level:Easy
-
Total Repair Time:15 - 30 mins
-
Tools:Screw drivers
2 of 2 people
found this instruction helpful.
Was this instruction helpful to you?
Thank you for voting!
Replaced broken lint filter.
-
Paul from LOVELAND, CO
-
Difficulty Level:Very Easy
-
Total Repair Time:Less than 15 mins
2 of 2 people
found this instruction helpful.
Was this instruction helpful to you?
Thank you for voting!
Dryer did not turn off when the door was opened and then closed.
Followed your video instructions and it worked exactly as described. You will be my source for all appliance repair parts.
Parts Used:
-
Robert from SOMERSET, NJ
-
Difficulty Level:Very Easy
-
Total Repair Time:Less than 15 mins
-
Tools:Pliers, Screw drivers
2 of 2 people
found this instruction helpful.
Was this instruction helpful to you?
Thank you for voting!
belt broke
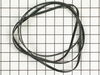
-
joseph a from VALLEY STREAM, NY
-
Difficulty Level:Easy
-
Total Repair Time:30 - 60 mins
-
Tools:Pliers, Screw drivers
2 of 2 people
found this instruction helpful.
Was this instruction helpful to you?
Thank you for voting!
Dryer made noise and squeaked the entire time the dryer was running.
I watched the Parts Select video with Steve and he showed me how to do the repair. Took the top cover off and front door panel, I did not undo the wiring on the door switch. Removed the old top bearing (it snaps in and out) put the new one in placed the glide bearing put everything back together and no more noise. It worked.
Parts Used:
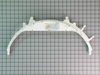

-
Samuel from PHILADELPHIA, PA
-
Difficulty Level:Easy
-
Total Repair Time:30 - 60 mins
-
Tools:Screw drivers, Wrench set
2 of 2 people
found this instruction helpful.
Was this instruction helpful to you?
Thank you for voting!
Old dryer filter was cracked and bulb burnt out
Easy peasey! Just Removed/Replace screw-in type bulb.
Parts Used:

-
Michael from MEMPHIS, TN
-
Difficulty Level:Very Easy
-
Total Repair Time:Less than 15 mins
2 of 2 people
found this instruction helpful.
Was this instruction helpful to you?
Thank you for voting!
Dryer timer had gone out, and would not start.
I remove the know, slid the old timer out, leaving the wires connected. Placed the new timer into position and secured it, then unplugged wiring one at a time, placing them onto the new timer. All went great.
Parts Used:
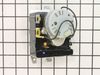
-
JESSIE from NATCHEZ, MS
-
Difficulty Level:Very Easy
-
Total Repair Time:Less than 15 mins
-
Tools:Socket set
2 of 2 people
found this instruction helpful.
Was this instruction helpful to you?
Thank you for voting!
Broken door handle
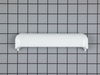
-
Bud from RCH CUCAMONGA, CA
-
Difficulty Level:Very Easy
-
Total Repair Time:Less than 15 mins
2 of 2 people
found this instruction helpful.
Was this instruction helpful to you?
Thank you for voting!
DRYER WOULD STAY ON UNLESS THE TIMER SWITCH WAS IN THE OFF POSITION
UNPLUGGED THE DRYER AND PULLED THE DIAL FROM THE START SWITCH. REMOVED THE FOUR SCREWS FROM THE TOP OF THE CONTROL PANEL WITH A T20 STAR SCREWDRIVER. PULLED THE CONTROL PANEL COVER FORWARD. LABELED THE THREE WIRES GOING TO THE START SWITCH WITH THE NUMBERS ON THE OLD SWITCH. PULLED THE WIRES OFF THE OLD SWITCH. LIFTED THE RETAINING CLIP ON THE OLD SWITCH AND ROTATED THE SWITCH ABOUT 90 DEGREES. PULLED THE OLD SWITCH OUT AND INSTALLED THE NEW SWITCH, ROTATING IT UNTIL THE RETAINING CLIP SNAPPED INTO PLACE. CONNECTED THE WIRES TO THE CORRECT NUMBERED TERMINALS ON THE NEW SWITCH. PUT THE CONTROL PANEL COVER BACK IN PLACE AND REATTACHED IT WITH THE SCREWS, REPLACED THE DIAL AND PLUGGED IN THE DRYER.
Parts Used:
-
JACK A from HIALEAH, FL
-
Difficulty Level:Very Easy
-
Total Repair Time:Less than 15 mins
2 of 2 people
found this instruction helpful.
Was this instruction helpful to you?
Thank you for voting!
Dryer wouldn't start
Unplugged the dryer. Removed the 4 star headed screws with a screwdriver. Tilted the console forward and lifted. I didn't have to slide mine to the right. Pulled the knob straight off the front of the console. Lifted the lock tab with the needle nose pliers and twisted the switch to the right. It popped right out. Pulled the wires off with the pliers. Be aware, there are three wires, two red and one black. The both red wires only connect to one terminal on the switch. It looked at first glance as if I had the wrong part. But those two wires are connected to each other so it was correct. Plugged those wires back on. Put the switch into the hole and twisted it back into place, the lock clicked in to place. Replaced the console and plugged it back in and it worked perfectly. Turned right on. This took me under 15 minutes to do. Steve is the man! This girl has been able to use his videos to repair the dryer 3 times, the washer once, and my dishwasher 3 times over the years!!
Parts Used:
-
CHERI from CREEKSIDE, PA
-
Difficulty Level:Really Easy
-
Total Repair Time:Less than 15 mins
-
Tools:Pliers, Screw drivers
2 of 2 people
found this instruction helpful.
Was this instruction helpful to you?
Thank you for voting!
My girlfriend told me her dryer wouldn't shut off and she was concerned about a house fire.
Based on the few components in a dryer, I diagnosed the problem as a defective timer switch. Five screws remove the rear cover. The timer switch purchased was the identical part that was currently installed. In the old days, I would have drawn a picture to note the wiring connections. These days, we just take a picture on a cell phone. I removed the switch from the dryer and moved the wire connections one at a time over to the new switch. When all of the connections were in place, I installed the new switch. With cover still removed, we tested it and the dryer shut off as it should. Super easy repair. The only thing I would have done differently is I should have purchased a replacement knob and retainer - the original had cracks in the plastic that I didn't know about until re-assembly. Superglue took care of the knob, but I should have replaced it too. Disconnect the power cord first, take your time, and be careful with the sharp edges of sheet metal. I suffered an ugly cut on my finger but I'll survive. Super easy repair. She'll think you're a hero since she didn't have to call a repair man.
Parts Used:
-
Bryan from FULTONDALE, AL
-
Difficulty Level:Very Easy
-
Total Repair Time:15 - 30 mins
-
Tools:Pliers, Screw drivers
2 of 2 people
found this instruction helpful.
Was this instruction helpful to you?
Thank you for voting!
the dial was hard to turn and the timer quit working
YouTube showed me just what to do. I unplugged the dryer and took the back off. Then I took a picture of the timer with my phone since there were about 6 different colored wires that had to be unhooked and put back in the right place. It was not difficult. Last I turned the timer in the bracket so it was secure. I also had to order a new dial since the old one was split from years of use. A repairman would have charged for the call out plus the parts so I saved money by doing it myself. P.S. I'm a 71 year old woman.
Parts Used:
-
Kathleen from HASTINGS, NE
-
Difficulty Level:Really Easy
-
Total Repair Time:15 - 30 mins
-
Tools:Pliers, Screw drivers
2 of 2 people
found this instruction helpful.
Was this instruction helpful to you?
Thank you for voting!
Loud noise

-
Mary from Enterprise, AL
-
Difficulty Level:Easy
-
Total Repair Time:15 - 30 mins
-
Tools:Screw drivers
3 of 5 people
found this instruction helpful.
Was this instruction helpful to you?
Thank you for voting!