This lid lock, also referred to as a door lock, is a genuine replacement component designed to secure the washing machine lid during operation. It ensures the appliance recognizes when the lid is prop...
This suspension rod and spring assembly is a manufacturer-approved replacement part designed to stabilize the washer tub during operation. Positioned on the left side of the machine, it is one of four...
Are you struggling with a malfunctioning washing machine? We have just the solution you need'the GE Drain Hose. This simple but essential part is tailor-made for washing machines, tasked with safely d...
Designed to regulate water flow during wash cycles, this inlet valve assembly manages both hot and cold water entry into your washing machine. Common signs of a failing valve include improper filling,...
Having trouble with your GE washer? Our Nut Hub could be just the solution you need. This little device has a big job ? it tightly secures your washer hub to the gear case shaft. Its accuracy helps yo...
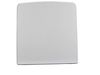
This large white washer lid is a genuine OEM replacement for top-load washing machines, designed to cover the drum securely, prevent water splashing, and ensure safe operation during wash cycles. Buil...
$193.64
Special Order
Questions And Answers for GTW460ASJ6WW
Ask our experts a question about this model and we'll get back to you as soon as possible!
35 questions answered by our experts.
< Prev
1
2
3
Next >
Sort by:
Search filter:
Clear Filter
Your search term must have 3 or more characters.
Keep searches simple. Use keywords, e.g. "leaking", "pump", "broken" or "fit".
Sorry, we couldn't find any existing answers that matched.Try using some different or simpler keywords, or submit your new question by using the "Ask a Question" button above!
Tonia
November 30, 2019
Why won't it spin??? why does it always beep when not in use?
For model number GTW460ASJ6WW
Hi Tonia, it may be a faulty door lock. If this part is broken, your washer may not run because it thinks the door is open. Based on the beeping it could also be a faulty control board.Thank you for your question and good luck with your repair!
7 peoplefound this helpful.
Was this helpful?
Thank you for voting!
Theresa
December 10, 2019
Fabric softener container does not drain well. Use downy ultra he and usually fill to first line. At least every 5 loads I have to remove and clean container and holes to disperse are all gunked up.
For model number GTW460ASJ6WW
Hello Theresa, Thank you for the question. I suggest checking the water pressure to make sure it is flowing enough to rinse the softener from the cup. Hope this helps!
4 peoplefound this helpful.
Was this helpful?
Thank you for voting!
Robert
March 25, 2022
When in delicate cycle washer bangs
When in normal wash cycle noisy slight grinding
My research says tub bearing...agree?
can't find it on your site
For model number GTW460ASJ6WW
Hi Robert,
Thank you for your question. If your washer shakes and moves, you will need to check the suspension rods, part numbers PS12343380 and PS12343381. If you are hearing a grinding noise when the washer is agitating, then the issue is likely tub bearing. The tub bearing would be part of the gearcase, part number PS12298171. Once you have determined the part you need, please feel free to call customer service. We are open 7 days a week and anyone will be happy to assist you. We look forward to hearing from you!
My washer will spin, but it won’t agitate. I’ve already put the door switch in and had it spin out but I can’t get it to agitate. Any suggestions?
For model number GTW460ASJ6WW
Hi Butch, thank you for the question. We have concluded that the issue is with the mode shifter, part number PS16554752, which may need to be replaced. The mode shifter is a component that causes the transmission to change between agitation and spinning modes. If the mode shifter is defective, the transmission may be stuck in the spin mode, resulting in the washer not agitating. Before replacing the mode shifter, make sure that the agitator is properly secured and not loose. We hope this helps, good luck with this repair!
3 peoplefound this helpful.
Was this helpful?
Thank you for voting!
John
November 4, 2021
Final spin, washer stops, light blinks & washer commences a refill. Control board?
For model number GTW460ASJ6WW
Hello John, Thank you for the question. Depending on what lights are blinking and how many blinks, this could indicate the Control Board is defective. We hope this helps!
1 personfound this helpful.
Was this helpful?
Thank you for voting!
< Prev
1
2
3
Next >
✖
Ask a Question
Ask our experts a question on this model and we'll respond as soon as we can.
Drain all the water out of the tub with a shop vac Remove rear drain hose and drained rest of water into a bucket Remove small rear panel (bottom left hand corner) where the drain hose connects Tipped washer up about 45 degrees to get underneath it - Supported it with a few paint cans Remove internal drain hose/clamps from pump - w/ pliers Remove belt cover (gray plastic) with socket - 3 bolts Remove wire assembly plug from socket Remove old drain pump with socket - 3 bolts Install new drain pump - 3 bolts - plug wire assembly into socket Reinstall belt cover - 3 bolts Reinstall hose to drain pump (note panel will be inside washer) Feed drain hose panel through hole and reinstall - 1 nut Re attached drain hose to exterior drain plug You are done !
Very simple to repair. Be sure to drain the tub outside or into the sump pump then lay the washer on its side. The pump is right there on the bottom of the basket with 3 bolts. You will also need to remove the belt cover to get to the plug. So simple and saves you hundreds off repair man prices.
I thought it was the control board from the onset, but 'Online experts" said it was more likely the mode shifter or the lid lock. I ordered one of each, did not correct problem. Ordered the control board that was designated for this unit, it did not correct problem. Defective? Was send replacememnt, did not fix problem. Twice? Phone conversation with parts person, and after a little digging, it was NOT the correct board, correct board was not available. Returned all parts, refunds all around. Ordered correct board from another site, installed, programed, SUCCESS! Total repair time/installation-less than 15 minutes. Getting the correct part 30 days.