




















GTH18GCDHRWW General Electric Refrigerator - Instructions
Keep searches simple. Use keywords, e.g. "leaking", "pump", "broken" or "fit".
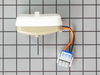
Fan not working
Took out old put new in. Watched a u tube, no problems
Parts Used:

-
joan from STERLING HTS, MI
-
Difficulty Level:Easy
-
Total Repair Time:1- 2 hours
-
Tools:Screw drivers, Socket set
3 of 3 people
found this instruction helpful.
Was this instruction helpful to you?
Thank you for voting!
intermittent loud screeching,,humming sound
removed food from freezer section removed fan guard, partially remove ice maker, remove back panel, then fan assembly,disaasembled fan motor from brackets, fan from motor, grommet from bracket. assembled grommet in bracket, fan blade on motor, motor in bracket, fan assembly back in compartment, installed back panel,then ice maker, replaced fan guard and food. no more noise.
Parts Used:
-
LARRY. T from KNOXVILLE, TN
-
Difficulty Level:Easy
-
Total Repair Time:30 - 60 mins
-
Tools:Nutdriver, Pliers, Screw drivers
3 of 3 people
found this instruction helpful.
Was this instruction helpful to you?
Thank you for voting!
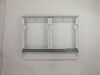
Plastic bracket broke so vegetable drawer would no longer stay in place
Pipes out the glass from existing shelf while in place inside refrigerator. Remove broken shelf. Install new shelf. Clean and replace glass. Easy job thanks to finding the correct part from Part Select!
Parts Used:
-
jim from CORNING, NY
-
Difficulty Level:Really Easy
-
Total Repair Time:30 - 60 mins
3 of 3 people
found this instruction helpful.
Was this instruction helpful to you?
Thank you for voting!
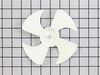
Motor making screeching sounds
Removed back panel
Unplugged wires to motor
Removed motor & fan assembly
Attached new fan to new motor
Attached motor to motor housing
Reattached wires
Reinstalled back panel
Unplugged wires to motor
Removed motor & fan assembly
Attached new fan to new motor
Attached motor to motor housing
Reattached wires
Reinstalled back panel
Parts Used:

-
David from MELBOURNE BCH, FL
-
Difficulty Level:A Bit Difficult
-
Total Repair Time:30 - 60 mins
-
Tools:Screw drivers, Socket set
3 of 3 people
found this instruction helpful.
Was this instruction helpful to you?
Thank you for voting!
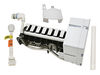
Ice maker needed replacement
Unplug refridge then loosened two bolts holding old ice maker. Lower then unplug and removed. Plugged in new harness and tightened two bolts to secure new ice maker. Plug in frig and wait for ice.
Parts Used:
-
James from PLYMOUTH, MA
-
Difficulty Level:Really Easy
-
Total Repair Time:15 - 30 mins
-
Tools:Socket set
3 of 3 people
found this instruction helpful.
Was this instruction helpful to you?
Thank you for voting!
switchlight on my refrigerator was not working
I found instructions on the web about how to do this repair, so I ordered the part with confidence. But the instructions simply said "pull out the old switchlight". That was actually somewhat difficult as the clip on the side intended to hold the part in was stubborn. I eventually used a utility to slice off the clip. From that point, it was just a matter of plugging in the new switchlight , which was very simple.
Parts Used:

-
Eileen from Coto de Caza, CA
-
Difficulty Level:A Bit Difficult
-
Total Repair Time:30 - 60 mins
-
Tools:Pliers
5 of 10 people
found this instruction helpful.
Was this instruction helpful to you?
Thank you for voting!
Compressor would randomly not turn on. Fridge too warm sometimes.
Replace temperature control. That fixed it. Also, removed plastic bag obstructing air vent in freezer which added performance. Fridge works good now.
Parts Used:
-
Mackenzie from Williston, ND
-
Difficulty Level:Really Easy
-
Total Repair Time:30 - 60 mins
-
Tools:Screw drivers
3 of 4 people
found this instruction helpful.
Was this instruction helpful to you?
Thank you for voting!
Freezer was not freezing food.
Inspected freezer because food was not freezing, getting cold, but not freezing. Noticed fan was not blowing air, but making a little motor noise, like it's trying to turn. Removed cover panel, and found the fan blade rubbing on the panel, fan shaft was worn out and very loose, wobley. That told me the fan needed to be replaced. Found part on the GE Partselect website and ordered the parts via the website order process. This was easy. The parts were shipped quickley and were at my front door the next day. Couldn't believe it. The actual process was very easy: Remove cover, remove bracket holding fan motor, remove and replace motor, re-assemble parts. About 20-25 minutes from start to finish. Freezer is working like it's suppose to.
Parts Used:
-
Steve from Ridgecrest, CA
-
Difficulty Level:Really Easy
-
Total Repair Time:15 - 30 mins
-
Tools:Nutdriver, Screw drivers
3 of 4 people
found this instruction helpful.
Was this instruction helpful to you?
Thank you for voting!
Replace the door gasket on the freezer door of my top-freezer refrigerator
Removed the door by removing the two screws holding it on. Do not try to do this repair with the door attached. Easily removed the old gasket. Getting the new one on the door was EXTREMELY difficult. I couldn't do it. After 90 minutes, I gave up and called my appliance repairman. When he arrived, he and I worked together to get the new gasket on the door. It took 2 sets of hands to do this. It still took us about 40 minutes. My repairman had a few choice words about the design of the system holding the gasket on the door. Ditto for me. So the cost of my repair was doubled because I had to pay the repairman to help me attach the new gasket. I should have just bought a new fridge.
Parts Used:
-
Scott from NAPLES, FL
-
Difficulty Level:Very Difficult
-
Total Repair Time:1- 2 hours
-
Tools:Socket set
3 of 4 people
found this instruction helpful.
Was this instruction helpful to you?
Thank you for voting!
Ice maker arm disconnected from frame causing problems.
The icemaker arm disconnected from the metal frame. This caused the icemaker to cycle and the heater to come on and stay on until the plastic parts melted causing a mess and stink. This action melted the ice and then the water fell through the frozen items in the freezer and refreezed in the lower portion. OK, I remover the dead icemaker and tossed it away. I installed the new icemaker and the wiring harness didn't fit right (way to long). I retrieved the old icemaker and removed the wiring harness from it. I removerd the new ice maker and installed the old wiring harness to the new icemaker. I then installed the new icemaker, plugged it in and turned on the power. No water, I ordered the dual solenoid water valve, installed it with difficulty (another story) the turned on the power. I reinstalled the ice bin and found it didn't fit. The icemaker was to low and couldn't be adjusted, 1/4" higher would have been great. I shoved in the bin anyway, I was out of ice for my scotch, and it started making ice.
Parts Used:
-
Kenneth from Callaway, FL
-
Difficulty Level:A Bit Difficult
-
Total Repair Time:1- 2 hours
-
Tools:Pliers, Screw drivers, Wrench (Adjustable)
5 of 10 people
found this instruction helpful.
Was this instruction helpful to you?
Thank you for voting!
Freezer shelf bracket broke. .
Took the bracket out of box and install it like the video showed me..very easy to install..
Parts Used:
-
George from Elkhart, IN
-
Difficulty Level:Really Easy
-
Total Repair Time:30 - 60 mins
3 of 4 people
found this instruction helpful.
Was this instruction helpful to you?
Thank you for voting!
Condensor fan blade cracked, blade was sheared off.
First, remove the cardboard cover on the back, lower portion of the refrigerator.
Next, locate the condensor fan motor assembly and blade. (Right side as you are facing)
Using a pliers, hold the shaft to keep it from turning and prevent damage to the motor. Using a screwdriver, slide the old ring compression on the blade shaft toward the motor (away from the fan blades) to loosen.
Remove old blade from the shaft by firmly grasping the motor shaft with a pliers (to prevent from damaging) and pull the blade assembly off.
Reverse the above steps to attach the new blade.
Next, locate the condensor fan motor assembly and blade. (Right side as you are facing)
Using a pliers, hold the shaft to keep it from turning and prevent damage to the motor. Using a screwdriver, slide the old ring compression on the blade shaft toward the motor (away from the fan blades) to loosen.
Remove old blade from the shaft by firmly grasping the motor shaft with a pliers (to prevent from damaging) and pull the blade assembly off.
Reverse the above steps to attach the new blade.
Parts Used:
-
Bradley from Cedarburg, WI
-
Difficulty Level:Easy
-
Total Repair Time:Less than 15 mins
-
Tools:Pliers, Screw drivers
3 of 4 people
found this instruction helpful.
Was this instruction helpful to you?
Thank you for voting!
icemaker stripper fall a part
instalation was very easy - but the part was 3/4 inch to long and a 1/32 inch to wide.Trimmed it with the "faithfull"
Dremel and it works!The instalation part of the "job" was less then 10 min.
Dremel and it works!The instalation part of the "job" was less then 10 min.
Parts Used:
-
Ted from Harrisonburg, VA
-
Difficulty Level:Easy
-
Total Repair Time:15 - 30 mins
-
Tools:Screw drivers
3 of 4 people
found this instruction helpful.
Was this instruction helpful to you?
Thank you for voting!
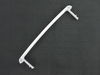
Broken freezee door shelf
-
Sophie from WASHINGTON, DC
-
Difficulty Level:Very Easy
-
Total Repair Time:Less than 15 mins
3 of 4 people
found this instruction helpful.
Was this instruction helpful to you?
Thank you for voting!
Fridge never cuts off.freeze everything inside of fridge.
To remove the temp sensor.2 Phillip head screws not remove the cover inside fridge .the temp control knob cover.removed that and unplugged switch.installed new switch.reinstalled cover.
Parts Used:
-
Henry from DOUGLASVILLE, GA
-
Difficulty Level:Very Easy
-
Total Repair Time:Less than 15 mins
-
Tools:Screw drivers
3 of 4 people
found this instruction helpful.
Was this instruction helpful to you?
Thank you for voting!