




















GTH18GCDHRWW General Electric Refrigerator - Instructions
Keep searches simple. Use keywords, e.g. "leaking", "pump", "broken" or "fit".
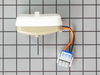
Evaporating fan not working
I did folllow the instructions on the video step by step.
Parts Used:


-
flor from glen cove, NY
-
Difficulty Level:Really Easy
-
Total Repair Time:30 - 60 mins
-
Tools:Nutdriver, Pliers, Screw drivers, Socket set, Wrench (Adjustable)
7 of 8 people
found this instruction helpful.
Was this instruction helpful to you?
Thank you for voting!
Twice I ordered the oven light bulb & each time the light bulb was defected
I had to call for a appointment for repair with GE Appliance because I thought then it . .was something electrical. The technician came out & checked everything out, turned out it was not electrical, The technician went out to his truck got a light bulb from his truck, put it in & it worked. It cost me $121.00 for trip charge from GE appliance for a light bulb that worked, your light bulbs were defective twice. Very disappointed with your products, cost me alot of money for a good light bulb thru GE appliance
Parts Used:

-
Barbara from BELLEVUE, WA
-
Difficulty Level:Very Difficult
-
Total Repair Time:Less than 15 mins
15 of 32 people
found this instruction helpful.
Was this instruction helpful to you?
Thank you for voting!
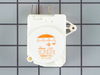
Refridgerator wouldn't cycle into defrost mode without doing it manually.
I removed the shield over the timer and the part that supported the timer. Just unpluged it and pluged in new timer and put back shield. I had already replaced the defrost heaters which had totally burned up. I also replaced the thermostat while I was making the repairs although the old one was still o.k. All the information that I needed to make the repairs I obtained through your website. After looking at several websites to compare prices-etc, I found yours to be the best overall. Thanks-a-million your website is worth it's weight in Cold Food !
Parts Used:
-
Ben from Warrior, AL
-
Difficulty Level:Easy
-
Total Repair Time:15 - 30 mins
-
Tools:Screw drivers, Socket set
9 of 14 people
found this instruction helpful.
Was this instruction helpful to you?
Thank you for voting!
refrigerator wasn't cooling but the freezer was working properly
From instructions found on the site I was directed to the defrost timer part being bad. And from the information others posted that have had the same problem I was able to replace that part by removing the bottom grill just below the door and on the left side was the part. Removing one screw to remove the bracket from the frame and then another screw to remove the part from the bracket. I found it easier to remove the part from the bracket before I pulled the part out so I would have more room to unplug the connector. Just reverse the steps to replace the new part. It took about a day or so for the refrigerator to get to the proper temp.
Parts Used:
-
Don from BELLVILLE, TX
-
Difficulty Level:Very Easy
-
Total Repair Time:15 - 30 mins
-
Tools:Nutdriver
6 of 6 people
found this instruction helpful.
Was this instruction helpful to you?
Thank you for voting!
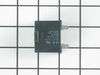
Freezer not getting cold enough to freeze ice cream
I took the advice off of your website about the only thing that will fix
the problem is change the run capacitor. I felt assured that I would
have a working refrigerator freezer after making this change. I was
pretty disheartened when it didn`t solve anything. I was not going to
take the new part back out after the small challenge of putting it in.
The next day I found out how to test the old capacitor and it was still
good. I will just have to eat the $49. I did learn not to take advice from
a website even if it seems like a sure thing
the problem is change the run capacitor. I felt assured that I would
have a working refrigerator freezer after making this change. I was
pretty disheartened when it didn`t solve anything. I was not going to
take the new part back out after the small challenge of putting it in.
The next day I found out how to test the old capacitor and it was still
good. I will just have to eat the $49. I did learn not to take advice from
a website even if it seems like a sure thing
Parts Used:
-
Gary from ROSETO, PA
-
Difficulty Level:A Bit Difficult
-
Total Repair Time:30 - 60 mins
-
Tools:Screw drivers
7 of 9 people
found this instruction helpful.
Was this instruction helpful to you?
Thank you for voting!
evap.motor burned out
common sense,removed plate,removed mounting bracked,unplugged,reversed order,and that was it.
Parts Used:
-
gerald from ardmore, PA
-
Difficulty Level:Really Easy
-
Total Repair Time:15 - 30 mins
-
Tools:Nutdriver, Pliers
7 of 9 people
found this instruction helpful.
Was this instruction helpful to you?
Thank you for voting!
Bottom door hinge was lost during move
I had lost the bottom hinge during a move and so I rigged the hinge using an old tv antenna and the door never really quite worked right and it was VERY annoying. I stumbled upon this site and was surprised how inexpensive the part I needed was. I was very impressed with the speed of shipping and the install took maybe 5 minutes. The fridge works as good as new. Thanks a ton!
Parts Used:

-
Dustin from Marlow, OK
-
Difficulty Level:Really Easy
-
Total Repair Time:Less than 15 mins
-
Tools:Screw drivers
10 of 18 people
found this instruction helpful.
Was this instruction helpful to you?
Thank you for voting!
Fan Motor was Noisy
4 screws in the freezer and the back panel came off then 2 more screws to take the motor off. I unpluged the old motor pluged in the new motor put the back panel back on and I was done.
Parts Used:
-
albert from patterson, NY
-
Difficulty Level:Really Easy
-
Total Repair Time:Less than 15 mins
-
Tools:Screw drivers, Wrench set
6 of 7 people
found this instruction helpful.
Was this instruction helpful to you?
Thank you for voting!
door dairy was broken
Repair was a no brainer. More important, Part Select was extremely efficient. Customer Service was very helpful as my model number was not available on line. Thanks for your wonderful and prompt service. Rich L.
Parts Used:

-
Richard from Millbrae, CA
-
Difficulty Level:Really Easy
-
Total Repair Time:Less than 15 mins
8 of 14 people
found this instruction helpful.
Was this instruction helpful to you?
Thank you for voting!
light not working
I used pliers to pull lightly on the head of the switch, while I inserted a small flat head screw driver into the base of switch and gently worked around the edges to free it from the panel.
Parts Used:

-
robert from FRANKLIN SQ, NY
-
Difficulty Level:Very Easy
-
Total Repair Time:Less than 15 mins
-
Tools:Pliers, Screw drivers
7 of 11 people
found this instruction helpful.
Was this instruction helpful to you?
Thank you for voting!
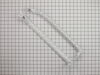
Remove screws holding handles
Using a screw driver(Phillips) I removed screws on top and bottom. Very easy and quick parts fit like a glove.
Parts Used:
-
Roger from SUFFOLK, VA
-
Difficulty Level:Very Easy
-
Total Repair Time:Less than 15 mins
-
Tools:Screw drivers
5 of 5 people
found this instruction helpful.
Was this instruction helpful to you?
Thank you for voting!
Handle broke off at top where the screws were on door.
Removed the screws, placed new handle on door, tightened screws, all done.
Parts Used:
-
Mary Ann from BELLVILLE, OH
-
Difficulty Level:Really Easy
-
Total Repair Time:Less than 15 mins
-
Tools:Screw drivers
5 of 5 people
found this instruction helpful.
Was this instruction helpful to you?
Thank you for voting!
Handle broke on the top where the screws go.This is the second handle that broke in the same place in 5 years.
Remove the top screws, with a Philips screw driver, take broken piece out. Then remove the plastic cover on bottom of handle, take the torx screw out. Now handle is off.Put new handle in place and put all three screws back in. Then install new plastic cap, and you are all done.
Parts Used:
-
Jerry from Esparto, CA
-
Difficulty Level:Really Easy
-
Total Repair Time:15 - 30 mins
-
Tools:Screw drivers
5 of 5 people
found this instruction helpful.
Was this instruction helpful to you?
Thank you for voting!
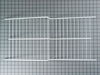
no shelf in my freezer
first I ordered parts that didn't work. the return process was painless and I found the part I needed, which just popped right in!
Parts Used:
-
Barbara from Brookfield, IL
-
Difficulty Level:Really Easy
-
Total Repair Time:Less than 15 mins
7 of 11 people
found this instruction helpful.
Was this instruction helpful to you?
Thank you for voting!
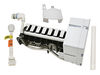
Unit had stopped making ice
Ordered the icemaker replacement. unplugged the unit, followed the simple instructions and got it done in less than 30 minutes. It did take a LONG time to start making ice. But it's working now.
Parts Used:
-
Ron from ORANGE, CA
-
Difficulty Level:Really Easy
-
Total Repair Time:30 - 60 mins
-
Tools:Nutdriver, Screw drivers
5 of 5 people
found this instruction helpful.
Was this instruction helpful to you?
Thank you for voting!