




















GTH18GCDGRWW General Electric Refrigerator - Instructions
Keep searches simple. Use keywords, e.g. "leaking", "pump", "broken" or "fit".
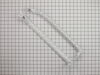
Handle broke
Removed old screws and replaced with new one
Parts Used:
-
Keith from SAN JUAN, TX
-
Difficulty Level:Very Easy
-
Total Repair Time:Less than 15 mins
-
Tools:Screw drivers
4 of 4 people
found this instruction helpful.
Was this instruction helpful to you?
Thank you for voting!
The handle got broken by pulling it in the wrong direction some times.
-
Mary from HUGER, SC
-
Difficulty Level:Very Easy
-
Total Repair Time:Less than 15 mins
-
Tools:Screw drivers
4 of 4 people
found this instruction helpful.
Was this instruction helpful to you?
Thank you for voting!
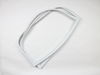
Gasket was torn and falling off customer was holding it in place with tape.
I opened the fridge door removed the tape the customer had on it to keep in place. Gasket was super worn out I pulled in it to remove it. Cleaned it where the new gasket was gonna insert. Put the new gasket in place and with my thumb applied some pressure till I heard a small snap. Did the same all the way around and closed and opened the door to check it all around making sure it was in place and sealing all around.
Parts Used:
-
Joel from WESLACO, TX
-
Difficulty Level:Really Easy
-
Total Repair Time:Less than 15 mins
4 of 4 people
found this instruction helpful.
Was this instruction helpful to you?
Thank you for voting!
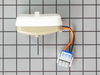
Howling motor
Open freezer, remove rack....this got a little complicated because I had to remove the door, that required the offset screwdriver because I had a clearance issues preventing the door from opening all the way. Remove the panel covering the fan, unplug the fan, remove it from bracket, install new fan, plug in, replace panel, replace rack, replace door...bam all done!
Parts Used:
-
Gregg from COEUR D ALENE, ID
-
Difficulty Level:A Bit Difficult
-
Total Repair Time:15 - 30 mins
-
Tools:Nutdriver
4 of 4 people
found this instruction helpful.
Was this instruction helpful to you?
Thank you for voting!
Wasn't Getting Any Water To The Icemaker
It could not have been easier. The new part matched the old part exactly. I turned the water off going to the refrigerator, unscrewed one screw from the old part, pulled the electric plug loose, disconnect the copper water line from old part, cut off the black plastic tube next to the water valve going to the icemaker, and the new water valve was ready to install. It's that simple. I then took the new water valve, connected the copper water line to it, pushed the black plastic water line into its hole, connected the electric plug, and screwed the new part onto the refrigerater. In a matter of minutes I had water running to my icemaker again. I can't imagine the money I saved by doing this simple project myself. This took less than 10 minutes.
Parts Used:

-
Mark from Ft. Lauderdale, FL
-
Difficulty Level:Really Easy
-
Total Repair Time:Less than 15 mins
-
Tools:Nutdriver, Screw drivers
5 of 7 people
found this instruction helpful.
Was this instruction helpful to you?
Thank you for voting!
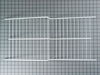
missing a shelf
My repair was simple. Just put the shelf in the holes in the freezer. The AMAZING thing was how quickly I recieved the part after placing my order. I placed the order at about 3:30 pm on a friday checked the box for ground shipping and the part was at my door the next morning. I think that was a mistake, but I was impressed.
Parts Used:
-
Joseph from Rome, NY
-
Difficulty Level:Really Easy
-
Total Repair Time:Less than 15 mins
6 of 10 people
found this instruction helpful.
Was this instruction helpful to you?
Thank you for voting!
Install rear wheel
I haven’t received the wheel yet. Originally ordered on Dec. 13. Hadn’t received it by Dec. 20. Finally shipped on Dec. 22. Tracking said it was expected to be delivered on Jan.2. Not delivered. Then it said it was still on its way but it was unknown when it would be delivered. Still waiting on Jan. 6. By far the most expensive economy shipping ever, as this refrigerator is in a rental that can’t be rented until a wheel is installed.
Parts Used:
-
Bruce from COLUSA, CA
-
Difficulty Level:Very Difficult
-
Total Repair Time:More than 2 hours
4 of 4 people
found this instruction helpful.
Was this instruction helpful to you?
Thank you for voting!
The original white plastic refigerator door handle broke on the top thin Attachment point. It was designed with a too thin under stength thickness just before the two upper screw holes.
The replacement was installed without difficulty and very quickly. I used a Philips and Torex screwdrivers. It only took a few minutes to accomplish. However, The design of the replacement handle is identical to the original's. So, it too has the same weak point. It is just as likely to break in the same spot as the original did. Also, this was the second replacement part that I had to order and pay for before I received the needed correct part. The first part that I incorrectly ordered and received was a clear plastic inner door. Was confused because this part was not pictured on the G E website showing replacement parts for this refrigerator. Both parts orders were received very quickly, even though I used normal shipping..
Parts Used:
-
Joseph Patrick from DEARBORN, MI
-
Difficulty Level:Really Easy
-
Total Repair Time:15 - 30 mins
-
Tools:Screw drivers, Socket set
4 of 5 people
found this instruction helpful.
Was this instruction helpful to you?
Thank you for voting!
The food door gasket was not doing its función properly.
Well, when I opened the package the gasket was bended in half so I opened it and put it first on the floor and after some minutes I put it on the refrigerator side.
Then I took a screwdriver and easily removed the old gasket, cleaned the the channel where the new gasket had to seat or be inserted. Then I took the new gasket and put it on place and begining on the top right corner I began to insert the gasket into the channel from the right to the left. Double check to see if was ok
I continued on both sides from top to the bottom, one by one.
When I reached the bottom I began from the left to the right inserting the gasket into the channel. To complete the installation at the bottom I had to pull the gasket a little to properly reach the corner and I finished
To make sure the gasket was on place I hit the gasket with my bare hand all around and I was done.
It was very easy, I just followed the instructions given by the manufacturer
Then I took a screwdriver and easily removed the old gasket, cleaned the the channel where the new gasket had to seat or be inserted. Then I took the new gasket and put it on place and begining on the top right corner I began to insert the gasket into the channel from the right to the left. Double check to see if was ok
I continued on both sides from top to the bottom, one by one.
When I reached the bottom I began from the left to the right inserting the gasket into the channel. To complete the installation at the bottom I had to pull the gasket a little to properly reach the corner and I finished
To make sure the gasket was on place I hit the gasket with my bare hand all around and I was done.
It was very easy, I just followed the instructions given by the manufacturer
Parts Used:
-
ROBERTO SOLIS PTY from MIAMI, FL
-
Difficulty Level:Very Easy
-
Total Repair Time:Less than 15 mins
-
Tools:Screw drivers
4 of 5 people
found this instruction helpful.
Was this instruction helpful to you?
Thank you for voting!
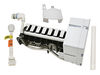
no ice made
Performed self test.turned off ice maker switch four 5 minutes.Then turn on switch,within 10 seconds,pushed ice paddle 3 times,with 1 second in between each push.Push all the way back and release. Ice maker should cycle and squirt water. My ice maker did neither.I unplugged cord from fridge.So i replaced the ice maker.After a couple of screws had ice again !
Parts Used:
-
Robert from San Marcos, CA
-
Difficulty Level:Really Easy
-
Total Repair Time:15 - 30 mins
-
Tools:Screw drivers
5 of 8 people
found this instruction helpful.
Was this instruction helpful to you?
Thank you for voting!
Old timer quit working.
-
John from Mesa, AZ
-
Difficulty Level:Easy
-
Total Repair Time:Less than 15 mins
-
Tools:Nutdriver, Screw drivers
7 of 14 people
found this instruction helpful.
Was this instruction helpful to you?
Thank you for voting!
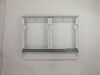
Broken vegetable pan cover
The part was delivered promptly. Then, to quote Raymond from Georgia:
I pulled the old one out, and put the new one in.
I pulled the old one out, and put the new one in.
Parts Used:
-
Luis from Washington, DC
-
Difficulty Level:Really Easy
-
Total Repair Time:Less than 15 mins
4 of 5 people
found this instruction helpful.
Was this instruction helpful to you?
Thank you for voting!
Ice maker stopped working.
I first replaced the ice maker and when that didn't work, I found out through this forum that another possibility is the water outlet valve.
When I got the replacement, it took some time to install because the bracket wasn't the same as the original. There are enough places on the bracket to mount the unit, but it may require using some force to bend the bracket so that it will flush with the wall.
After installation, it took about 2 days to fill up the ice bin. It cycles out ice crescents every 2-3 hours.
Thanks partselect for having this forum and saving me some money by having others share their experiences.
When I got the replacement, it took some time to install because the bracket wasn't the same as the original. There are enough places on the bracket to mount the unit, but it may require using some force to bend the bracket so that it will flush with the wall.
After installation, it took about 2 days to fill up the ice bin. It cycles out ice crescents every 2-3 hours.
Thanks partselect for having this forum and saving me some money by having others share their experiences.
Parts Used:
-
Alice from Vancouver, WA
-
Difficulty Level:Really Easy
-
Total Repair Time:Less than 15 mins
-
Tools:Nutdriver, Screw drivers, Socket set
5 of 8 people
found this instruction helpful.
Was this instruction helpful to you?
Thank you for voting!
cracked valve
Super simple. Extremely fast delivery of part. Simply disconnect the 2 fast-on connectors to valve, disconnect intake and out lines. connect intake and out tubes to new unit, mount via screws to fridge, reconnect the 2 fast-on power connectors and your back in business. Could not be an easier repair.
Parts Used:
-
Don from Crete, IL
-
Difficulty Level:Really Easy
-
Total Repair Time:Less than 15 mins
-
Tools:Nutdriver, Screw drivers
6 of 11 people
found this instruction helpful.
Was this instruction helpful to you?
Thank you for voting!
Difficulty in removing the old switch
The old switch was hard to remove. Thinking that I may have to loosen the wires I used a socket wrench to remove a clamp. This was unnecessary. In the end the switch did come out using a large size screwdriver. The problem was that the expanding plastic tongue is not visible from the ouside so you have to try to feel your way around. If i had ordered the replacement before and not afterwards I would have seen this before hand.
Parts Used:

-
James from Federal Way, AL
-
Difficulty Level:A Bit Difficult
-
Total Repair Time:30 - 60 mins
-
Tools:Screw drivers, Socket set
5 of 8 people
found this instruction helpful.
Was this instruction helpful to you?
Thank you for voting!