




















GSS25CGHWCWW General Electric Refrigerator - Instructions
Keep searches simple. Use keywords, e.g. "leaking", "pump", "broken" or "fit".
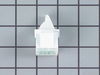
Light switch broke when I dropped a jar of jam on it.
The three bulbs would then remain on, so I loosened them to keep them off. I didn't know that the cooling system also would stop when the door was open, so for two days only the side freezer was operational. When I discovered that, I hot glued the switch button off, while I searched for a replacement part. The replacement part was an exact duplicate. A simple prying out of the old switch - using a screwdriver, and the reconnection of the two wires connectors to the new part, and clicking back in place ... done. Seriously, it took two minutes.
Parts Used:
-
Robert from Centennial, AL
-
Difficulty Level:Really Easy
-
Total Repair Time:Less than 15 mins
-
Tools:Screw drivers
5 of 8 people
found this instruction helpful.
Was this instruction helpful to you?
Thank you for voting!
Water line was leaking
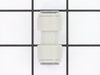
The internal water line was leaking. I could not find any repair parts for my refrigerator but the GE 5/16 water line was the same size. I purchased 6' of tubing and two unions. Make sure the clean and square. If possible, make the cuts in a spot where you can use the pliers and wrench to tighten the union. I cut approximately 2' out of the existing line and replaced it with the same length of new line using the 2 unions, one on each end. Took about 5 minutes.
Parts Used:
-
Doug from MODESTO, CA
-
Difficulty Level:Really Easy
-
Total Repair Time:Less than 15 mins
-
Tools:Nutdriver, Pliers, Wrench (Adjustable)
4 of 5 people
found this instruction helpful.
Was this instruction helpful to you?
Thank you for voting!
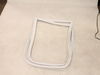
The refrigerator wouldn't stay closed because the gasket was worn
Looked it up on You Tube and basically followed the very simple instructions. Two minor differences: 1) I took the old gasket off while the door was still attached to the fridge. And 2) because it was a side-by-side freezer/ fresh food, I didn't have to take off the freezer door at all and the fresh food door was only attached at the top with 2 screws covered by a hinge cap. So I undid the screws and lifted it off the lower pin. We put the door on a table handle down and slightly off the table edge. Inserting the v-shaped rubber part of the gasket into the groove was easy- pinching it together with my fingers with a little hammer tap at the corners. Reinstalled the door and voila. 27 minutes!
Most of my DIY projects take twice as long as expected. Much time is spent taking off the old part then not as easy as expected to replace the new part. This was a breeze!
Most of my DIY projects take twice as long as expected. Much time is spent taking off the old part then not as easy as expected to replace the new part. This was a breeze!
Parts Used:
-
Carol from DAVIS, CA
-
Difficulty Level:Really Easy
-
Total Repair Time:15 - 30 mins
-
Tools:Screw drivers
4 of 5 people
found this instruction helpful.
Was this instruction helpful to you?
Thank you for voting!
water was squirting out a crack in water tank assembly.
This was a great opportunity to clean the bottom 3 shelves. I unplugged the frig.,disconnected both water lines, unscrewed water tank, pulled water lines out, put new tank in and pushed new water lines in and connected them, and plugged frig. back in. I grabbed my glass to get a drink and feeling proud but no water. I thought about this for a while and came to the conclusion that the freezer was set to 9 and the water had frozen in the value in the door. I dropped the temp. in the freezer from 9 to 3 and after about 2 days the water worked just fine. I emptied the ice because it was clumped into one big piece. I heard the ice maker going to town all day long. I called for ice later and the motor that dispenses the ice was humming and no ice was dropping. I thought about it and could not come up with the answer so I called tech. at GE and he was no help. So I solved one problem and now I have another that I don't have an answer to. My last attempt is to remove the motor housing to see if gears are jammed or something else.
Parts Used:

-
Fillmore from Asheville, NC
-
Difficulty Level:Really Easy
-
Total Repair Time:15 - 30 mins
6 of 11 people
found this instruction helpful.
Was this instruction helpful to you?
Thank you for voting!
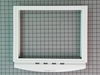
Broken snack bin frame
The replacement frame arrive fast and as ordered. Used the two rollers from the broken bin frame to install on the new frame. Also the glass shelf does not come included, so transfer that from the old bin frame.Total time of replacement was less than 5 minutes.
Parts Used:
-
Steven from MANASSAS, VA
-
Difficulty Level:Very Easy
-
Total Repair Time:Less than 15 mins
-
Tools:Screw drivers
4 of 5 people
found this instruction helpful.
Was this instruction helpful to you?
Thank you for voting!
Water dispenser not dispensing water
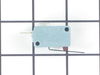
I went to the internet and found parts select web site. Saw all of the possible fixes for my problem and read all of the other repair stories. My story actually became a journey that is still continuing. I first changed the water filter, but still no water at the dispenser. I next disconnected the coupling at the bottom of the freezer door that carries water to the dispenser and when the dispenser was depressed, water flowed at the coupling, but not at the dispenser. After reconnecting the coupling, I turned the freezer setting to 1 for 4-5 days, but still no water at the dispenser (possibly the line was frozen, but we had recently been away for a week and the water dispenser still supplied water at a freezer setting of 4). Now I am at the point of the journey into replacing parts one at a time to get water. First I ordered the dual water valve for the ice maker and water dispenser. I replaced this valve with instructions from Parts Select and still no water at dispenser. Next I ordered and replaced the switch at the dispenser lever and still no water. Next was the solenoid attached to the ice door, ordered, replaced and still no water at dispenser. I am now at the final part in this repair and that is the $132 circuit board. So I will be ordering this part soon and hopefully that will fix the issue.
Parts Used:
-
David from Georgetown, TX
-
Difficulty Level:Easy
-
Total Repair Time:15 - 30 mins
-
Tools:Pliers, Screw drivers, Wrench (Adjustable)
3 of 3 people
found this instruction helpful.
Was this instruction helpful to you?
Thank you for voting!
5/16" tubing to chilled water dispenser cracked
Cut out cracked tubing between valve and where tubing enters into refrigerator. Cut new tubing to length and attach to existing using union.
Parts Used:
-
Mark from Indian Trail, NC
-
Difficulty Level:Easy
-
Total Repair Time:15 - 30 mins
-
Tools:Nutdriver
4 of 6 people
found this instruction helpful.
Was this instruction helpful to you?
Thank you for voting!
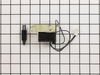
replace solenoid on ice door
remove the front plate. use screwdriver to pry the cover off from the bottom of the cover, remove the wiring from the front cover.remove the 4 screws and pull out the shute. remove three screws from the solonide and replace . very easy fix. save yourself $100.00 labor.
Parts Used:
-
Allan from Ponce Inlet, FL
-
Difficulty Level:Easy
-
Total Repair Time:15 - 30 mins
-
Tools:Screw drivers
3 of 3 people
found this instruction helpful.
Was this instruction helpful to you?
Thank you for voting!
The rubber gasket had torn, and super glue only provided a temporary solution.
1. Emptied the crisper pan,
2. Removed it from the refrigerator,
3. Flipped it upside down,
4. Removed the old one by pulling it off,
5. Replaced it with the new OEM part. and
6. Reversed the process.
2. Removed it from the refrigerator,
3. Flipped it upside down,
4. Removed the old one by pulling it off,
5. Replaced it with the new OEM part. and
6. Reversed the process.
Parts Used:
-
Lee from UPPR MARLBORO, MD
-
Difficulty Level:Very Easy
-
Total Repair Time:Less than 15 mins
3 of 3 people
found this instruction helpful.
Was this instruction helpful to you?
Thank you for voting!
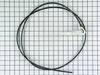
Water leaking as it enters the frezer ice maker
-
Shock Tech Electric from VICKSBURG, MI
-
Difficulty Level:Really Easy
-
Total Repair Time:Less than 15 mins
-
Tools:Nutdriver
3 of 3 people
found this instruction helpful.
Was this instruction helpful to you?
Thank you for voting!
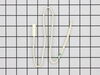
Defrost not working coil iced up
Removed back wall cover over coil. Defrost all ice with a hair dryer. Cut white wires and replaced Temperature Sensor. It has been working for a week and no trouble at this time. If you have this system on your GE refrigerator do this before replacing the motherboard. I must admit I was thinking that was the trouble. Motherboard was replaced after 5 years old now 5 years later my thinking is this a 5 year problem. So try the Temperature Sensor.
Parts Used:
-
charles from SCOTTSDALE, AZ
-
Difficulty Level:Very Easy
-
Total Repair Time:30 - 60 mins
-
Tools:Nutdriver
3 of 3 people
found this instruction helpful.
Was this instruction helpful to you?
Thank you for voting!
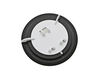
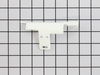
Flapper is stuck open
There are three holes under the front panel in which you push a very small screwdriver in and the front panel comes off.In back of the panel is another panel with 4 screws .1 at each corner.Remove the 4 screws and that will come off exposing the working parts that need to be replaced.This is also a good time to clean anything you can get to in that area.It is very important to remember how everything came out.
Parts Used:
-
mike from hatboro, PA
-
Difficulty Level:Easy
-
Total Repair Time:30 - 60 mins
-
Tools:Screw drivers
6 of 12 people
found this instruction helpful.
Was this instruction helpful to you?
Thank you for voting!
We put too much weight in the drawer and it finally broke. It would fall apart when opened.
Simply took the old drawer out, and slid the new one in. Took 30 seconds, and voila! All fixed.
Parts Used:
-
Stephen from DALLAS, TX
-
Difficulty Level:Really Easy
-
Total Repair Time:Less than 15 mins
3 of 3 people
found this instruction helpful.
Was this instruction helpful to you?
Thank you for voting!
lights went out on the fridge
Super easy. Hardest part was popping the plastic covers off without breaking them. I had to use a butter knife to get under it & lift it just enough
to grab it & pull easy until it turned loose.
to grab it & pull easy until it turned loose.
Parts Used:
-
Deborah from White House, TN
-
Difficulty Level:Really Easy
-
Total Repair Time:Less than 15 mins
3 of 3 people
found this instruction helpful.
Was this instruction helpful to you?
Thank you for voting!
Busted water tank
Removed the lower 2 drawers, lower front grill, rear lower compressor cover. Removed the 2 water lines from the quick connects and screws from the water tank. Pulled lines through the hole in the right rear of the refrigerator and removed tank. Then reversed steps to install new tank. The upper plastic tank cover has 2 buttons on top that are really screws with a plastic cap, these are easily removed with pliers.
Parts Used:
-
Larry from Shepherdsville, KY
-
Difficulty Level:Really Easy
-
Total Repair Time:15 - 30 mins
-
Tools:Nutdriver, Pliers, Screw drivers
4 of 6 people
found this instruction helpful.
Was this instruction helpful to you?
Thank you for voting!