




















GSD3361K55SS General Electric Dishwasher - Instructions
Keep searches simple. Use keywords, e.g. "leaking", "pump", "broken" or "fit".
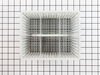
Lower Dishwasher rack was starting to rust
The rack for my model has been discontinued so they shipped me the replacement version. The wheels on the new one are skinnier than the original model so I had to remove them and replace them with the wheels from the old rack for it to fit/roll correctly. The new wheels were a little tricky to get off as I had to use a screw driver and basically manipulate/pry apart the clamps that hold them on. The old wheels just snap on.
Parts Used:
-
John from TAMPA, FL
-
Difficulty Level:Really Easy
-
Total Repair Time:30 - 60 mins
-
Tools:Screw drivers
1 person
found this instruction helpful.
Was this instruction helpful to you?
Thank you for voting!
Leaking Dishwasher
Replacing the two corner baffles was the third attempt to stopping the leak. I first replaced the door seal without removing the inner door and the leak did not stop. Then I removed the inner door, reinstalled the door along the bottom and added the small seal required at the lower center portion which is separate than the longer door seal. Still leaked! Then I replaced the corner baffles and alas., the leak stopped. I would recommend that all seals be replaced at the same time. Total cost about $40.00 and can easily be done in one hour or less. I ordered the parts And they arrived remarkably in les than 24 House with regular delivery. Very pleased with Parts Select instructions and service!
Parts Used:
-
Eugene from Port Saint Lucie, FL
-
Difficulty Level:Really Easy
-
Total Repair Time:1- 2 hours
-
Tools:Screw drivers
1 person
found this instruction helpful.
Was this instruction helpful to you?
Thank you for voting!
Dishwasher leaking
I simply lifted the baffles out and cleaned the base and installed the new baffles and started the dishwasher and NO LEAKS.
Parts Used:
-
Larry from JOLIET, IL
-
Difficulty Level:Very Easy
-
Total Repair Time:Less than 15 mins
1 person
found this instruction helpful.
Was this instruction helpful to you?
Thank you for voting!
Hinge arm link wore out
Used Phillips screwdriver to undo brackets that keep dishwasher in place. Pulled out dishwasher from underneath the counter. Placed hinge arm in spring, hooked spring onto clip, placed hinge arm in clip. Put back dishwasher under the counter and screwed in place. Took all of 15 minutes. Saved 185.00 for service call.
Parts Used:
-
Samuel from LAS VEGAS, NV
-
Difficulty Level:Really Easy
-
Total Repair Time:15 - 30 mins
-
Tools:Pliers, Screw drivers
1 person
found this instruction helpful.
Was this instruction helpful to you?
Thank you for voting!
Leaking from the corner of the door
Replaced the lower right and lower left corner tub baffles
Parts Used:
-
garrett from OROVILLE, CA
-
Difficulty Level:Really Easy
-
Total Repair Time:Less than 15 mins
1 person
found this instruction helpful.
Was this instruction helpful to you?
Thank you for voting!
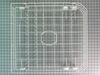
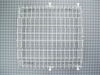
The covering over the original dishracks had worn away and the framework beneath was rusting.
The only trick was the endcaps, which were not intuitive. I followed the instructions in the following Youtube video , which direct the user to bend a tab at the rear of the endcap back away from the front using a quarter in order to allow the endcap to rotate out of position inwards into the interior of the dishwasher. The old racks then slid easily out of the dishwasher, the new ones equally easily slid in, and then the endcaps required the tab to be bent back to allow them to rotate back into position.
Parts Used:
-
Douglas from WOODBURY, MN
-
Difficulty Level:Really Easy
-
Total Repair Time:Less than 15 mins
1 person
found this instruction helpful.
Was this instruction helpful to you?
Thank you for voting!
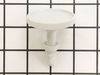
Fill Cap Just Keep Turning, Not Locking In Place
-
Broggie from Burlington, NJ
-
Difficulty Level:Really Easy
-
Total Repair Time:Less than 15 mins
6 of 16 people
found this instruction helpful.
Was this instruction helpful to you?
Thank you for voting!
Threads on the cap broken
A no brainer, replaced old fill cap with new fill cap. Delighted I was able to order the part, website is user friendly.
Parts Used:
-
Martie from FULTON, MO
-
Difficulty Level:Very Easy
-
Total Repair Time:Less than 15 mins
1 person
found this instruction helpful.
Was this instruction helpful to you?
Thank you for voting!
No power to dishwasher
-
Robert from OLD TOWN, FL
-
Difficulty Level:Really Easy
-
Total Repair Time:Less than 15 mins
-
Tools:Screw drivers
2 of 4 people
found this instruction helpful.
Was this instruction helpful to you?
Thank you for voting!
PS259168 Replaced broken end cap on upper dish rack
No tools needed for this half-minute repair. Just bend the flexible plastic tab on the back of the end cap until it slips into the metal rail and the end cap snaps into place. Couldn't be easier or simpler!
Parts Used:

-
Stephen from Waterville, ME
-
Difficulty Level:Really Easy
-
Total Repair Time:Less than 15 mins
1 person
found this instruction helpful.
Was this instruction helpful to you?
Thank you for voting!
Rear 1/2" wheels on new rack were too narrow causing rack to fall off tracks
Removed 3/4" rear wheels from old damaged rack and installed them on new rack. Works fine now. For the price paid for this replacement rack, wide wheels should be included as part of the replacement package.
Parts Used:
-
David from EDEN PRAIRIE, MN
-
Difficulty Level:A Bit Difficult
-
Total Repair Time:15 - 30 mins
-
Tools:Screw drivers
1 person
found this instruction helpful.
Was this instruction helpful to you?
Thank you for voting!
old silverware basket had slots that were broken and knives would fall through and get stuck.
Opened the box the new silverware basket came in and replaced the broken one.m
Parts Used:
-
Joanna from SEWELL, NJ
-
Difficulty Level:Very Easy
-
Total Repair Time:Less than 15 mins
1 person
found this instruction helpful.
Was this instruction helpful to you?
Thank you for voting!
Replace dishwasher basket
Pulled out old basket with holes at bottom and replaced it with new basket. Perfect fit!
Parts Used:
-
Kim from DETROIT, MI
-
Difficulty Level:Very Easy
-
Total Repair Time:Less than 15 mins
1 person
found this instruction helpful.
Was this instruction helpful to you?
Thank you for voting!
dislodged & deformed baffle leaked after 29 years of use
I lifted out the old baffles, cleaned the soap scum from the recesses, and placed the new baffles in by hand. No tools were required, and total repair time was less than 8 minutes. the total cost was a fraction of the cost of a service call.
Parts Used:
-
MAX E. from CALDWELL, ID
-
Difficulty Level:Very Easy
-
Total Repair Time:Less than 15 mins
1 person
found this instruction helpful.
Was this instruction helpful to you?
Thank you for voting!
water leak
Removed 1 C clip and 2 screws that held the Solonoid, cut the old push on nut off with a pair of dykes so it would not scratch the shaft, pinched out the old seal with a needle nose pliers and wiped everything clean with a moist paper towel. Replaced the old parts with the new ones but I still have the same, smaller, but same water leak.
Parts Used:
-
Frank from St Louis, MO
-
Difficulty Level:Easy
-
Total Repair Time:15 - 30 mins
-
Tools:Pliers, Screw drivers
2 of 5 people
found this instruction helpful.
Was this instruction helpful to you?
Thank you for voting!