




















GLEH1642DS0 Frigidaire Washer Dryer Combo - Instructions
Keep searches simple. Use keywords, e.g. "leaking", "pump", "broken" or "fit".
Tub was sagging and seal was not complete, would leak
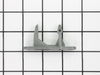
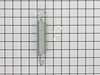
The tub is supported by two springs and two shock absorbers. First remove the back panel of the washer. Then I placed the auto jack from my car under the tub, alongside the motor, and cranked it up, lifting the tub, until the top of the seal in the front was compressed. Then I took the top off of the washer to access the springs. There are retaining straps over the top of each spring that I had to remove to get to the springs. Pulling up hard on the spring allowed me to get a pair of pliers on the spring and pull it out of the slot it was in.
Once it was out of the slot I could remove it from the tub as well. I put the new spring in and replaced the retaining strap. Then I repeated this process on the other spring.
Once both springs were in place the tub was hanging as it should and the seal around the door was smooth all the way around. I haven't seen any more leaks since replacing the springs.
Once it was out of the slot I could remove it from the tub as well. I put the new spring in and replaced the retaining strap. Then I repeated this process on the other spring.
Once both springs were in place the tub was hanging as it should and the seal around the door was smooth all the way around. I haven't seen any more leaks since replacing the springs.
Parts Used:
-
Steven from Irving, TX
-
Difficulty Level:A Bit Difficult
-
Total Repair Time:30 - 60 mins
-
Tools:Pliers, Screw drivers
6 of 8 people
found this instruction helpful.
Was this instruction helpful to you?
Thank you for voting!
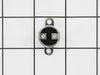
Dryer would not even turn on. Removed 2 screws holding thermal limiter switch and removed t
Basically, i followed instructions on 1 video i seen, but was able to shorten repair by not removing drum, and was still able to access the thermal limiter switch to remove old one and install new one. Worked like a charm. Thanks Dan
Parts Used:
-
Daniel from SAN ANTONIO, TX
-
Difficulty Level:Really Easy
-
Total Repair Time:30 - 60 mins
-
Tools:Screw drivers
5 of 5 people
found this instruction helpful.
Was this instruction helpful to you?
Thank you for voting!
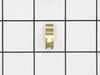
Broken Door Strike
After the part arrived, I located a pair of needle nose pliers. Then removed the broken one and inserted the new one. It was very easy.
I also noted that the new part was of a better design than the original. It should not need further attention.
I also noted that the new part was of a better design than the original. It should not need further attention.
Parts Used:
-
William from Martinsville, IN
-
Difficulty Level:Really Easy
-
Total Repair Time:Less than 15 mins
-
Tools:Pliers
9 of 17 people
found this instruction helpful.
Was this instruction helpful to you?
Thank you for voting!
The rear drum hitch was sheared off
I noticed for sometime that my dryer had been sqeeking...but I had thought nothing of it. It got alot louder as time went on and then one day the drum stopped spinning. Not to mention I had my son's 5th birthday party in 3 days. So I went online and found parts select. They sent me the whole assembly and I got it the day before the birthday, and it only took me 30 mins to replace it. Thank you, Parts Select for the prompt response and saving me for the embarrasment of having clothes all over the floor.
Parts Used:

-
Nathan from Clarence, IA
-
Difficulty Level:Really Easy
-
Total Repair Time:15 - 30 mins
-
Tools:Nutdriver, Screw drivers, Wrench set
5 of 5 people
found this instruction helpful.
Was this instruction helpful to you?
Thank you for voting!
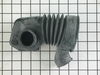
tub to pump hose (coin trap) was leaking
I was hoping it was the drain hose but it wasn't. It's a front load washer so I pulled the kick plate in the front (2 screws) removed the three clamps and put the new hose on. Easy job, saved a hundred or so from the repair man. Part cost 35 bucks!
Parts Used:
-
mike j from merritt island, FL
-
Difficulty Level:Easy
-
Total Repair Time:15 - 30 mins
-
Tools:Pliers
6 of 8 people
found this instruction helpful.
Was this instruction helpful to you?
Thank you for voting!
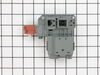
Loud humming noise from the door closure area.
First,turned the power and water off. I disassembled the door lock and switch assembly by removing two screws from the rear of the top lid to gain access to the switch. Removed two screws from the switch assembly located in the front door latch area. With screws removed, I seperated the three terminal blocks and inspected the assembly for failure potential. Discovered a small crack in the switch housing which created error in relay function. Ordered the part and installed in reverse order of above. Realigned the door for proper closing, turned water and power on and did laundry all night to catch up!!!
Parts Used:
-
Alyre from Van Buren, ME
-
Difficulty Level:Really Easy
-
Total Repair Time:Less than 15 mins
-
Tools:Screw drivers
6 of 8 people
found this instruction helpful.
Was this instruction helpful to you?
Thank you for voting!
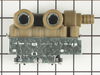
Inlet valve leaked water from supply line(s) back into washer.
Pulled washer electrical plug from receptacle.
Unscrewed hot and cold water inlet hose connectors.
Removed screws retaining backplate.
Removed back plate.
Removed two screws connecting valve assembly to frame.
Pulled two spade electrical wire connectors from valve assembly.
Opened hose clip securing hose on outlet side of valve assembly, using pliers.
Pulled hose from valve assembly.
Valve assembly now free.
Reversed above with replacement valve assembly.
Unscrewed hot and cold water inlet hose connectors.
Removed screws retaining backplate.
Removed back plate.
Removed two screws connecting valve assembly to frame.
Pulled two spade electrical wire connectors from valve assembly.
Opened hose clip securing hose on outlet side of valve assembly, using pliers.
Pulled hose from valve assembly.
Valve assembly now free.
Reversed above with replacement valve assembly.
Parts Used:
-
John from Powhatan, VA
-
Difficulty Level:Really Easy
-
Total Repair Time:Less than 15 mins
-
Tools:Pliers, Screw drivers
6 of 8 people
found this instruction helpful.
Was this instruction helpful to you?
Thank you for voting!
space
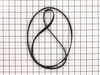
1. replaced (2) shocks, remove bottom cover 2. (1) spring and rib belt, used a wooden block to hold up drum , rolled out ld belt and rolled in new----remove top and rear covers after replaced same ---thanks..
Parts Used:
-
Alvin from Woodside, NY
-
Difficulty Level:A Bit Difficult
-
Total Repair Time:30 - 60 mins
-
Tools:Nutdriver, Pliers, Screw drivers, Socket set
8 of 14 people
found this instruction helpful.
Was this instruction helpful to you?
Thank you for voting!
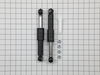
One of the wash tub shock absorbers broke.
I heard that the repair job was simple and the part was not expensive (whew!) The repair video on your website was MOST helpful and gave me confidence. At first I tried it exactly as the guy demonstrated and all went well removing the broken support. Installing the new one (on the right side) was impossible for me. I could not get good enough leverage to fully re-insert the lock pins and I was slicing up my arm on the sharp metal edges. I removed the 900+ screws (just kidding- but there were quite a few) from the back panel and could access the lock pins MUCH easier. All four for both shock absorbers snapped right in. Re-attaching the rubber vent hose involved a few cuss words but I got it back on correctly after taking a break. All is great with the little washing machine once again! Thank you for the installation video and amazingly fast shipping, wow.
Parts Used:
-
Joshuah from Indianapolis, IN
-
Difficulty Level:Easy
-
Total Repair Time:30 - 60 mins
-
Tools:Pliers, Screw drivers
6 of 8 people
found this instruction helpful.
Was this instruction helpful to you?
Thank you for voting!
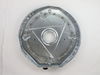
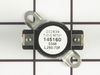
Replaced burned out heating element
Not having the repair manual made the repair more difficult. Prior experience made the job somewhat easy. Had to study every move to make sure no parts were not broken but overall the repair went without any problems. I found out that the bearing plate was removable to facilitate removal and replacement of the heating element. Advise if you are doing a repair of an appliance you don't know much about, take your time and everything should go well for you.
Parts Used:
-
George from ALLENTOWN, PA
-
Difficulty Level:Really Easy
-
Total Repair Time:30 - 60 mins
-
Tools:Screw drivers
5 of 6 people
found this instruction helpful.
Was this instruction helpful to you?
Thank you for voting!
Both shock absorbers for the tumbler had broken off
The repair itself was simple; it was the original design of the washer itself that made it time-consuming, because of the tight spaces involved. Basically, all you have to do is remove 2 plastic pins, take out the broken part, make sure you have the new part facing the right way, and put the 2 plastic pins back in. Should take 2 minutes if there are not other machine parts in the way!
Parts Used:
-
Elizabeth from Bellevue, WA
-
Difficulty Level:A Bit Difficult
-
Total Repair Time:30 - 60 mins
-
Tools:Pliers, Screw drivers, Wrench (Adjustable)
5 of 6 people
found this instruction helpful.
Was this instruction helpful to you?
Thank you for voting!
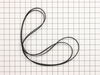
Dryer bearing failure
From previous responses on this site. I just followed their lead. If I had not found these folks, and the responses, it would have been a nightmare. It looked like and I thought the dryer came apart from the back! But in reality it comes apart from the front!! Absolutely fantastic site and help. Fast shipping, I ordered on Wednesday before Labor Day, didn't expect the parts until the following Wednesday, but received the parts on Saturday morning, and had the dryer back running by Sunday AM. Never even ran out of clean clothes!!!!!
Parts Used:
-
Douglas Green from Kansas City, MO
-
Difficulty Level:Easy
-
Total Repair Time:More than 2 hours
-
Tools:Pliers, Screw drivers, Socket set
21 of 36 people
found this instruction helpful.
Was this instruction helpful to you?
Thank you for voting!
squeaking in dyer progressively got unbearable
removed top and front panel on stackable dyer unit. 3 screws at back of the inside of the drum, and the drum was out. installed new bearing and belt and all was good.
Parts Used:
-
matt from south vienna, OH
-
Difficulty Level:Easy
-
Total Repair Time:More than 2 hours
-
Tools:Nutdriver, Screw drivers
6 of 9 people
found this instruction helpful.
Was this instruction helpful to you?
Thank you for voting!
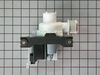
drain pump stopped working
First, I unplugged the unit, then took out the hold down screw. Next I took off both snap rings and layed towels down. Pulled off both hoses. Finally reattached in reverse order. I did not have the problem of others with the snap rings they came off easy and went back on easy.
Parts Used:
-
Robert from Camby, IN
-
Difficulty Level:Easy
-
Total Repair Time:Less than 15 mins
-
Tools:Pliers, Socket set
5 of 6 people
found this instruction helpful.
Was this instruction helpful to you?
Thank you for voting!
dryer door wouldnt close
the catch on the door was worn and cracked.... so I noticed it could be easily popped out with a screw driver and when the new part came in the mail 2 days later, it was just as easy to pop back in with no tools required. Now the door stays shut really good!!!
Parts Used:

-
karen from aurora, IL
-
Difficulty Level:Really Easy
-
Total Repair Time:Less than 15 mins
-
Tools:Screw drivers
5 of 6 people
found this instruction helpful.
Was this instruction helpful to you?
Thank you for voting!