If your dishes aren’t coming out as clean as they should, the upper spray arm might be the issue. This part helps direct water to the upper rack, ensuring thorough cleaning. Over time, it can become c...
This part is the replacement tub gasket for your dishwasher. It is black in color and is made of rubber. The tub gasket fits around the circumference of your dishwasher tub, and creates a seal that pr...
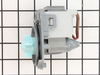
This door spring is approximately 7 inches long. The dishwasher door spring applies tension to the dishwasher door through the door hinge to prevent the door from dropping too quickly when the unit i...
Struggling with a flooded dishwasher or water not draining correctly? The GE Drain Pump is just the solution you need. This essential component is at the heart of the draining process in your dishwash...
Ask our experts a question about this model and we'll get back to you as soon as possible!
1 question answered by our experts.
< Prev
1
Next >
Sort by:
Search filter:
Clear Filter
Your search term must have 3 or more characters.
Keep searches simple. Use keywords, e.g. "leaking", "pump", "broken" or "fit".
Sorry, we couldn't find any existing answers that matched.Try using some different or simpler keywords, or submit your new question by using the "Ask a Question" button above!
John
December 31, 2019
Where can i get a replacement 'fibe filter's?
For model number GLDT690D00BB
Hello John and thank you for writing.
Filter part number: PS2355907 is in the list of compatible items for your model. We hope this helps. Please contact us anytime. If you would like to place an order with our company or inquire about pricing, availability, and shipping, you will have to contact our customer service. You can do so one of two ways: online: www.partselect.ca or telephone: 800-901-6912
. Thank you.
1 personfound this helpful.
Was this helpful?
Thank you for voting!
< Prev
1
Next >
✖
Ask a Question
Ask our experts a question on this model and we'll respond as soon as we can.
We ordered a whole new set for the lower rack and even though they were smaller than the original ones, we replaced them all and now the rack slides in and out of the dishwasher with ease!
I had to buy the inner door assembly since the seal at the bottom was not available separately. $104 for a $10 part.
Before you take anything apart, shut off the power. There is 110V in the door, and it’s pretty unforgiving.
The inner door assembly is manufactured with razor sharp edges all around. It is fastened with approximately 11,000 Phillips screws, all of which fall under the dishwasher upon removal. The outer door will fall to the floor to indicate you have removed all the screws. Or, you could support the outer door, if you are smarter than I am.
Putting the new inner door on isn’t too bad. Mine was bent a little in shipping, but I bent it straight again, pretty much. I had my 19 year old son help hold it in place, so I could learn how “lame” this activity was. Once a couple of screws are installed, he can go back to sleeping 15 hours a day. Make sure the lower seal is aligned as you tighten the bottom screws.
Once you’re done, turn on the power and run the dishwasher. You’ll learn that the leak is due to a clogged discharge hose, and you just burned an hour an $104.
This seal is not a “slide off and slide on” type like other dishwasher inner door assemblies because it’s stainless steel. CAUTION - THIS COMPONENT IS SHARP AND WILL SEVERELY CUT YOU - I DOUBLED UP ON LATEX GLOVES
1. Remove bottom rack from washer 2. Using Phillips screwdriver remove all screws from inner door area - place towels under exterior of door because it will drop off when all screws are removed. ALSO - there are 4 screws that hold the hinges to the door frame - be careful because the hinges are spring loaded!! 3. Cut the 2 wires feeding the detergent release compartment ( you will have to strip and reconnect them using wire nuts - orange or blues) 4. Slide outer shell up to remove from inner door assembly 5. Remove vent assembly(adjustable pliers) and detergent compartment (4 phillips screws/2 brackets) BE CAREFUL NOT TO DAMAGE GASKETS (you will reuse when reinstalling them on the new inner door assembly).
REASSEMBLY 1. Remove protective film from entire door assembly 2. Install vent & detergent compartment DO NOT FORGET GASKETS 3. CAREFULLY - pull down door hinges far enough to place new inner door assembly in its designated place when in operation THEN allow hinges to slowly touch the inner door assembly 4. Wire up detergent compartment wires you cut earlier 5. Using some means of adhesive (duct tape, double back tape) place to styrofoam filler back in place 6. Slide the outer door assembly on while slowly opening door - pay attention to the outer door assembly door frame so that it goes over the inner door assembly - this is the difficult part and having a second set of hands will help with overcoming obstacles 7. Place all your screws back in place and put the bottom rack back 8. Run the dishwasher empty first through a full cycle so the water level can heat the gasket and check for leaks after running awhile


 – Part Number: WD12X10319")