Models > GIWN3000M0WW

GIWN3000M0WW General Electric Washer - Overview

Sections of the GIWN3000M0WW

[Viewing 4 of 4]
Keep searches simple, eg. "belt" or "pump".
Tub Dampening Strap – Part Number: WH1X2727
Tub Dampening Strap
★★★★★
★★★★★
(9)
PartSelect #: PS271100
Manufacturer #: WH1X2727
Your washer uses 4 tub dampening straps. It is recommended to replace all 4 at the same time. They keep the tub in the center of the cabinet and are sold individually.
$16.70
  Special Order
Selector Knob with Clip – Part Number: WH1X2721
Selector Knob with Clip
★★★★★
★★★★★
(3)
PartSelect #: PS271094
Manufacturer #: WH1X2721
This knob accepts a D-shaped shaft. Sold individually.
  No Longer Available
D-Shaped Knob Clip – Part Number: WH01X10106
D-Shaped Knob Clip
★★★★★
★★★★★
(4)
PartSelect #: PS268493
Manufacturer #: WH01X10106
Sold individually.
$11.49
  Special Order
Tub Seal – Part Number: WH02X10383
Tub Seal
★★★★★
★★★★★
(2)
PartSelect #: PS4704237
Manufacturer #: WH02X10383
The main tub seal is located between the transmission and the outer tub. It's the primary water seal in the outer tub for the transmission-shaft. This seal is difficult to replace and should probably ...
$25.45
  Special Order
Timer Knob with Clip – Part Number: WH1X2754
Timer Knob with Clip
★★★★★
★★★★★
(1)
PartSelect #: PS271124
Manufacturer #: WH1X2754
White in color.
  No Longer Available
Dual Action Agitator – Part Number: WH43X10034
Dual Action Agitator
★★★★★
★★★★★
(10)
PartSelect #: PS1482519
Manufacturer #: WH43X10034
This does not come with the fabric dispenser - must order separately or use original part.
$150.31
  Special Order
Tub Bearing – Part Number: WH2X1198
Tub Bearing
★★★★★
★★★★★
(3)
PartSelect #: PS271510
Manufacturer #: WH2X1198
This tub bearing goes in your washing machine. You will find it on the bottom of the outer tub, where the transmission goes through the tub. If you hear metal on metal when the washer is spinning, you...
$35.10
  Special Order
Tub Bearing Washer – Part Number: WH2X1197
Tub Bearing Washer
PartSelect #: PS271509
Manufacturer #: WH2X1197
$11.80
  Special Order
Drain Hose – Part Number: WH41X10096
Drain Hose
★★★★★
★★★★★
(3)
PartSelect #: PS890597
Manufacturer #: WH41X10096
This drain hose is a replacement part for your top-loading washer. The hose measures 57 inches in length.
$74.14
  Special Order
Split Ring – Part Number: WH02X10265
Split Ring
PartSelect #: PS1766022
Manufacturer #: WH02X10265
This split ring is two inches in diameter.
$18.37
  Special Order
6-Rib Drive Belt – Part Number: WH01X10302
6-Rib Drive Belt
★★★★★
★★★★★
(2)
PartSelect #: PS1482278
Manufacturer #: WH01X10302
This drive belt is made to slip on the motor pulley to bring the basket up to the speed required and this makes the belt get wear and tear.
$45.99
  Special Order
Agitator Coupling – Part Number: WH43X10032
Agitator Coupling
★★★★★
★★★★★
(4)
PartSelect #: PS1482517
Manufacturer #: WH43X10032
Bolt not included. This part connects the transmission drive shaft to the agitator base.
$84.80
  Special Order

Questions And Answers for GIWN3000M0WW

Be the first to ask our experts a question about this model!

Common Symptoms of the GIWN3000M0WW

[Viewing 10 of 10]
Leaking
Fixed by
these parts
Fixing Fixing Fixing
Show All
Will not agitate
Fixed by
these parts
Fixing Fixing Fixing
Show All
Will Not Start
Fixed by
these parts
Fixing Fixing Fixing
Show All
Marks left on clothes
Fixed by
these parts
Fixing Fixing
Show All
Will not drain
Fixed by
these parts
Fixing Fixing
Show All
Does not dispense fabric softener or detergent
Fixed by
these parts
Fixing
Show All
Spins slowly
Fixed by
these parts
Fixing
Show All
Burning smell
Fixed by
these parts
Fixing Fixing
Show All
Shaking and Moving
Fixed by
these parts
Fixing
Show All
Noisy
Fixed by
these parts
Fixing Fixing
Show All
Keep searches simple. Use keywords, e.g. "leaking", "pump", "broken" or "fit".
Replaced broken START knob on dryer.
Slid off the old START knob, then pushed on the new START knob.

I created and printed a label on my computer for use with the time selector dial, which must be set at or beyond 10 minutes, before turning the START knob.

I made a label that says "Minimum" with a red arrow that points past the 10 minute setting on the time selector dial.

My teenage daughter was not setting the time selector dial, to a point past 10 minutes. When she turned the START knob, the dryer would not come on, because the time selector dial was not set past the 10 minute setting.

My daughter had continually twisted the START knob until it broke. I am hoping she will be able to see the large printed label I put on the dryer near the time selector, saying "Minimum" with a large red arrow pointing past 10 minutes.

I am very pleased that I was quickly able to find the exact matching START knob for my dryer and the exact same color, from PartSelect.Com
Parts Used:
Selector Knob with Clip
  • SAM from ROCK HILL, NY
  • Difficulty Level:
    Really Easy
  • Total Repair Time:
    Less than 15 mins
502 of 513 people found this instruction helpful.
Was this instruction helpful to you?
Thank you for voting!
The inside of the Selector Knob was stripped
Removed the damaged knob and replaced it with the new knob. Very ease
Parts Used:
Selector Knob with Clip
  • Frank from Irvine, CA
  • Difficulty Level:
    Really Easy
  • Total Repair Time:
    Less than 15 mins
383 of 389 people found this instruction helpful.
Was this instruction helpful to you?
Thank you for voting!
broken drive belt
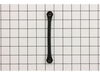
To diagnose, first I unhooked the washer: power, water supply, and drain pipe. I then slid the washer out, laying it on its front. With nutdriver, I unscrewed two screws that held the other end of the drain tube and removed it completely. Then, again with the nutdriver removed 4 screws from the back near the legs, two in between the legs in the middle, and approx. 4 to 6 on the bottom. This let me pull the bottom off partially to access the motor area. (I did did not take the bottom completely off, only about 2/3 off and let it bend over, as it was flexible tin) The belt was broken. After receiving the new belt, I positioned it between the pulley and the motor and between the drum and the big pulley. Then I rotated the big pulley, pulling the belt onto it as I rotated. At the same time, as I rotated, I pulled the other end of the belt on to the little pulley. Once it was on, I would put pressure on it as I turned the pulley, to jump the belt to the appropriate grooves on the little pulley. Note: the replacement belt had been modified, so it had one less groove than the pulley. I would have known this if I had read the insert that came with the belt first! Anyway, this was not a problem, only a design change. Also it was important to start the belt on the inside, so if it slipped, you didnt loose your bite. Total diagnostic, repair, and reassembly time: 30 minutes plus or minus. I had read other online forums that said you had to loosen the motor, etc. And I do know some type of a belt installation tool was offered on line, but I got along fine with my installation method. An extra set of hands would have been helpful, but not necessary.
Parts Used:
6-Rib Drive Belt
  • jon from barry, IL
  • Difficulty Level:
    A Bit Difficult
  • Total Repair Time:
    15 - 30 mins
  • Tools:
    Nutdriver
91 of 110 people found this instruction helpful.
Was this instruction helpful to you?
Thank you for voting!