




















GIE16GSHPRSS General Electric Refrigerator - Instructions
Keep searches simple. Use keywords, e.g. "leaking", "pump", "broken" or "fit".
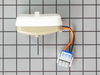
The fan got very noisy.
My husband did the repair in 45 minutes and said it was very easy. The video made everything plain and simple.
Parts Used:
-
Carol from ORANGE, CA
-
Difficulty Level:Really Easy
-
Total Repair Time:30 - 60 mins
-
Tools:Screw drivers, Socket set
2 of 2 people
found this instruction helpful.
Was this instruction helpful to you?
Thank you for voting!
Defroster fan burned up
First I removed the ice tray rack lifting it out of the way to reach the back cover of the fan. Then, the whole back inside panel had to be removed. Two screws removed the fan and bracket from the freezer unit. The missing bumper lid just snapped into place. Replaced everything in reverse order. Pretty easy job.
Parts Used:

-
Peter M. from Lincoln Park, NJ
-
Difficulty Level:Easy
-
Total Repair Time:30 - 60 mins
-
Tools:Nutdriver, Pliers, Screw drivers, Socket set
3 of 6 people
found this instruction helpful.
Was this instruction helpful to you?
Thank you for voting!
Fridge making LOUD humming sound.
Started removing screws until I got to the fan (it's easy). Then just took out the old fan and put the new one back in the same way. The only challenging part was putting the clamp back on the fan, but I finally got it. The fridge is finally quiet and we can sleep again! PartSelect made it really easy and they were incredibly fast. Thanks!
Parts Used:
-
jack from homestead, FL
-
Difficulty Level:Easy
-
Total Repair Time:15 - 30 mins
-
Tools:Nutdriver, Screw drivers
2 of 3 people
found this instruction helpful.
Was this instruction helpful to you?
Thank you for voting!
The Light Would Not Go On
Knew the switch was bad. Researched on the internet how to fix. Used a steak knife to pop the old one out, changed the contacts to the new switch and popped it back in. It took longer to open the box than it did to replace the switch. And the part arrived 2 days after I ordered it.
Parts Used:

-
Steve from Littleton, CO
-
Difficulty Level:Really Easy
-
Total Repair Time:Less than 15 mins
3 of 6 people
found this instruction helpful.
Was this instruction helpful to you?
Thank you for voting!
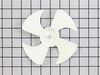
Noise in the back of freezer
I must thank yo for sending the fan so fast. If I ever have to deal with any appliance again, you are first on my list.
Parts Used:
-
MaryLou from Levittown, NY
-
Difficulty Level:A Bit Difficult
-
Total Repair Time:Less than 15 mins
3 of 6 people
found this instruction helpful.
Was this instruction helpful to you?
Thank you for voting!
I dropped one of the trays and it hit the light switch and broke off!
It was so darn easy! Took less then 10 minutes to fix. Self explanatory no instructions needed! Very cool!
Parts Used:
-
Cyndy from Rancho Cucamonga, CA
-
Difficulty Level:Really Easy
-
Total Repair Time:Less than 15 mins
-
Tools:Screw drivers
2 of 3 people
found this instruction helpful.
Was this instruction helpful to you?
Thank you for voting!
The switch was loose ( no spring). The lights did not work.
Unplug the refrigerator. Gently pry old switch out with screw driver. Move wires to connector on new switch with needle nose pliers. Pop it back into the hole. Plug back in. Peek inside to see the lights working.
Parts Used:
-
Michael from PALMYRA, VA
-
Difficulty Level:Really Easy
-
Total Repair Time:Less than 15 mins
-
Tools:Pliers, Screw drivers
1 person
found this instruction helpful.
Was this instruction helpful to you?
Thank you for voting!
noisy refrigerator
I followed your video and completely dismantled the refrigerator evaporator motor, fan, brackets, and grommet, I completely cleaned the refrigerator including the cooling coils. I then ordered the evaporator motor ,fan, grommets, lid bumper, and brackets. The order would take a week to arrive. In the meantime I cleaned and reassembled all the old parts, waiting for the new ones to come. Guess what! The refrigerator was quiet as a mouse. I really did not need the new parts, but I kept them anyway just for good luck. Not bad for a refrigerator that's twenty four years old.
Parts Used:
-
James from NEW YORK, NY
-
Difficulty Level:Easy
-
Total Repair Time:1- 2 hours
-
Tools:Nutdriver, Pliers, Screw drivers, Socket set
1 person
found this instruction helpful.
Was this instruction helpful to you?
Thank you for voting!
Refigerator was amking a loud noise when the fan came on to cool.
Followed the on line instructions and found the repair to be very easy. Took longer to remove the food from the freezer than to switch out the fan motor.
Parts Used:
-
Maureen from LYNCHBURG, VA
-
Difficulty Level:Very Easy
-
Total Repair Time:15 - 30 mins
-
Tools:Pliers
1 person
found this instruction helpful.
Was this instruction helpful to you?
Thank you for voting!
Noisy fan in freezer compartment
First I unplugged the power. Then I removed the wire shelf, center plastic cover, flited the stryofoam piece out, removed the back panel. Then I disconnedted the fan connectors. Then I took the fan brackets off and removed the clamp holding the fan blades to the motor shaft. I then reversed the steps to complete the installation.
Parts Used:
-
Louis from GAINESVILLE, FL
-
Difficulty Level:Easy
-
Total Repair Time:15 - 30 mins
-
Tools:Nutdriver, Pliers, Screw drivers
1 person
found this instruction helpful.
Was this instruction helpful to you?
Thank you for voting!
Noisy motor that was getting worse.
Followed the steps on the linked video. Absolutely accurate and easy to follow. Beware: Don't drop a screw down the opening after removing the styrofoam block.
Parts Used:
-
Judy from NEW YORK, NY
-
Difficulty Level:Very Easy
-
Total Repair Time:15 - 30 mins
-
Tools:Nutdriver, Screw drivers
1 person
found this instruction helpful.
Was this instruction helpful to you?
Thank you for voting!
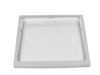
replaced glass shelve
1. Open refrigerator door.
2. Push glass shelve in until it locks.
3. If 1 and 2 are too hard for you, "man up" and ask your wife for help.
2. Push glass shelve in until it locks.
3. If 1 and 2 are too hard for you, "man up" and ask your wife for help.
Parts Used:
-
norm from LA CROSSE, WI
-
Difficulty Level:Very Easy
-
Total Repair Time:Less than 15 mins
1 person
found this instruction helpful.
Was this instruction helpful to you?
Thank you for voting!
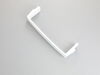
It was broken
-
Felina from BRONX, NY
-
Difficulty Level:Very Easy
-
Total Repair Time:Less than 15 mins
1 person
found this instruction helpful.
Was this instruction helpful to you?
Thank you for voting!
Attached to hooks
-
Rosemary from COLUMBUS, OH
-
Difficulty Level:Very Easy
-
Total Repair Time:Less than 15 mins
1 person
found this instruction helpful.
Was this instruction helpful to you?
Thank you for voting!
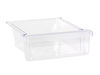
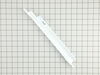
Replaced broken rail
I used a screwdriver and it took about 2 minutes to install. Very easy to do.
Parts Used:
-
Antonio from HARTFORD, CT
-
Difficulty Level:Very Easy
-
Total Repair Time:Less than 15 mins
-
Tools:Screw drivers
1 person
found this instruction helpful.
Was this instruction helpful to you?
Thank you for voting!