




















GIE16GSHHRSS General Electric Refrigerator - Instructions
Keep searches simple. Use keywords, e.g. "leaking", "pump", "broken" or "fit".
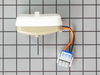
Fan Motor stopped working
Not only was finding the part rediculously easy for a person who has never done this type of thing...the repair was a sinch!! I will always return to this company for help with home equipment repairs. I saved so much money doing it this way. :) thanks guys!
Parts Used:
-
connie from omaha, AR
-
Difficulty Level:Really Easy
-
Total Repair Time:Less than 15 mins
-
Tools:Screw drivers
12 of 13 people
found this instruction helpful.
Was this instruction helpful to you?
Thank you for voting!
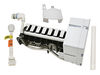
Ice maker ot making ice
First I replaced the double valve because the ice maker was not filling with water. It still did not work. Then I replaced the ice maker itself. This worked and was relatively easy to replace. I had to use the water fill "slide" from the old ice maker. The new one was too narrow and it leaked water into the freezer.
Parts Used:
-
Barry from Phoenix, AZ
-
Difficulty Level:Easy
-
Total Repair Time:15 - 30 mins
-
Tools:Nutdriver
18 of 31 people
found this instruction helpful.
Was this instruction helpful to you?
Thank you for voting!
Broken Switch
Just pop the old one out, careful not to lose the wiring inside the ref wall & popped the new one in.
Parts Used:
-
ron from hermitage, TN
-
Difficulty Level:Really Easy
-
Total Repair Time:Less than 15 mins
12 of 14 people
found this instruction helpful.
Was this instruction helpful to you?
Thank you for voting!
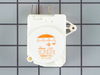
botton half of refrigerator not cooling
easy as 1.2.3 remove and replace before even thinking. just to let you know i also do this for a living but it is one of the most difficult thing when you have to stop and fix your own
Parts Used:
-
HANCEL from ELMONT, NY
-
Difficulty Level:Really Easy
-
Total Repair Time:15 - 30 mins
-
Tools:Nutdriver, Screw drivers
25 of 55 people
found this instruction helpful.
Was this instruction helpful to you?
Thank you for voting!
Refridgerator Freezer stoped making ice
Turned off power, removed cover from Ice maker, checked resistance across thermostat for zero (read open), all other switches read proper value (when activated). Ordered and received thermostat. Removed Ice Maker from freezer, removed two screws holding ice tray to Control Assembly. Removed Thermostat and replaced with new one. Applied Silicone Sealant to face of Thermostat for adhesion to ice tray when assembled. Remounted Ice Tray to Control Assembly and remounted in freezer. Works Great...
Parts Used:
-
Marion from Palm Coast, FL
-
Difficulty Level:Easy
-
Total Repair Time:30 - 60 mins
-
Tools:Screw drivers
17 of 31 people
found this instruction helpful.
Was this instruction helpful to you?
Thank you for voting!
Ice machine wasnt making ice
First I turned the refrigerator and water line off. Then moved to the freezer section, followed the directions, removed the two screws. Directions state to not remove them but I had to in this case. Unplugged the ice maker and removed it from the freezer. I installed the two mounting screws then tried to plug the electrical connection back in but had to use the adaptor cord furnished in the kit. The cord was a little long but I tucked it in and mounted the ice maker. Turned it on then turned the refrigerator and water back on and in a few hours had ice! Very easy to do!
Parts Used:
-
Robert from Auburn, AL
-
Difficulty Level:Really Easy
-
Total Repair Time:Less than 15 mins
-
Tools:Screw drivers
14 of 23 people
found this instruction helpful.
Was this instruction helpful to you?
Thank you for voting!
broken ice maker
removed 3 screws unplug and remove old unit. install two screws install new ice maker, tighten screws plug in and turn on. had ice in 20 min.
Parts Used:
-
robert from bensalem, PA
-
Difficulty Level:Really Easy
-
Total Repair Time:Less than 15 mins
-
Tools:Screw drivers
10 of 12 people
found this instruction helpful.
Was this instruction helpful to you?
Thank you for voting!
Ice maker Stripper lost a tooth
First turn off the power, remove the ice tray, remove the two screws holding the ice maker to the side of the freezer, use the screw driver to gently open the electrical clip for the power cord inside the freezer, remove the complete unit from freezer, bend the old stripper from the holding pin- it is flexible- it will bend, replace the new stripper on the holding pin and bend into the slot to hold it firmly, no water will come out from the fill cup into the freezer, plug in the power cord, mount back to side of freezer, you are done.
Parts Used:
-
Ernest W. from Charlotte, NC
-
Difficulty Level:Really Easy
-
Total Repair Time:Less than 15 mins
-
Tools:Nutdriver, Screw drivers
10 of 12 people
found this instruction helpful.
Was this instruction helpful to you?
Thank you for voting!
Evap Motor - loud noise
The evap fan, based on research, appears to be built to only last a few years. Pay attention to your order of removal for all pieces and it will go back rather easily in reverse.Remove items from freezer. UNPLUG FREEZER. Pop out the shelf. Use screwdriver to remove plastic piece in back. Pop out styrofoam piece. Use screwdriver to remove back metal section of freezer. Use nutdriver to remove screws holding the fan to the back. Unplug the motor. Pop off the fan. Pay attention to location of all these pieces. Put them on the new motor. Reassemble in reverse. Piece of cake.
Parts Used:

-
James from Floral Park, NY
-
Difficulty Level:Easy
-
Total Repair Time:Less than 15 mins
-
Tools:Nutdriver, Screw drivers
9 of 11 people
found this instruction helpful.
Was this instruction helpful to you?
Thank you for voting!
Fresh food section lights were all out, but the bulbs tested good elsewhere.
I popped the switch out using the blade of a small screwdriver and noticed that it connected with two wires via a slide on connector for each one. I noted the info on the old switch to identify which wire went to which terminal. I held each wire with a pair of pliers while I pulled the wire connector off the terminal on the old switch. I connected the two wires to the correct terminals on the new swith, and popped the switch back into the door frame. Easy, easy, easy and saved the $40 service call + parts cost!
Parts Used:
-
EDWARD from INDIAN WELLS, CA
-
Difficulty Level:Really Easy
-
Total Repair Time:Less than 15 mins
-
Tools:Pliers, Screw drivers
8 of 8 people
found this instruction helpful.
Was this instruction helpful to you?
Thank you for voting!
Will not make ice
-
GEORGE from ELIOT, ME
-
Difficulty Level:Easy
-
Total Repair Time:Less than 15 mins
-
Tools:Screw drivers
13 of 23 people
found this instruction helpful.
Was this instruction helpful to you?
Thank you for voting!
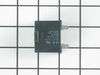
Fridge keeps cycling on and off and a clicking sound happens every time compressor cycles.
I opened the back panel of the fridge and exposed the compressor. Unplugged existing run capacitor and installed new one with the addition of the sleeve that is stated must be installed around the run capacitor.
Everything I read and on this web site says that based on these symptoms, that the problem is the run capacitor. I searched and search for a part called a start relay which plugs in to the compressor. This run capacitor plugs in to this other part which I take as the start relay.
Installing this run capacitor did not solve the problem. The fridge compressor keeps cycling on and off. Freezer doesn't keep as cold as it should.
Everything I read and on this web site says that based on these symptoms, that the problem is the run capacitor. I searched and search for a part called a start relay which plugs in to the compressor. This run capacitor plugs in to this other part which I take as the start relay.
Installing this run capacitor did not solve the problem. The fridge compressor keeps cycling on and off. Freezer doesn't keep as cold as it should.
Parts Used:
-
Kirk E from GRASS VALLEY, CA
-
Difficulty Level:Easy
-
Total Repair Time:Less than 15 mins
-
Tools:Screw drivers
8 of 9 people
found this instruction helpful.
Was this instruction helpful to you?
Thank you for voting!
Ice in freezer running down sides
This is a built-in unit. Remove the external bezel at the top of the unit. Reach through the unit and unplug the frig. On the compressor unit, you'll see a vertical metal panel. Remove the metal panel and the timer is right behind it. Remove one wire at a time and switch it to the new timer. Remove timer and replace with new one.
Just an added comment, GE Service wanted to put an "ice kit" into my unit. The full repairs would have cost $1,000. While I described how to replace the defrost timer, the problem was the tray heater. But that's another story.
Just an added comment, GE Service wanted to put an "ice kit" into my unit. The full repairs would have cost $1,000. While I described how to replace the defrost timer, the problem was the tray heater. But that's another story.
Parts Used:
-
P. Michael from Tustin, CA
-
Difficulty Level:Easy
-
Total Repair Time:15 - 30 mins
-
Tools:Nutdriver, Screw drivers
8 of 9 people
found this instruction helpful.
Was this instruction helpful to you?
Thank you for voting!
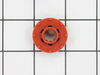
Bearing chatter and slow running fan motor
assembled ordered parts then replaced defective fan and blade and bracket as a group
Parts Used:


-
Michael from Kalamazoo, MI
-
Difficulty Level:Really Easy
-
Total Repair Time:15 - 30 mins
-
Tools:Nutdriver, Screw drivers, Socket set
10 of 15 people
found this instruction helpful.
Was this instruction helpful to you?
Thank you for voting!
defrost system kept freezing up
took out 4 screws - lowered timer cover - replaced timer- put it back together
Parts Used:
-
Robert from Williamstown, NY
-
Difficulty Level:Easy
-
Total Repair Time:15 - 30 mins
-
Tools:Screw drivers
8 of 10 people
found this instruction helpful.
Was this instruction helpful to you?
Thank you for voting!