


GI6FARXXF02 Whirlpool Refrigerator - Overview
Sections of the GI6FARXXF02
[Viewing 11 of 11]


 Diagram and Parts List for Whirlpool Refrigerator")


Manuals & Care Guides for GI6FARXXF02
Click to downloadKeep searches simple, eg. "belt" or "pump".

Refrigerator Water Filter
PartSelect #: PS11722130
Manufacturer #: EDR4RXD1
This water filter purifies water going to the water dispenser and sometimes the icemaker as well. This part should be replaced if it is causing reduced water flow or just replaced periodically per the...
29% OFF
$49.99
$69.99
In Stock

Refrigerator Center Rail
PartSelect #: PS11752912
Manufacturer #: WPW10326469
This OEM Center Rail is a white plastic part which supports the crisper frame, which holds the crisper. Fifteen inches long and white in colour, if broken, the support may no longer hold properly. Re...
$34.95
In Stock

P-Trap Drain Tube Kit
PartSelect #: PS8691807
Manufacturer #: W10619951
Also known as a duck bill. This kit includes the tube extension piece and spacer.
$52.75
In Stock

Refrigerator Capacitor
PartSelect #: PS11757023
Manufacturer #: WPW10662129
This part helps the compressor kick on and off while maintaining a constant temperature to keep things frozen in your freezer.
$57.73
In Stock

Touch-Up Paint - White
PartSelect #: PS385132
Manufacturer #: 72017
This 18 ml bottle of white appliance touch-up paint is used to cover scratches or marks on your appliance. The white touch-up paint can be used on refrigerators, microwaves, ranges, clothes dryers, an...
$17.95
In Stock

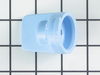
Refrigerator Water Filter Bypass
PartSelect #: PS12731165
Manufacturer #: W11395888
This water filter bypass cap is a genuine OEM component designed for select Whirlpool, Maytag, KitchenAid, and affiliated refrigerator models. Installed in place of the water filter, it allows uninter...
$53.85
In Stock

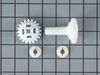
Refrigerator Humidity Control Slide
PartSelect #: PS11743638
Manufacturer #: WP67005864
This part mounts on the crisper drawer cover and is used to limit the amount of air that gets into the crisper.
$14.69
In Stock

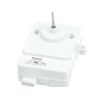
Door Switch
PartSelect #: PS12731166
Manufacturer #: W11396033
This light switch may also be known as a refrigerator door switch or a light switch kit, and is compatible with your refrigerator. The function of the refrigerator door switch is to turn on the light ...
$38.96
In Stock

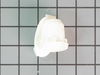
Refrigerator Pivot Block
PartSelect #: PS11743531
Manufacturer #: WP67003405
This is a replacement pivot block for your refrigerator. It is made of white plastic and is approximately 4 inches long and 1 inch wide. The pivot block catches and holds the door mullion cover when y...
$14.72
In Stock

Cantilever Bin
PartSelect #: PS11750465
Manufacturer #: WPW10212139
Made from durable, transparent plastic, this door shelf bin attaches to the inside of the refrigerator door to store small items like condiments and jars. It’s compatible with select Whirlpool, Maytag...
$87.97
In Stock

Refrigerator Damper Control Assembly
PartSelect #: PS11750106
Manufacturer #: WPW10196393
This part allows the cold air from the freezer section to be aired into the fresh food section and it is controlled by the thermostat.
$159.79
In Stock
 – Part Number: WPW10534155")
Refrigerator Kickplate Grille (Apollo Gray)
PartSelect #: PS11756053
Manufacturer #: WPW10534155
This kickplate grille is attached to the bottom of the refrigerator.
$104.34
In Stock
Common Symptoms of the GI6FARXXF02
[Viewing 21 of 21]Leaking
Fixed by
these parts
these parts


Show All
Light not working
Fixed by
these parts
these parts


Show All
Ice maker not making ice
Fixed by
these parts
these parts


Show All
Fridge too warm
Fixed by
these parts
these parts


Show All
Door won’t open or close
Fixed by
these parts
these parts


Show All
Not dispensing water
Fixed by
these parts
these parts
Show All
Will Not Start
Fixed by
these parts
these parts
Show All
Fridge and Freezer are too warm
Fixed by
these parts
these parts

Show All
Freezer section too warm
Fixed by
these parts
these parts
Show All
Noisy
Fixed by
these parts
these parts
Show All
Frost buildup
Fixed by
these parts
these parts

Show All
Clicking sound
Fixed by
these parts
these parts
Show All
Ice maker won’t dispense ice
Fixed by
these parts
these parts

Show All
Freezer not defrosting
Fixed by
these parts
these parts
Show All
Door Sweating
Fixed by
these parts
these parts

Show All
Fridge too cold
Fixed by
these parts
these parts
Show All
Too warm
Fixed by
these parts
these parts
Show All
Ice maker dispenses too little ice
Fixed by
these parts
these parts
Show All
Fridge runs too long
Fixed by
these parts
these parts
Show All
Touchpad does not respond
Fixed by
these parts
these parts
Show All
Won’t start
Fixed by
these parts
these parts
Show All


Keep searches simple. Use keywords, e.g. "leaking", "pump", "broken" or "fit".
light on to order water filter
Pressed in the end of the filter cover, lowered it down part way. Twisted the old filter 1/4 turn and removed it. Set in the sink to drain. Inserted new filter and twisted it to lock. closed cover. Done. Total time @ 1 Minute.
Parts Used:
-
Douglas from Byron, NY
-
Difficulty Level:Really Easy
-
Total Repair Time:Less than 15 mins
916 of 1057 people
found this instruction helpful.
Was this instruction helpful to you?
Thank you for voting!
My refrigerator stopped cooling and the freezer section stopped freezing
I knew the chances of all the freon leaking out was unlikely so I looked at the wiring to the compressor and there was a capacitor and a starter/overload so i figured I would start there. I went on line and found the parts at this site and they were less than the minimum service call charge for a service tech so I figured what the heck let's give her a shot so I did give it a shot. I ordered the parts and they were there in less time than a service tech could come out and i installed the parts and guess what for 90.00 in parts and 15 minutes in time I repaired my refrigerator. Thanks guys, It took less time to order the parts than it did to make the repair so thanks, your website rocks and is very well designed so my hat is off to you guys!
Parts Used:
-
garth from forest lake, MN
-
Difficulty Level:Really Easy
-
Total Repair Time:15 - 30 mins
-
Tools:Nutdriver, Screw drivers
439 of 554 people
found this instruction helpful.
Was this instruction helpful to you?
Thank you for voting!
Removing the existing filter by rotating as directed and then dislodging from 'docking' station proved difficult. Turns out, the old filter is under a bit of vacuum pressure and getting the unit to separate or release was a challenge.
I removed the drop-down outer housing by gently prying the sides of the two pivot pins at the rear. This gave me move 'room' to grip and slightly rotate then pull the old filter forward and away from the tight suction connection. I was concerned that I would be too forceful for the plastic assemblies and would break something; deliberate motions and a steady thought process on the problem helped disengage the darned old filter!
Parts Used:
-
Jake from Novato, CA
-
Difficulty Level:Easy
-
Total Repair Time:Less than 15 mins
216 of 335 people
found this instruction helpful.
Was this instruction helpful to you?
Thank you for voting!