




















GC900QPPB7 Whirlpool Trash Compactor - Overview
Sections of the GC900QPPB7
[Viewing 1 of 1]
Keep searches simple, eg. "belt" or "pump".
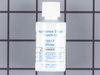
Touch-Up Paint - White
PartSelect #: PS385132
Manufacturer #: 72017
This 18 ml bottle of white appliance touch-up paint is used to cover scratches or marks on your appliance. The white touch-up paint can be used on refrigerators, microwaves, ranges, clothes dryers, an...
$17.95
In Stock
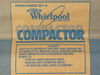
15" Paper Compactor Bags - 12 Pack
PartSelect #: PS382653
Manufacturer #: 675186
Moisture-resistant liner. Pre-cuffed.
No Longer Available
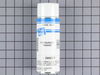

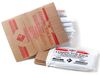
Bags - 48 Pack
PartSelect #: PS398580
Manufacturer #: 882652
Used with trash compactors. These are 15" bags.
No Longer Available
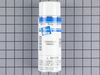
Spray Paint - Superior Black
PartSelect #: PS334404
Manufacturer #: 285006
This is a 12oz can of black spray paint.
$53.85
In Stock

Safety Switch
PartSelect #: PS405439
Manufacturer #: 9871829
Got a Whirlpool trash compactor acting up? You could be in need of a drawer tilt switch'which is just a fancy name for a little safety switch that keeps your trash compactor working safely and efficie...
$60.45
Special Order

SLIDE TRACK-FRAME,RH,GALV,SERV
PartSelect #: PS17629621
Manufacturer #: W11722978
$98.81
Special Order

Handle - White
PartSelect #: PS985203
Manufacturer #: 9872040W
Have you been struggling with a broken or faulty handle on your trash compactor? Our genuine OEM White Container Handle, straight from the trusted manufacturer, Whirlpool, could be the perfect fix you...
$186.31
Special Order
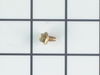
Refrigerator Screw
PartSelect #: PS11742745
Manufacturer #: WP489399
This screw is sold individually.
$9.85
Special Order
Safety Switch Actuator
PartSelect #: PS405252
Manufacturer #: 9871125
This part is used in conjunction with trash compactors by connecting to the drawer frame and activates the safety switch when the drawer is closed.
$29.56
Special Order
Common Symptoms of the GC900QPPB7
[Viewing 1 of 1]
Keep searches simple. Use keywords, e.g. "leaking", "pump", "broken" or "fit".
Scratches in Surface
This product comes in a bottle with a brush like Liquid Paper. It goes on incredibly easy. A second coat might be needed. I wanted to prevent rust from setting in so I covered the scratches and dings. The paint is a little brighter since my washer is 10 years old but it still looks great.
Parts Used:
-
Michelle from Richardson, TX
-
Difficulty Level:Really Easy
-
Total Repair Time:Less than 15 mins
83 of 227 people
found this instruction helpful.
Was this instruction helpful to you?
Thank you for voting!
My COMPACTOR WOULD NOT TURN ON
I ORDERDED THE SELECTOR SWITCH WHICH SITS BEHIND THE TOUCH PANEL THAT SAYS ON/OFF/START.i REMOVED THE 2 PHILLIPS SCREWS JUST BELOW THE DISPLAY.SLIDE THE WHOLE DISPLAY UP AND IT WILL EXPOSE 3 WIRES AND THE SWITCH.REMOVE THE TWO PHILLIPS SCREWS,REMOVE THE CLEARLY MARKED Y=YELLOW R=RED AND V=VIOLET .INSTALL THE WIRES MOUNT THE SWITCH REPLACE THE TWO SCREWS REINSTALL THE PANEL,HIT START AND GOOD TO GO!
Parts Used:
-
Mark from Tewksbury, MA
-
Difficulty Level:Really Easy
-
Total Repair Time:Less than 15 mins
-
Tools:Screw drivers
6 of 8 people
found this instruction helpful.
Was this instruction helpful to you?
Thank you for voting!
the operating buttom membrance was cracked
1Turn the compactor off
2Removed the plate on the top of the compactor. Mine was held by 2 screws.
Make note of where the electrical connections are located
3Remove the electrical connections on the operating plate.
4Remove 2 screws holding the plate to the compactor
the unit housing the operating buttons is now free from the compactor
using a small blade move around the outside of the membrane to release the existing cover
Clean the lip where glue still exists
peel back the plastic cover from the part and press into place
Reverse steps 1,2,3 &4
2Removed the plate on the top of the compactor. Mine was held by 2 screws.
Make note of where the electrical connections are located
3Remove the electrical connections on the operating plate.
4Remove 2 screws holding the plate to the compactor
the unit housing the operating buttons is now free from the compactor
using a small blade move around the outside of the membrane to release the existing cover
Clean the lip where glue still exists
peel back the plastic cover from the part and press into place
Reverse steps 1,2,3 &4
Parts Used:
-
Ken from SOMERSET, NJ
-
Difficulty Level:Easy
-
Total Repair Time:30 - 60 mins
-
Tools:Screw drivers
2 of 3 people
found this instruction helpful.
Was this instruction helpful to you?
Thank you for voting!