




















GAS18PSJFRSS General Electric Refrigerator - Instructions
Keep searches simple. Use keywords, e.g. "leaking", "pump", "broken" or "fit".
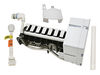
The icemaker quit making ice and the water started forming on the bottom of the ice bucket.
First I removed the electrical plug from the back of the freezer that plugs into the icemaker. I then removed the two hex head screws that hold the icemaker to the wall of the freezer and removed the icemaker. I removed the plastic cover, which incidentally protects the gears, by prying it off with a srewdriver. I removed three small nuts(7mm) which holds the internal cam in place. I removed the cam by pulling it off the shaft. Once I got the part from you folks I reversed the procedure that I just mentioned, and put the icemaker back together. It works great. The part with shipping was around $16.00. A new icemaker was roughly $159.00. If I would have called a technician it would have cost around $300.00 to repair.
Parts Used:
-
John from Anaheim, CA
-
Difficulty Level:Really Easy
-
Total Repair Time:Less than 15 mins
-
Tools:Nutdriver, Screw drivers, Wrench (Adjustable)
2 of 3 people
found this instruction helpful.
Was this instruction helpful to you?
Thank you for voting!
I dropped one of the trays and it hit the light switch and broke off!
It was so darn easy! Took less then 10 minutes to fix. Self explanatory no instructions needed! Very cool!
Parts Used:
-
Cyndy from Rancho Cucamonga, CA
-
Difficulty Level:Really Easy
-
Total Repair Time:Less than 15 mins
-
Tools:Screw drivers
2 of 3 people
found this instruction helpful.
Was this instruction helpful to you?
Thank you for voting!
The Light Would Not Go On
Knew the switch was bad. Researched on the internet how to fix. Used a steak knife to pop the old one out, changed the contacts to the new switch and popped it back in. It took longer to open the box than it did to replace the switch. And the part arrived 2 days after I ordered it.
Parts Used:
-
Steve from Littleton, CO
-
Difficulty Level:Really Easy
-
Total Repair Time:Less than 15 mins
3 of 6 people
found this instruction helpful.
Was this instruction helpful to you?
Thank you for voting!
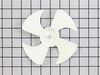
Noise in the back of freezer
I must thank yo for sending the fan so fast. If I ever have to deal with any appliance again, you are first on my list.
Parts Used:
-
MaryLou from Levittown, NY
-
Difficulty Level:A Bit Difficult
-
Total Repair Time:Less than 15 mins
3 of 6 people
found this instruction helpful.
Was this instruction helpful to you?
Thank you for voting!
Fridge making LOUD humming sound.
Started removing screws until I got to the fan (it's easy). Then just took out the old fan and put the new one back in the same way. The only challenging part was putting the clamp back on the fan, but I finally got it. The fridge is finally quiet and we can sleep again! PartSelect made it really easy and they were incredibly fast. Thanks!
Parts Used:
-
jack from homestead, FL
-
Difficulty Level:Easy
-
Total Repair Time:15 - 30 mins
-
Tools:Nutdriver, Screw drivers
2 of 3 people
found this instruction helpful.
Was this instruction helpful to you?
Thank you for voting!
Defroster fan burned up
First I removed the ice tray rack lifting it out of the way to reach the back cover of the fan. Then, the whole back inside panel had to be removed. Two screws removed the fan and bracket from the freezer unit. The missing bumper lid just snapped into place. Replaced everything in reverse order. Pretty easy job.
Parts Used:

-
Peter M. from Lincoln Park, NJ
-
Difficulty Level:Easy
-
Total Repair Time:30 - 60 mins
-
Tools:Nutdriver, Pliers, Screw drivers, Socket set
3 of 6 people
found this instruction helpful.
Was this instruction helpful to you?
Thank you for voting!
freezer was too warm, only froze ice cubes on the bottom, fan making noise, food only stayed froze if already frozen
followed instructions in the video. simple tools. pretty easy. Most people would have just bought another refrigerator, $50.00 was much better. Is working just like new.
Parts Used:
-
Wendy m from BROWNINGTON, VT
-
Difficulty Level:Really Easy
-
Total Repair Time:30 - 60 mins
1 person
found this instruction helpful.
Was this instruction helpful to you?
Thank you for voting!
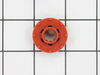
Fan was not centered in the middle of the back panel opening.
Bent the motor bracket down, then using a rat tail file, elongated the holes in the back panel of the refrigerator to secure the fan in the "centered" position. This was a problem that was with the refrig. since it was made. The parts involved were perfect. NO problem at all installing them.
Parts Used:
-
James from GREENSBORO, NC
-
Difficulty Level:Easy
-
Total Repair Time:30 - 60 mins
-
Tools:Screw drivers, Socket set
1 person
found this instruction helpful.
Was this instruction helpful to you?
Thank you for voting!
Evaporator motor bearings failing - squeaking
1. Watch the video.2.Place all screws in a central location that will not be hit, stepped on, fall on the floor, etc. 3. Be systematic. 4. Allow a full hour. 5. Watch the video.
Parts Used:
-
Gilbert from LOUISVILLE, KY
-
Difficulty Level:Easy
-
Total Repair Time:30 - 60 mins
-
Tools:Screw drivers, Socket set
1 person
found this instruction helpful.
Was this instruction helpful to you?
Thank you for voting!
Leaking And Making Stalactites
Had to defrost the freezer to melt off all the ice before servicing. Once that was done the icemaker replacement only took about 15-30 minutes to complete. The new icemaker came with many accessories and adaptors that were not needed and the instructions were based on replacing an older model and not really clear for my model. They mentioned not being able to use the new stripper but it was exactly the same as the old one so I left the new one in place. All in all it was easy and did the job.
Parts Used:
-
Richard from Zephyrhills, FL
-
Difficulty Level:Easy
-
Total Repair Time:More than 2 hours
-
Tools:Nutdriver, Screw drivers
2 of 4 people
found this instruction helpful.
Was this instruction helpful to you?
Thank you for voting!
Loud whirling noises when the motor started up, then they subside (and stop) in a short time
I have not yet done the repair. After watching this repair video two problems came to mind. First I only ordered one grommet not knowing that there were two (or more I don't yet know). The second problem is that this video must be for a fridge from like the 1940, but it looks NOTHING like mine from 2008. The manual shows a bazillion parts and frankly I'm just a wee bit afraid to get started, and I am generally very handy, buuuttttttttt I don't know about this one
Parts Used:
-
Randy from VALLEY CENTER, CA
-
Difficulty Level:Very Difficult
-
Total Repair Time:More than 2 hours
1 person
found this instruction helpful.
Was this instruction helpful to you?
Thank you for voting!
water leaking from under dishwasher
Water was leaking from under the GE dishwasher, but once we pulled it out, had apparently been going on for a little while. Turning the water off to the dishwasher made it stop, so it was happening even when the unit was not running, potentially indicating somewhere early in the path of the water to and into the machine.
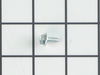
Indeed, inspecting the water inlet vale showed a slow leak. Getting the replacement part was fine, and it fit the electrical, water inlet (existing 90-degree water inlet elbow), and water outlet connections just fine - but the original machine screws that held on the original water inlet valve did not work. It took a little research to figure out the new type of screw required, which was apparently a 10/16 Type AB, which seemed to be a less common type of sheet metal screw (with a point), as opposed to the original flat-ended machine screws. So, after ordering those separately (which were a bit expensive), it went together fine.
A note on the water inlet valve part just indicating the the threading on those parts has changed over time, so potentially ordering the screws to attach it might be worthwhile, would be good information to add about the water inlet valve.
Indeed, inspecting the water inlet vale showed a slow leak. Getting the replacement part was fine, and it fit the electrical, water inlet (existing 90-degree water inlet elbow), and water outlet connections just fine - but the original machine screws that held on the original water inlet valve did not work. It took a little research to figure out the new type of screw required, which was apparently a 10/16 Type AB, which seemed to be a less common type of sheet metal screw (with a point), as opposed to the original flat-ended machine screws. So, after ordering those separately (which were a bit expensive), it went together fine.
A note on the water inlet valve part just indicating the the threading on those parts has changed over time, so potentially ordering the screws to attach it might be worthwhile, would be good information to add about the water inlet valve.
Parts Used:
-
Edward from E LONGMEADOW, MA
-
Difficulty Level:A Bit Difficult
-
Total Repair Time:30 - 60 mins
-
Tools:Pliers, Socket set, Wrench (Adjustable)
1 person
found this instruction helpful.
Was this instruction helpful to you?
Thank you for voting!
Fridge light dead even with new bulb
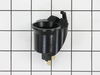
1- youtubed the potential diagnoses, 2- resourced and ordered parts, 3- removed old socket, installed new one :-)... My fridge is an older fridge and could've used a screwdriver for eyeglasses. Plug and play easy... YAY!
Parts Used:
-
marj from NEWBURY PARK, CA
-
Difficulty Level:Really Easy
-
Total Repair Time:15 - 30 mins
-
Tools:Screw drivers
1 person
found this instruction helpful.
Was this instruction helpful to you?
Thank you for voting!
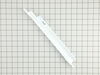
Replaced broken rail
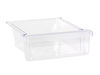
I used a screwdriver and it took about 2 minutes to install. Very easy to do.
Parts Used:
-
Antonio from HARTFORD, CT
-
Difficulty Level:Very Easy
-
Total Repair Time:Less than 15 mins
-
Tools:Screw drivers
1 person
found this instruction helpful.
Was this instruction helpful to you?
Thank you for voting!
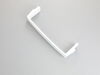
Attached to hooks
-
Rosemary from COLUMBUS, OH
-
Difficulty Level:Very Easy
-
Total Repair Time:Less than 15 mins
1 person
found this instruction helpful.
Was this instruction helpful to you?
Thank you for voting!