


FTF2140FE0 Frigidaire Washer - Overview
Sections of the FTF2140FE0
[Viewing 5 of 5]


Manuals & Care Guides for FTF2140FE0
Click to downloadInstall
Installation Instructions
(3.72MB)
Install
Installation Instructions
(1.48MB)
Manual
Owner's Manuals
(1.32MB)
Manual
Owner's Manuals
(1.35MB)
Care
Use and Care Manual
(2.42MB)
Wiring
Wiring Diagram
(1.89MB)
Keep searches simple, eg. "belt" or "pump".

Door Striker
PartSelect #: PS2378364
Manufacturer #: 131763302
This part is found on the door of your washer and keeps your door closed for use.
$43.95
In Stock
Order within the next 40 mins and your part ships today!

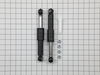
Shock Absorber Kit
PartSelect #: PS3508101
Manufacturer #: 5304485917
This kit is used for front load washers and includes 2 dual-stage shock absorbers, 1 spare shock mounting pin and 4 locking nuts. These shock absorbers keep the washer from vigorous shaking during it's cycles.
$64.85
In Stock
Order within the next 40 mins and your part ships today!

Front Load Washer Door Lock and Switch Assembly
PartSelect #: PS12364048
Manufacturer #: 131763256
This door lock and switch assembly is manufactured to lock the door on your front load washer to prevent it from opening while it is running. You may need to replace the door lock and switch if the do...
$194.66
In Stock
Order within the next 40 mins and your part ships today!

Door Handle
PartSelect #: PS2330842
Manufacturer #: 134412860
Handle ONLY.
$81.84
In Stock
Order within the next 40 mins and your part ships today!

Drain Pump - 120V 60 Hz.
PartSelect #: PS7783938
Manufacturer #: 137221600
The pump is what your washer uses to remove the water from the tub. This part is the pump and motor assembly which includes the red flapper to prevent drain back flow.
$275.78
In Stock
Order within the next 40 mins and your part ships today!

Bellow Kit
PartSelect #: PS1148773
Manufacturer #: 134515300
Also known as a Door Boot Seal and is used in front load washers. This part is used to keep the clothes inside the tub during the wash cycle. The folds in the bellow allow the tub to move separately f...
$223.50
In Stock
Order within the next 40 mins and your part ships today!

Screw
PartSelect #: PS417463
Manufacturer #: 131302800
This is a replacement screw for your washer or dryer. The screw is approximately half an inch in length and is a Phillips-head screw. It screws in from the outside of the drum, into the vane/baffle. T...
$28.95
In Stock
Order within the next 40 mins and your part ships today!

Screw-In Plastic Leveling Leg
PartSelect #: PS1152204
Manufacturer #: 134548800
Sold individually.
$32.89
In Stock
Order within the next 40 mins and your part ships today!

Single Shock Mounting Pin
PartSelect #: PS417323
Manufacturer #: 131268300
This washer shock absorber mounting pin is a small but essential fastener that secures the shock absorber to the outer tub of a front-load washing machine. By holding the shock absorber firmly in plac...
$29.73
In Stock
Order within the next 40 mins and your part ships today!

Drain Hose
PartSelect #: PS975871
Manufacturer #: 134455900
Also known as tub-to-pump drain hose.
$82.72
In Stock
Order within the next 40 mins and your part ships today!

Drum Vane
PartSelect #: PS1145727
Manufacturer #: 134509600
Sold individually.
$188.62
In Stock
Order within the next 40 mins and your part ships today!

Door Glass
PartSelect #: PS1145708
Manufacturer #: 134366400
Your washer's door glass panel is the window to efficiency and cleanliness. If it's compromised, it may affect your appliance's performance. That's where our genuine Frigidaire Door Glass Panel comes ...
$341.95
In Stock
Order within the next 40 mins and your part ships today!
Common Symptoms of the FTF2140FE0
[Viewing 17 of 17]Lid or door won’t close
Fixed by
these parts
these parts


Show All
Will Not Start
Fixed by
these parts
these parts

Show All
Leaking
Fixed by
these parts
these parts


Show All
Will not drain
Fixed by
these parts
these parts

Show All
Locking Issues
Fixed by
these parts
these parts
Show All
Shaking and Moving
Fixed by
these parts
these parts
Show All
Spins slowly
Fixed by
these parts
these parts

Show All
Will not agitate
Fixed by
these parts
these parts
Show All
Door won’t close
Fixed by
these parts
these parts
Show All
Spinning Issues
Fixed by
these parts
these parts
Show All
Door latch failure
Fixed by
these parts
these parts
Show All
Marks left on clothes
Fixed by
these parts
these parts
Show All
Noisy
Fixed by
these parts
these parts
Show All
Draining Issues
Fixed by
these parts
these parts
Show All
Burning smell
Fixed by
these parts
these parts
Show All
Not draining
Fixed by
these parts
these parts
Show All
Touchpad does not respond
Fixed by
these parts
these parts
Show All


Keep searches simple. Use keywords, e.g. "leaking", "pump", "broken" or "fit".
Broken Door Catch
This was one of the simpliest repairs I have ever done taking less than 5 minutes to complete. On the inner door I removed the two screws that hold the plastic catch in place. I then removed the broken catch and put the new catch in place. Finally I replaced the two screws that hold the catch in place and it was done.
Parts Used:
-
Joy from Columbia, MO
-
Difficulty Level:Really Easy
-
Total Repair Time:Less than 15 mins
-
Tools:Screw drivers
574 of 593 people
found this instruction helpful.
Was this instruction helpful to you?
Thank you for voting!
Door on washer wouldn't lock or start
1. Unplug unit.
2. Unscrew 2 nuts holding top in place in rear of unit using phillips head screwdriver.
3.Slide top back and remove.
4. Open door of washer and unscrew 2 screws holding in door lock unit.
5.Pull out unit from the top and install new unit reconnecting the 3 wire connections.
2. Unscrew 2 nuts holding top in place in rear of unit using phillips head screwdriver.
3.Slide top back and remove.
4. Open door of washer and unscrew 2 screws holding in door lock unit.
5.Pull out unit from the top and install new unit reconnecting the 3 wire connections.
Parts Used:
-
DOUG from KING FERRY, NY
-
Difficulty Level:Really Easy
-
Total Repair Time:Less than 15 mins
-
Tools:Screw drivers
475 of 563 people
found this instruction helpful.
Was this instruction helpful to you?
Thank you for voting!
Old Bellow Ripped
remove top of machine by removing 3 screws along the top edge in the back of your machine and then sliding the top back and up. Then loosen the screws holding on the control panel enough to get to the 2 screws at the top of the door panel. Next remove bottom panel by removing 2 screws along bottom edge then pulling it free from snaps. Then along the outside lip of the bellow, just inside the door, is a wire clip that is easily removed by prying it past rubber lip with a screw driver and lifting it away. Remove the door panel by removing the 2 screws you exposed by loosening the control panel and 2 more along the bottom that were exposed when removing bottom panel. After the door panel is removed and the bellow is completely exposed, you will find that it is held in place by a circular spring which wraps the whole way around the drum opening. Again it can be removed by prying it out away from the groove in which it sits with a screw driver. Now your machine is broken down as far as it needs to be. From here you can follow the directions included in your new bellow kit and put it back together by following these instructions in reverse.
Parts Used:
-
Peggy from New Castle, PA
-
Difficulty Level:A Bit Difficult
-
Total Repair Time:30 - 60 mins
-
Tools:Nutdriver, Screw drivers
251 of 346 people
found this instruction helpful.
Was this instruction helpful to you?
Thank you for voting!