




















FSG848RHQ0 Frigidaire Dryer - Instructions
Keep searches simple. Use keywords, e.g. "leaking", "pump", "broken" or "fit".
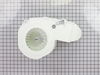
Motor locked
I determined the problem was the fan wheel and housing. I located the part on partsselect.com, Ordered it and installed the afternoon I got it in the mail. Perfect fit.
I have used partsselect before, always had great luck, great prices, always have the exact part.
I have used partsselect before, always had great luck, great prices, always have the exact part.
Parts Used:
-
Patrick from Littleton, CO
-
Difficulty Level:Easy
-
Total Repair Time:More than 2 hours
-
Tools:Nutdriver, Pliers, Screw drivers
13 of 30 people
found this instruction helpful.
Was this instruction helpful to you?
Thank you for voting!
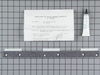
cloths being torn in dryer
first i removed the top -second I removed the two screws hold the front on - thrid I unpluged the wiring to remove the front - fourth I removed old part and cleaned off old glue -fifth I applied new glue and new part - sixth I reasembled - worked good as new
Parts Used:
-
rene from las cruces, NM
-
Difficulty Level:Easy
-
Total Repair Time:Less than 15 mins
-
Tools:Screw drivers
5 of 6 people
found this instruction helpful.
Was this instruction helpful to you?
Thank you for voting!
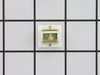
dryer door wouldnt close
the catch on the door was worn and cracked.... so I noticed it could be easily popped out with a screw driver and when the new part came in the mail 2 days later, it was just as easy to pop back in with no tools required. Now the door stays shut really good!!!
Parts Used:
-
karen from aurora, IL
-
Difficulty Level:Really Easy
-
Total Repair Time:Less than 15 mins
-
Tools:Screw drivers
5 of 6 people
found this instruction helpful.
Was this instruction helpful to you?
Thank you for voting!
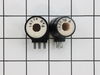
My dryer would light but when it called for more heat it would not light.
lifted the top panel, there were 2 screws to remove the front panel, then the coils were right there on the bottom left side. a screw or two hold the coils inplace. Then just unplug the old coils and plug in to the new coils.
Parts Used:
-
Tyler from Story City, IA
-
Difficulty Level:Easy
-
Total Repair Time:15 - 30 mins
-
Tools:Screw drivers
5 of 6 people
found this instruction helpful.
Was this instruction helpful to you?
Thank you for voting!
I broke the turn start switch and had to replace it
This was a Sears Dryer, also know as Kenmore, This dryer can be stacked or side by side. In this case it was stacked. There are no directions on how to replace this part. For this model made in 2005 the lid of the dryer is held in front by two clips. You open the lid simply by prying the two front corners up with a flat head screw driver. The front of the top lid pops right up. You may have to remove the mounts in back if you cant lift the dryer lid enough to be able to get your hands in. UNPLUG THE DRYER I got a nasty shock. There are two wires on the switch, remember how they go and where they are, that's important. Turn the switch (from the front or back) so that it pops out. Remove and replace the wires put it back in (from behind/top) and twist a 1/4 turn into place. Plug, test and simply push the cover back down onto the clips. Done.
Parts Used:
-
Don from Port Jefferson, NY
-
Difficulty Level:A Bit Difficult
-
Total Repair Time:30 - 60 mins
-
Tools:Pliers, Screw drivers
4 of 4 people
found this instruction helpful.
Was this instruction helpful to you?
Thank you for voting!
female part of door clasp broke
-
Tammy from St. Peters, MO
-
Difficulty Level:Really Easy
-
Total Repair Time:Less than 15 mins
5 of 7 people
found this instruction helpful.
Was this instruction helpful to you?
Thank you for voting!
fan cage came undone from motor
The new motor from parts select was not correct. The new motor is a bolt on. The original motor was a press on. Had to return at a cost of 42.00 dollars. Had to buy a new dryer.
Parts Used:
-
Christopher from DENVER, PA
-
Difficulty Level:Really Easy
-
Total Repair Time:Less than 15 mins
4 of 4 people
found this instruction helpful.
Was this instruction helpful to you?
Thank you for voting!
clothes not drying in one cycle
remove top cover, remove front of dryer, unscrew two #2 screws from gas valve coil hol down bracket. replace coils. reassemble dryer.. works great.. had already replaced the thermostate and flame sensor.. didn't change anything.. the coil set did the trick..
Parts Used:
-
Aaron from Kerhonkson, NY
-
Difficulty Level:Easy
-
Total Repair Time:Less than 15 mins
-
Tools:Screw drivers
4 of 4 people
found this instruction helpful.
Was this instruction helpful to you?
Thank you for voting!
my mother dryer was leaving marks on the clothes and squeaking.
1 Unplug the dryer and Raise top up by releasing the clips and fold back to expose the drum. 2. Take Phillips head screw driver and remove two screws inside the front dryer panel and then take flathead screwdriver to pop out both sides and set aside. 3. Lay on your stomach and reach inside to the belt pulley and push right so the belt will release then stand to either side of dryer and grab the belt and lift the drum up out of its bracket. 4. Go to the front and pull the drum out and replace the Rear Drum Bearing Kit . 5. Grab the front panel and remove the Top dryer guide and replace to match evenly with the bottom dryer guide by cutting at least 1/8 -1/4" from felt and use High temp adhesive to glue down. 6. Replace everything in order that was taken apart and reconnect electrical plug and start dryer.
Parts Used:

-
Jonathan from GAINESVILLE, GA
-
Difficulty Level:Really Easy
-
Total Repair Time:30 - 60 mins
-
Tools:Screw drivers
4 of 4 people
found this instruction helpful.
Was this instruction helpful to you?
Thank you for voting!
Screeching noise under load
I basically followed the video instructions on your website. Pretty simple but ran into an issue pre-threading the 3 self taping screws into the spindle bearing. The screws provided were blunt on the end and did not tap easily at all. I used the existing screws that were much more "sharp" and worked much better. Also, the new screws were Philips drive and due to the amount of torque trying to self tap nearly stripped them out. The old sharper screws were square drive which had a better bite. So basically, I used the old screws to self tap and then used the new screws for the final installation.
It took a long time to clean all the lint out from the inside of the dryer. The motor was completely embedded with lint and animal hair. You may want to suggest that a good cleaning may be needed so bring a shop vac...and also something to carefully pick the lint balls out from around the motor armature and bearing area. Overall the video instructions were really a big help!
It took a long time to clean all the lint out from the inside of the dryer. The motor was completely embedded with lint and animal hair. You may want to suggest that a good cleaning may be needed so bring a shop vac...and also something to carefully pick the lint balls out from around the motor armature and bearing area. Overall the video instructions were really a big help!
Parts Used:
-
John from WESTLAKE, OH
-
Difficulty Level:Easy
-
Total Repair Time:1- 2 hours
-
Tools:Nutdriver, Screw drivers
4 of 4 people
found this instruction helpful.
Was this instruction helpful to you?
Thank you for voting!
Squeeling noise during operation.
Almost exactly as per the videos available on the PartSelect web site. The only additional information that would help is that the vent on the back of the unit can be removed to allow for access to the belt spring pulley. This avoids having to reach around from the front of the unit and feel your way to remove and re-install the belt.
Parts Used:
-
John from Seeley Lake, MT
-
Difficulty Level:Easy
-
Total Repair Time:1- 2 hours
-
Tools:Nutdriver, Screw drivers
4 of 4 people
found this instruction helpful.
Was this instruction helpful to you?
Thank you for voting!
Dryer wasn't heating
Determined that the coil on the gas valve wasn't pulling in to ignite. Using an ohmmeter, I determined the coil was open. The coil was removed by pulling off the wire connecter and removing the two phillips screws holding the bracket over the two coils. The coil then slides out. I slid the new coil into place, replaced the bracket and two screws and reconnected the wire connector. It worked immediately. The actual repair only took 15 minutes. The bulk of the time was spent tracking down which part had failed.
Parts Used:
-
Jack from Huntingdon, PA
-
Difficulty Level:Easy
-
Total Repair Time:1- 2 hours
-
Tools:Pliers, Screw drivers
4 of 5 people
found this instruction helpful.
Was this instruction helpful to you?
Thank you for voting!
My lent screen broke on my dryer

-
Mary from Garland, NC
-
Difficulty Level:Really Easy
-
Total Repair Time:Less than 15 mins
-
Tools:Pliers
4 of 5 people
found this instruction helpful.
Was this instruction helpful to you?
Thank you for voting!
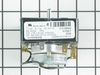
The timer would not shut off.
Removed back of the control panel. Removed 2 screws unplugged the wires. Plugged wires into the new timer, put the back cover on. Worked great.
The repair man was going to charge us twice the cost of the part ($150) plus labor. He even recommended buying a new dryer rather then putting the money into fixing this one!
The repair man was going to charge us twice the cost of the part ($150) plus labor. He even recommended buying a new dryer rather then putting the money into fixing this one!
Parts Used:
-
David from Worthington, MN
-
Difficulty Level:Really Easy
-
Total Repair Time:15 - 30 mins
-
Tools:Pliers, Screw drivers
4 of 5 people
found this instruction helpful.
Was this instruction helpful to you?
Thank you for voting!
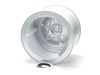
The rim that supports the front of the drum had worn through, due to my failure to replace the glide styrips in time.
There are only three screws holding the drum in. However, to get it out I had to remove the front panels, and the top of the dryer part of the washer-dryer combo. The drum came out easily, but getting the new one in was pretty hard. I had to guess how the drive belt was routed around the motor pulley and idler pulley, since I couldn't see it until I'd removed the drum. Since the new drum wasn't exactly like the old one, I had to remove the glide strip from the front panel to get it to fit. At present, the unit is not completely reassembled, so I can't say I've been entirely successful. Tomorrow, I will put it back together, cross my fingers, and switch it on. Wish me luck!
Followup: The dryer part of this washer-dryer combo is back online. At first, the dryer made a squealing noise, but eventually quieted down. At present, the drum replacement seems to be just fine. It cost about $215, and, except for a few cuts due to sharp-edged metal, a dropped clip that disappeared into the depths of the bottom of the washer, it is actually REPAIRED. I could have used more specific help, but, all in all, it has been pretty easy, and pretty effective.
Followup: The dryer part of this washer-dryer combo is back online. At first, the dryer made a squealing noise, but eventually quieted down. At present, the drum replacement seems to be just fine. It cost about $215, and, except for a few cuts due to sharp-edged metal, a dropped clip that disappeared into the depths of the bottom of the washer, it is actually REPAIRED. I could have used more specific help, but, all in all, it has been pretty easy, and pretty effective.
Parts Used:
-
Don from Houston, TX
-
Difficulty Level:Difficult
-
Total Repair Time:More than 2 hours
-
Tools:Screw drivers
4 of 5 people
found this instruction helpful.
Was this instruction helpful to you?
Thank you for voting!