




















FRS20NRAD0 Frigidaire Refrigerator - Instructions
Keep searches simple. Use keywords, e.g. "leaking", "pump", "broken" or "fit".
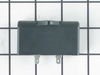
Freezer and refrigerator stopped cooling
The site offers a video for this part which worked perfectly. In addition to replacing the part, since the cardboard panel was off, we also cleaned all the dust off of the coils which someone recommended to do annually.
Parts Used:
-
Amy from PITTSBURGH, PA
-
Difficulty Level:Easy
-
Total Repair Time:Less than 15 mins
-
Tools:Screw drivers
8 of 8 people
found this instruction helpful.
Was this instruction helpful to you?
Thank you for voting!
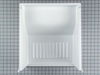
Drawer tracks had cracked
it was pretty straight forward, pulled the old drawer out , emptied it out of all the food of course then i removed the front clear panel using a screw driver to gently pry off that part, the front then just slides and snaps on to the new part really easy . slide it back in and hopefully it should last another 10 years.
Parts Used:
-
LOUIS from WOODLAND HILLS, CA
-
Difficulty Level:Really Easy
-
Total Repair Time:15 - 30 mins
-
Tools:Screw drivers
8 of 8 people
found this instruction helpful.
Was this instruction helpful to you?
Thank you for voting!
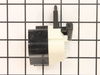
mottor starts than stop.
i looked byhind the freezer , the mottor has the relay connected to it.i took out the relay, and i descovery something was loose inside, i decided to take to check out at sears to see if they have in stock that especific relay. they did not have, they could order, that's when i dicided to go ahead and looking for in the internet, good i found PARTSELECT,they had the part and i was very nice attended,they sent in 2 days i had fix my freezer. thanks PARTSELECT. gilmar couto.
Parts Used:
-
Gilmar from Miami, FL
-
Difficulty Level:Easy
-
Total Repair Time:15 - 30 mins
-
Tools:Screw drivers, Socket set
9 of 11 people
found this instruction helpful.
Was this instruction helpful to you?
Thank you for voting!
Freezer quit. Compressor would not start.
Like another post, the start relay rattled like a baby rattle. Replaced the start relay and freezer works great.
Parts Used:
-
Steve from Neosho, MO
-
Difficulty Level:Really Easy
-
Total Repair Time:15 - 30 mins
-
Tools:Pliers, Screw drivers
9 of 11 people
found this instruction helpful.
Was this instruction helpful to you?
Thank you for voting!
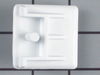
my shelf supports broke
I pulled out the old pieces and poped what I couldn't into the foam insulation behind the support. Then I placed the new piece in the hole and popped the plastic pin to seat the support. bang. the only problem I had was knowing if it was the right part by the picture. The little pin that had to be pushed through kinda threw me.
Parts Used:
-
michael from hanford, CA
-
Difficulty Level:Really Easy
-
Total Repair Time:Less than 15 mins
-
Tools:Pliers, Screw drivers
7 of 7 people
found this instruction helpful.
Was this instruction helpful to you?
Thank you for voting!
Oven light bulb went dark; it needed replacing

-
Lise from CEDAR GROVE, NJ
-
Difficulty Level:Very Easy
-
Total Repair Time:Less than 15 mins
10 of 17 people
found this instruction helpful.
Was this instruction helpful to you?
Thank you for voting!
plastic drawer edges were broken and would not support the drawer or allow it to slide in and out
I removed the front cover from the original drawer and slid it onto the new one from PartSelect. Perfect fit. I recieved my part in only two days with regular ground shipping and I am completely satisfied with the part and service.
Parts Used:
-
Robert from Grenada, MS
-
Difficulty Level:Really Easy
-
Total Repair Time:Less than 15 mins
7 of 8 people
found this instruction helpful.
Was this instruction helpful to you?
Thank you for voting!
Refrigerator Light bulb went out
I replaced the bulb using my hands to twist the bulb in the socket located at the top of the refrigerator.
Parts Used:
-
ANGELA from MEBANE, NC
-
Difficulty Level:Very Easy
-
Total Repair Time:Less than 15 mins
7 of 10 people
found this instruction helpful.
Was this instruction helpful to you?
Thank you for voting!
Broken plastic drawer
Had to pry off front glass of drawer with screwdriver.Very east install. The shipping for this part was the fastest I have ever recieved.I called at about 2:00pm and had the part the next day at 2:00pm..incredible service
Parts Used:
-
Lenny from Brodhead, WI
-
Difficulty Level:Really Easy
-
Total Repair Time:Less than 15 mins
-
Tools:Screw drivers
5 of 5 people
found this instruction helpful.
Was this instruction helpful to you?
Thank you for voting!
Fridge made a hellacious noise and wasn't cooling well
From discussions with friends, I determined the problem might be easy to fix. The fridge made a lot of noise, but the compressor DID come on, and inside the freezer was cold, but the main fridge was warming.
After unplugging the fridge, I removed the fan assembly in the freezer (there were about 4 nuts and a couple of plugs to uncouple.
I could see right away the fan blades has broken off, but the motor looked good. The new new fan pushed easily onto the shift and fit perfectly in the housing.
I reinstalled the fan assembly, plugged in the fridge, and right away heard the new fan come on - very quietly. What was a roar became a whisper and the fridge was down to 38 degrees with a few hours.
After unplugging the fridge, I removed the fan assembly in the freezer (there were about 4 nuts and a couple of plugs to uncouple.
I could see right away the fan blades has broken off, but the motor looked good. The new new fan pushed easily onto the shift and fit perfectly in the housing.
I reinstalled the fan assembly, plugged in the fridge, and right away heard the new fan come on - very quietly. What was a roar became a whisper and the fridge was down to 38 degrees with a few hours.
Parts Used:

-
Bruce from MARTINEZ, CA
-
Difficulty Level:Really Easy
-
Total Repair Time:Less than 15 mins
-
Tools:Nutdriver
5 of 5 people
found this instruction helpful.
Was this instruction helpful to you?
Thank you for voting!
unit quit cooling
First I removed the two screws that hold the element in place. I then pulled the element out about 3 inches and disconnected the wiring harness plug, replaced the old timer with the new one, re-connected the wiring harness and reinstalled the mount in position. Hardest thing about it was lying on the floor.
Parts Used:
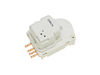
-
Steve from Cedar Park, TX
-
Difficulty Level:Really Easy
-
Total Repair Time:Less than 15 mins
-
Tools:Screw drivers
5 of 6 people
found this instruction helpful.
Was this instruction helpful to you?
Thank you for voting!
Fridge would not cool at all, because the compressor was not running. Fan running, lights working, just no cool.
Remove the cardboard access cover at the bottom back of the fridge. On the left side, locate the run capacitor. Remove it by prying it loose from its socket, after first removing the wire hold down clamp. One wonders why the clamp is there, which makes it difficult to get the run capacitor out. Be careful not to disrupt in any way the copper refrigerant tubes. If you mess them up, you will have wasted your time and effort trying to repair the machine. I was lucky, since a failed run capacitor is the problem only about 12% of the time, based on what I’ve read. Hallelujah! It was the problem with my fridge.
Parts Used:
-
David from ABINGDON, VA
-
Difficulty Level:Easy
-
Total Repair Time:15 - 30 mins
-
Tools:Screw drivers
4 of 4 people
found this instruction helpful.
Was this instruction helpful to you?
Thank you for voting!
Broken crisper holder (bracket)
Removed broke bracket. Installed new bracket (part #100). Now, everything is O-TAY!
Parts Used:
-
Charles from LECANTO, FL
-
Difficulty Level:Very Easy
-
Total Repair Time:Less than 15 mins
-
Tools:Screw drivers
4 of 4 people
found this instruction helpful.
Was this instruction helpful to you?
Thank you for voting!
I had a broken fan blade due to ice build up from a leaking ice maker.
1. I took out one screw on the ice maker and loosened the other two screws and unplugged and removed the ice maker.
2. Next I took out 2 screws from the bottom of the auger drive box and unplugged the wiring harness and removed the box. The wiring harness was a little tricky. The lock on the plug pushes in to unlock even though it looks like it pulls out,.
3.next you must remove 2 screws from the left side bracket that holds the auger box and remove the bracket.
4.Now take out 8 screws that hold the back panel in place and remove the back panel.
5. now your looking at the evaporator fan blade and motor. The simple way to replace the fan blade is to unplug the motor and remove it from the freezer. It just sits in with nothing holding it. The fan requires a little pressure but should pull right off. Install new fan blade and put everything back in the same order it was removed.
2. Next I took out 2 screws from the bottom of the auger drive box and unplugged the wiring harness and removed the box. The wiring harness was a little tricky. The lock on the plug pushes in to unlock even though it looks like it pulls out,.
3.next you must remove 2 screws from the left side bracket that holds the auger box and remove the bracket.
4.Now take out 8 screws that hold the back panel in place and remove the back panel.
5. now your looking at the evaporator fan blade and motor. The simple way to replace the fan blade is to unplug the motor and remove it from the freezer. It just sits in with nothing holding it. The fan requires a little pressure but should pull right off. Install new fan blade and put everything back in the same order it was removed.
Parts Used:
-
gary from ARANSAS PASS, TX
-
Difficulty Level:Easy
-
Total Repair Time:30 - 60 mins
-
Tools:Nutdriver
5 of 7 people
found this instruction helpful.
Was this instruction helpful to you?
Thank you for voting!
freezer defrost would melt the food
Looked up similar problems and found it to be the defrost timer. All I had to do was remove the plastic portion in the fridge section to get to the old timer. Popped the new one in and put it back together. Works great now. Would have been almost $150 to have a repair company come out and fix it.
Parts Used:
-
Joseph from West Allis, WI
-
Difficulty Level:Really Easy
-
Total Repair Time:Less than 15 mins
-
Tools:Nutdriver
4 of 5 people
found this instruction helpful.
Was this instruction helpful to you?
Thank you for voting!